
Desertcart purchases this item on your behalf and handles shipping, customs, and support to EGYPT.
🧼 Restore your clean game with precision and pride!
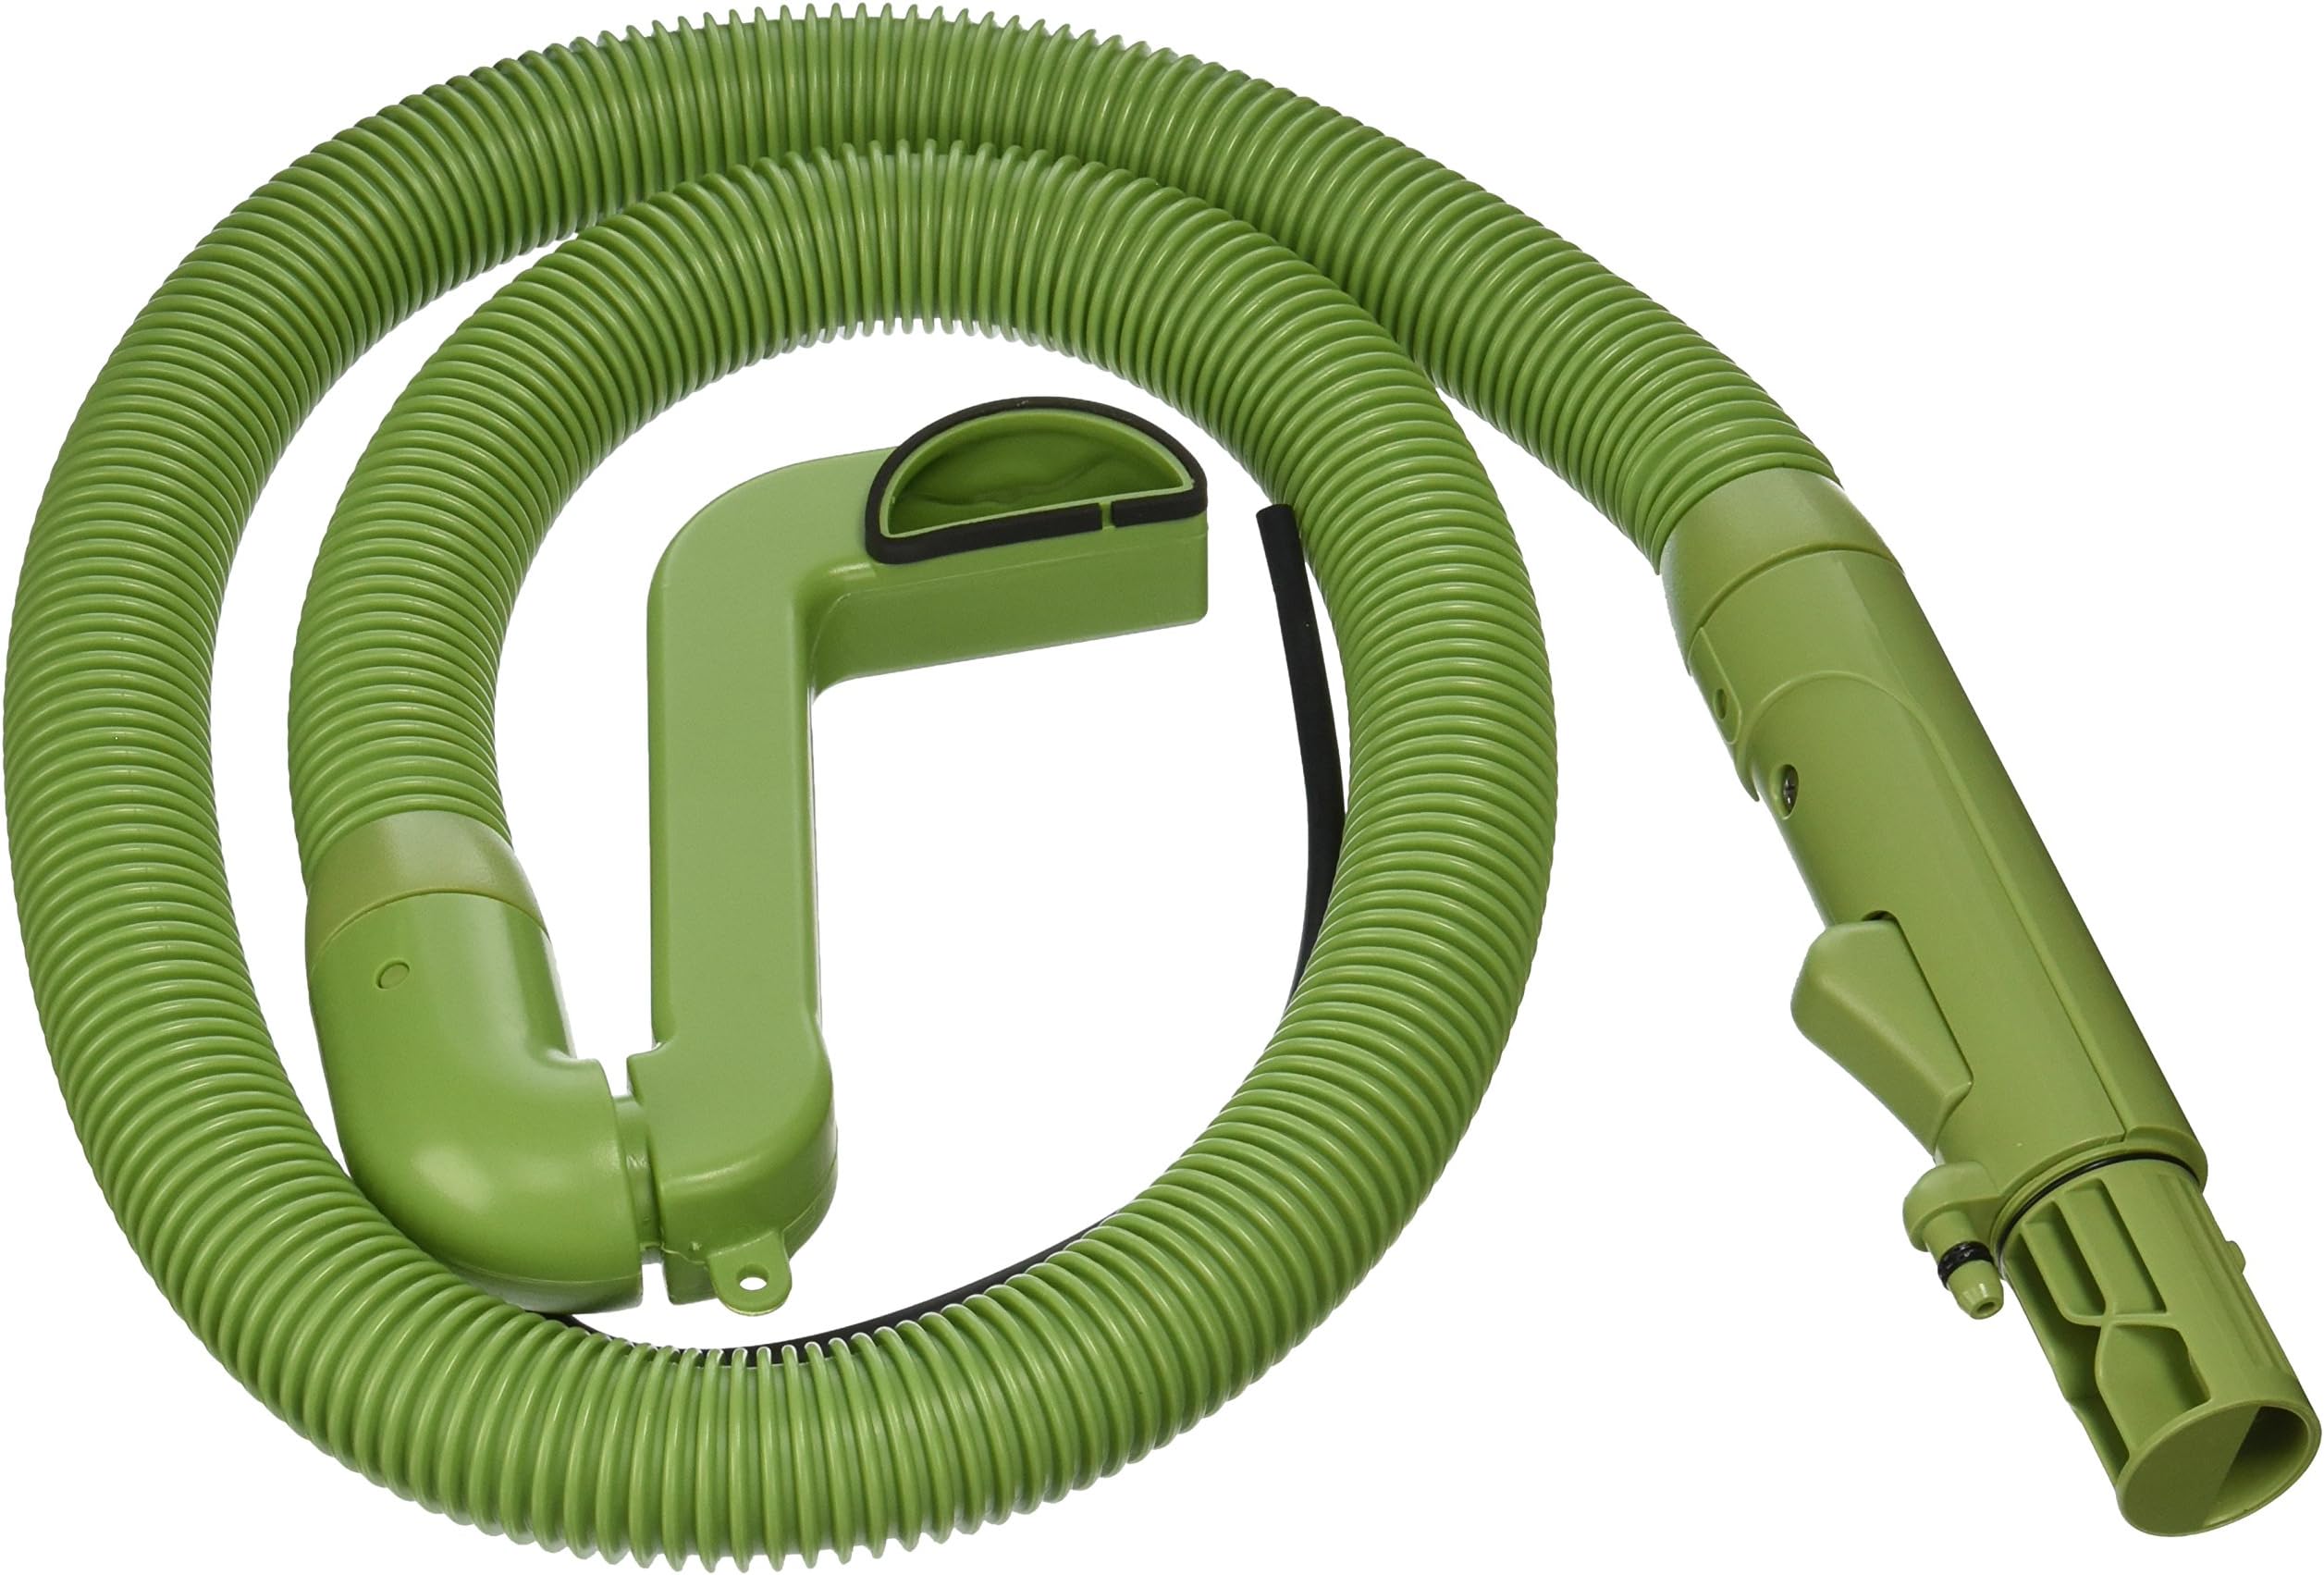
The Bissell Hose with Handle Flex (OEM part #203-7152) is a high-quality, USA-made replacement hose designed to fit various Bissell models, including the classic Green Machine series. Crafted from durable plastic, it features a leak-proof gasket and an optimized inner spray tube length for flawless water flow. Easy to install in under 10 minutes, this hose revives your machine’s performance, extending its life and reducing waste.

| ASIN | B0047L49JG |
| Best Sellers Rank | #540,435 in Home & Kitchen ( See Top 100 in Home & Kitchen ) #302 in Vacuum Hoses |
| Brand | Bissell |
| Brand Name | Bissell |
| Color | Green |
| Customer Reviews | 4.6 out of 5 stars 1,319 Reviews |
| Global Trade Identification Number | 07225830252945 |
| Included Components | Hose & Handle |
| Item Dimensions L x W | 11"L x 15"W |
| Item Length | 57 centimeters |
| Manufacturer | Bissell |
| Manufacturer Warranty Description | 30 Day Warranty |
| Material | Plastic |
| Material Type | Plastic |
| Outside Diameter | 0.81 inches |
| Product Dimensions | 11"L x 15"W |
| Unit Count | 1 Count |
T**Y
Perfect fit for classic Green Machine 1400 series models
Perfect fit for my older Green Machine and installation was super easy. Hose arrived exactly as pictured with a new gasket on the end cup. Some older reviews mentioned the inner spray tube was too short it the current version I received was the perfect length. I also used a small section from the old hose to replace the short hose between the pump and inlet cup. The only item you will need is a zip tie for the inner hose. Works great and no leaks. 25 years and my machine is good as new
S**R
It works! Took me less than 10 minutes...
The product looked like it was high quality and it fit my Bissell perfectly. It was a super easy install and fixed the problem right away, which in my case was no water coming out of the hose. It does seem like instructions should come with it for those who aren't handy. But it's seven screws and it's pretty straightforward to see where all the parts go. There are several videos on YouTube to walk you through it if you get stumped. Great product, great price, came quick, and got my Bissell Little Green machine back up and running and not in landfill! Yahoo!
K**R
You have to take apart the machine to replace hose
Great for a replacement hose, but I did have to Google how to take apart the machine to replace the hose, the hose just does not come off and go back on. You have to take apart the machine to replace it.
D**Y
Short hose - simple fix
Like a lot of orders for this replacement hose here, the black water feeder line was 6 inches too short. I went to the auto parts store and bought a tubing connector and 2 clamps. I scavenged 6 inches of black tubing from the old hose and spliced it to the new hose and it fit perfectly. Problem solved. It's a great little machine and I'm glad it's fixed!
C**N
easy replacement - here's how
works great + simple replacement. it doesn't come with instructions, but it's not difficult - an easy 20-40 minute job. here's how. how to replace the assembly: (you'll need a Phillips head screwdriver and probably a set of needlenose pliers.) • unplug the machine from the wall outlet (duh...) • remove waste tank + fresh water tank • turn the machine over and unscrew bottom cover. there's six screws here. - you'll probably want to put the bottom cover in the tub or something, especially if your steamer has heavy use and there's a few years of jank inside...eww. • flip the machine over and unscrew the top housing cover. there's four screws here - two on each side of the housing, located where the water tanks sit. the switches on the top housing are connected to the motor with a few wires. they can be easily disconnected if you'd like. you might find it easier to disconnect the switches and set the top housing aside, but remember to label the wires. • find where the current little fresh water hose is connected to the water pump. on this replacement part, it's the small black rubber hose, but on my old model it was clear. • it's usually connected to the pump with a squeeze-type hose clamp. your model might differ, but for me I used the needlenose pliers to gently squeeze the clamp and pull it back onto the clear hose. this releases the pressure around the connection and you'll be able to gently pull it right off. • save the hose clamp - this replacement doesn't come with one. • pull the rubber hose back towards the rear of the steamer where it comes in from underneath. you might need to use the pliers to gently tug it through. • flip the machine over and pull the rubber hose out from the top of the machine. • the whole flex assembly is attached with two screws - one underneath the rubber hose you just pulled out from the top and the other near the waste tank. unscrew these and throw the old unit away. (again, it's probably really gross anyhow so why save it...) • screw the new assembly into place. • thread the little black rubber hose up from the bottom of the unit to the pump up top. you might have to gently pull an inch or two more hose out from the flex tube so it reaches the pump. if you do, that's ok. • flip the machine over and slide the hose clamp onto the end of the black rubber hose. • gently slide the hose onto the end of the pump and use needlenose pliers to secure the hose to the pump. • if you disconnected the switches in the top housing, reconnect them now and place the top housing back onto the main body. • before screwing the top housing in, plug the unit it and flip it on for a quick second. you want to make sure the switches are properly reconnected before fastening the housing in place. if it works, screw the top housing in place. • flip the machine on its back one last time - screw the bottom cover in place. • replace the waste tank and fresh water tank. attach a brush tool to the flex assembly, plug in the unit and give it a test run. • see if the vacuum function works and squeeze + hold down the water trigger. it'll take a second or two for the pump to get fresh water to the brush tool - keep squeezing the trigger and it should spray after a short delay.
C**S
Perfect fit, machine works like new
I had a problem with my ProHeat Little Green Machine. The hot cleaning solution would leak out onto my hand when I pulled the trigger, and the suction was poor as well. I took apart the trigger assembly and discovered that there was a crack in the line where the tubing met the plastic handle (most likely from pushing down too hard with the handle to increase suction - don't do that. If you have to push down, push directly on the brush piece and not the handle). I ordered this hose and a new brush/suction head and after following the instructions written by another helpful Amazon reviewer, I restored my machine to like new performance. I saw that a few people had some issues with the black fluid tubing being too short. I just pulled on the tube and it stretched out a few more inches, which was more than enough to make it work. So if for some reason you are a little short on tubing, go ahead and pull on it. It stretched and did not kink or break. In summary, this hose kit was easy to install, and I have a machine that should last me another ten years. Well worth the effort and money.
R**N
Wish I had done this years ago
Not the easiest repair on this older Bissel Little Green but the end result was eye opening. For years I have had to really push to install the brush head onto the handle and over the years it would crack the brush head around the water connecter and then leak badly until a new brush head was replaced (3 times). The new brush slipped right on and latched easily on this new hose assy as it should and no leaks. It does take a minute or two to prime the water line.
D**.
Perfect Fit Even on an Older Machine
We've had our Little Green Clean Machine for quite a long time. Ours is model 1425-1. After over 7 years of use between four dogs and now two kids, the hose handle finally cracked where it connects to the attachment. Since the unit was otherwise in good shape, I decided I would try my hand at repairing it vs. throwing it away and buying a new one. I've gotten tired of the fact that it seems like everything we buy these days is disposable. Anyways... Despite our model being one of the older ones (the original hose on our machine looked nothing at all like this one - it wasn't even green), it fit perfectly. Installation took about 45 minutes, but I was being very deliberate to make sure I could put everything back together without any "extra parts." Even for someone who isn't terribly mechanical, it was pretty self explanatory. The hardest part was finding all the screws to remove. You have to take the top AND the base off of the machine. You also have to take the top off of the solution pump housing to connect the black solution hose. You may have to pull on the solution hose a bit BEFORE feeding it up into the machine to make it long enough. Also, make sure you don't lose the little hose clamp that is holding the old solution hose onto the machine, because the hose assembly does NOT come with a new one. After doing it once, I could probably do it again in about 15 minutes. The machine runs like brand new for less than half the cost of replacement, and that includes a couple new attachments.
B**K
Replacement hose.
Easy job to replace, just follow a you tube video on how to do it. The new hose replace the fifteen year old hose which the end securing tab attachment goes brittle and the chemical nozzle part swollen which makes the head attachment difficult. It brings new life to my 15 year old machine.
K**E
Great replacement
Replacement part perfect for bissell green machine
J**N
Gran refacción
Le qu do perfecto a mi equipo
J**O
Great replacement
Fitted easily
N**T
changing the old leaking hose
The hose was a perfect match for the product I had. Being an older woman with not a lot of repair knowledge under my belt, I hesitated to try this, but jumped in both feet. Everything went well until I tried to remove the clasp that held the inside hose on the spigot. It was VERY FIRMLY attached and would only rotate around the spigot without releasing. Finally lost patience and just ripped it off and replaced it with a small plastic multipurpose tie. Put everything back together and it works like a charm. All those little cleaning jobs I had put off doing are now done.
Trustpilot
2 weeks ago
1 month ago