معلومات عنا
دعم العملاء
احصل على التطبيق

قم بتوجيه الكاميرا لتنزيل التطبيق
حقوق الطبع والنشر © 2024 Desertcart Holdings Limited


🔌 Power Up Your Protection!
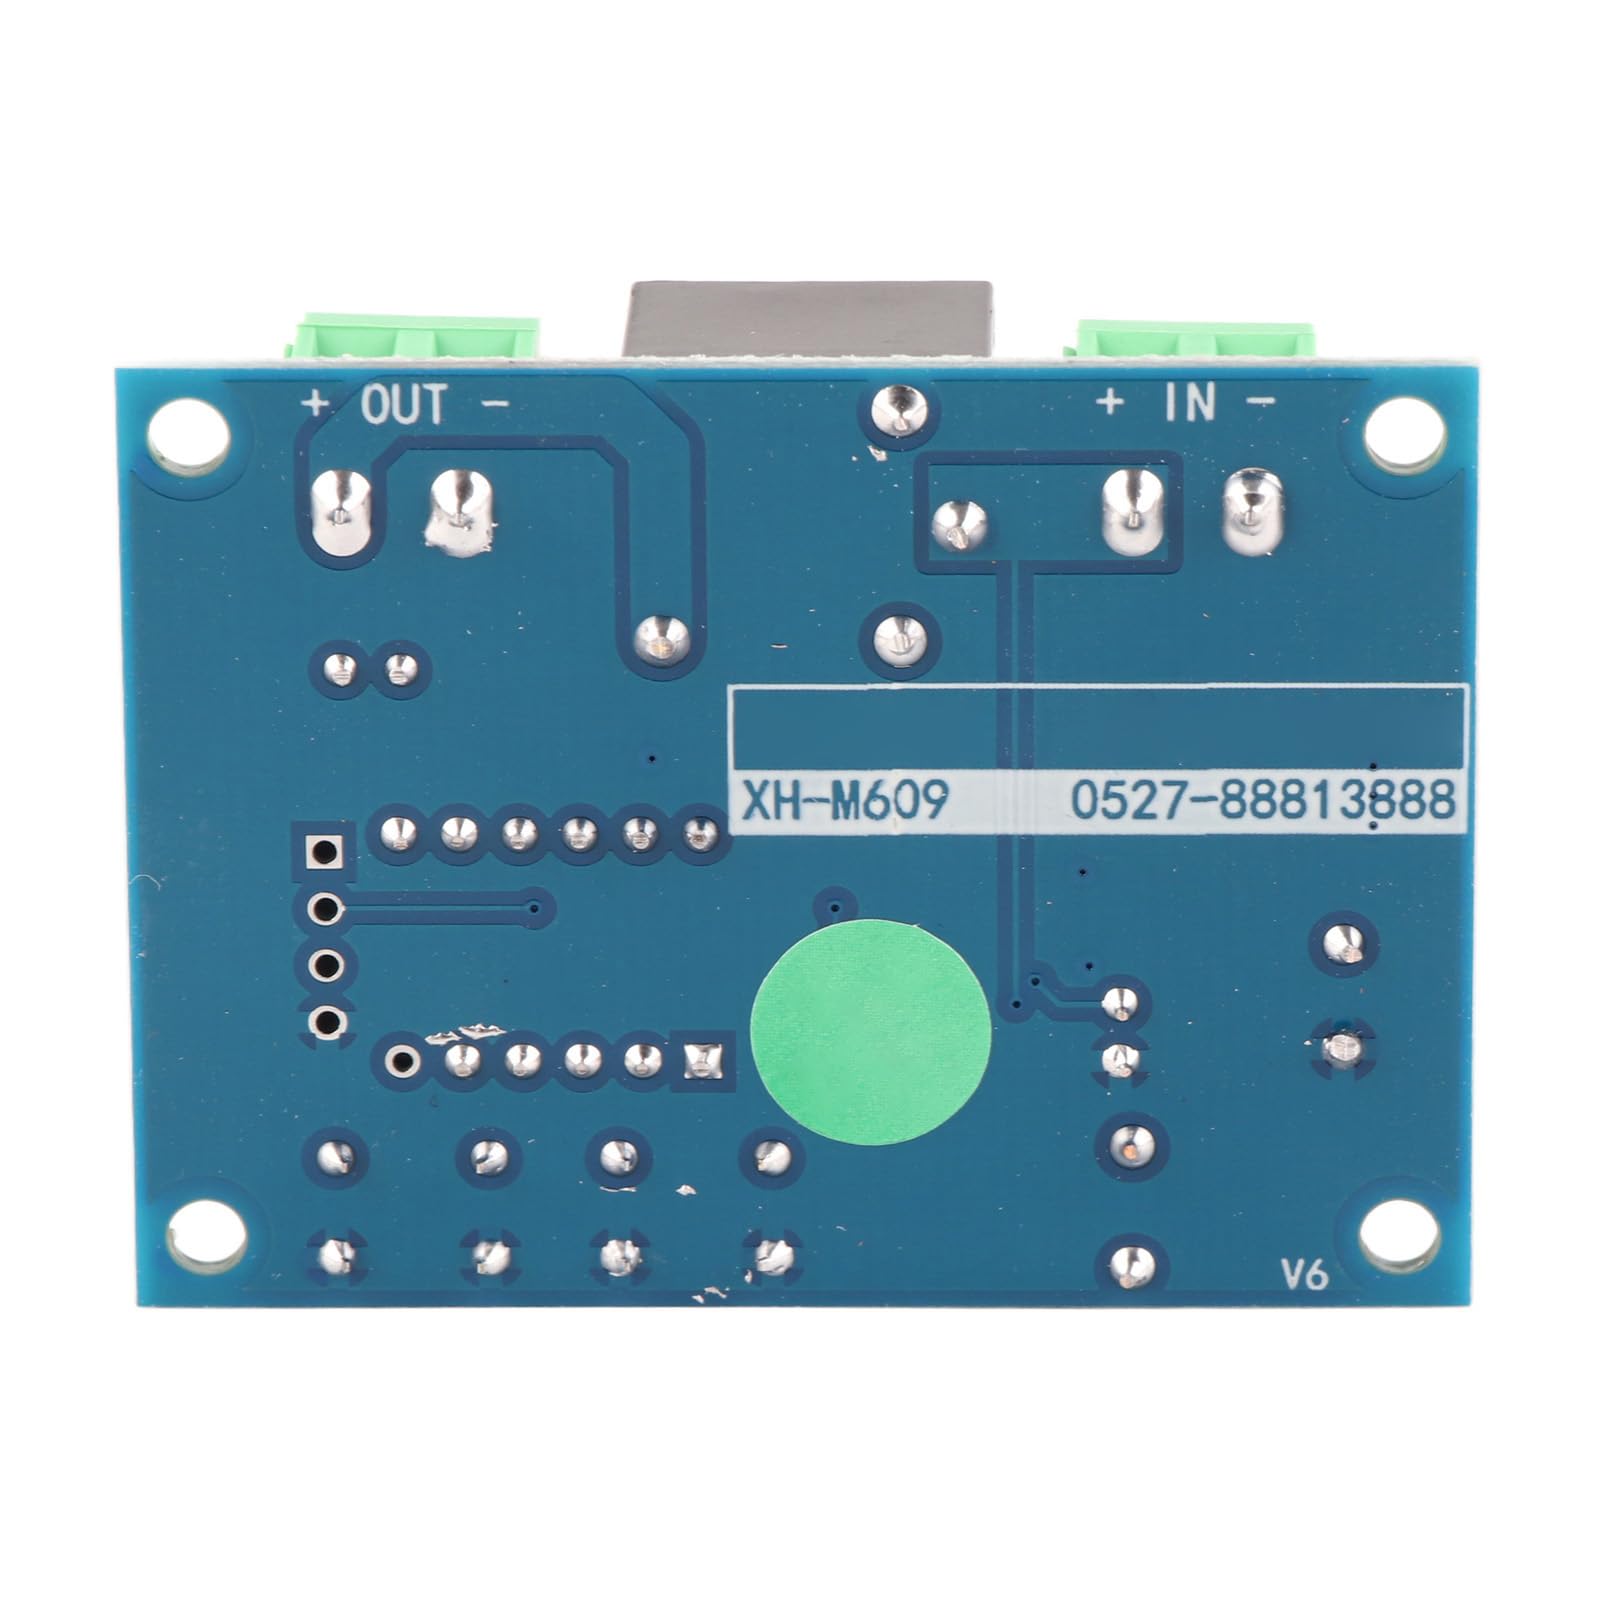
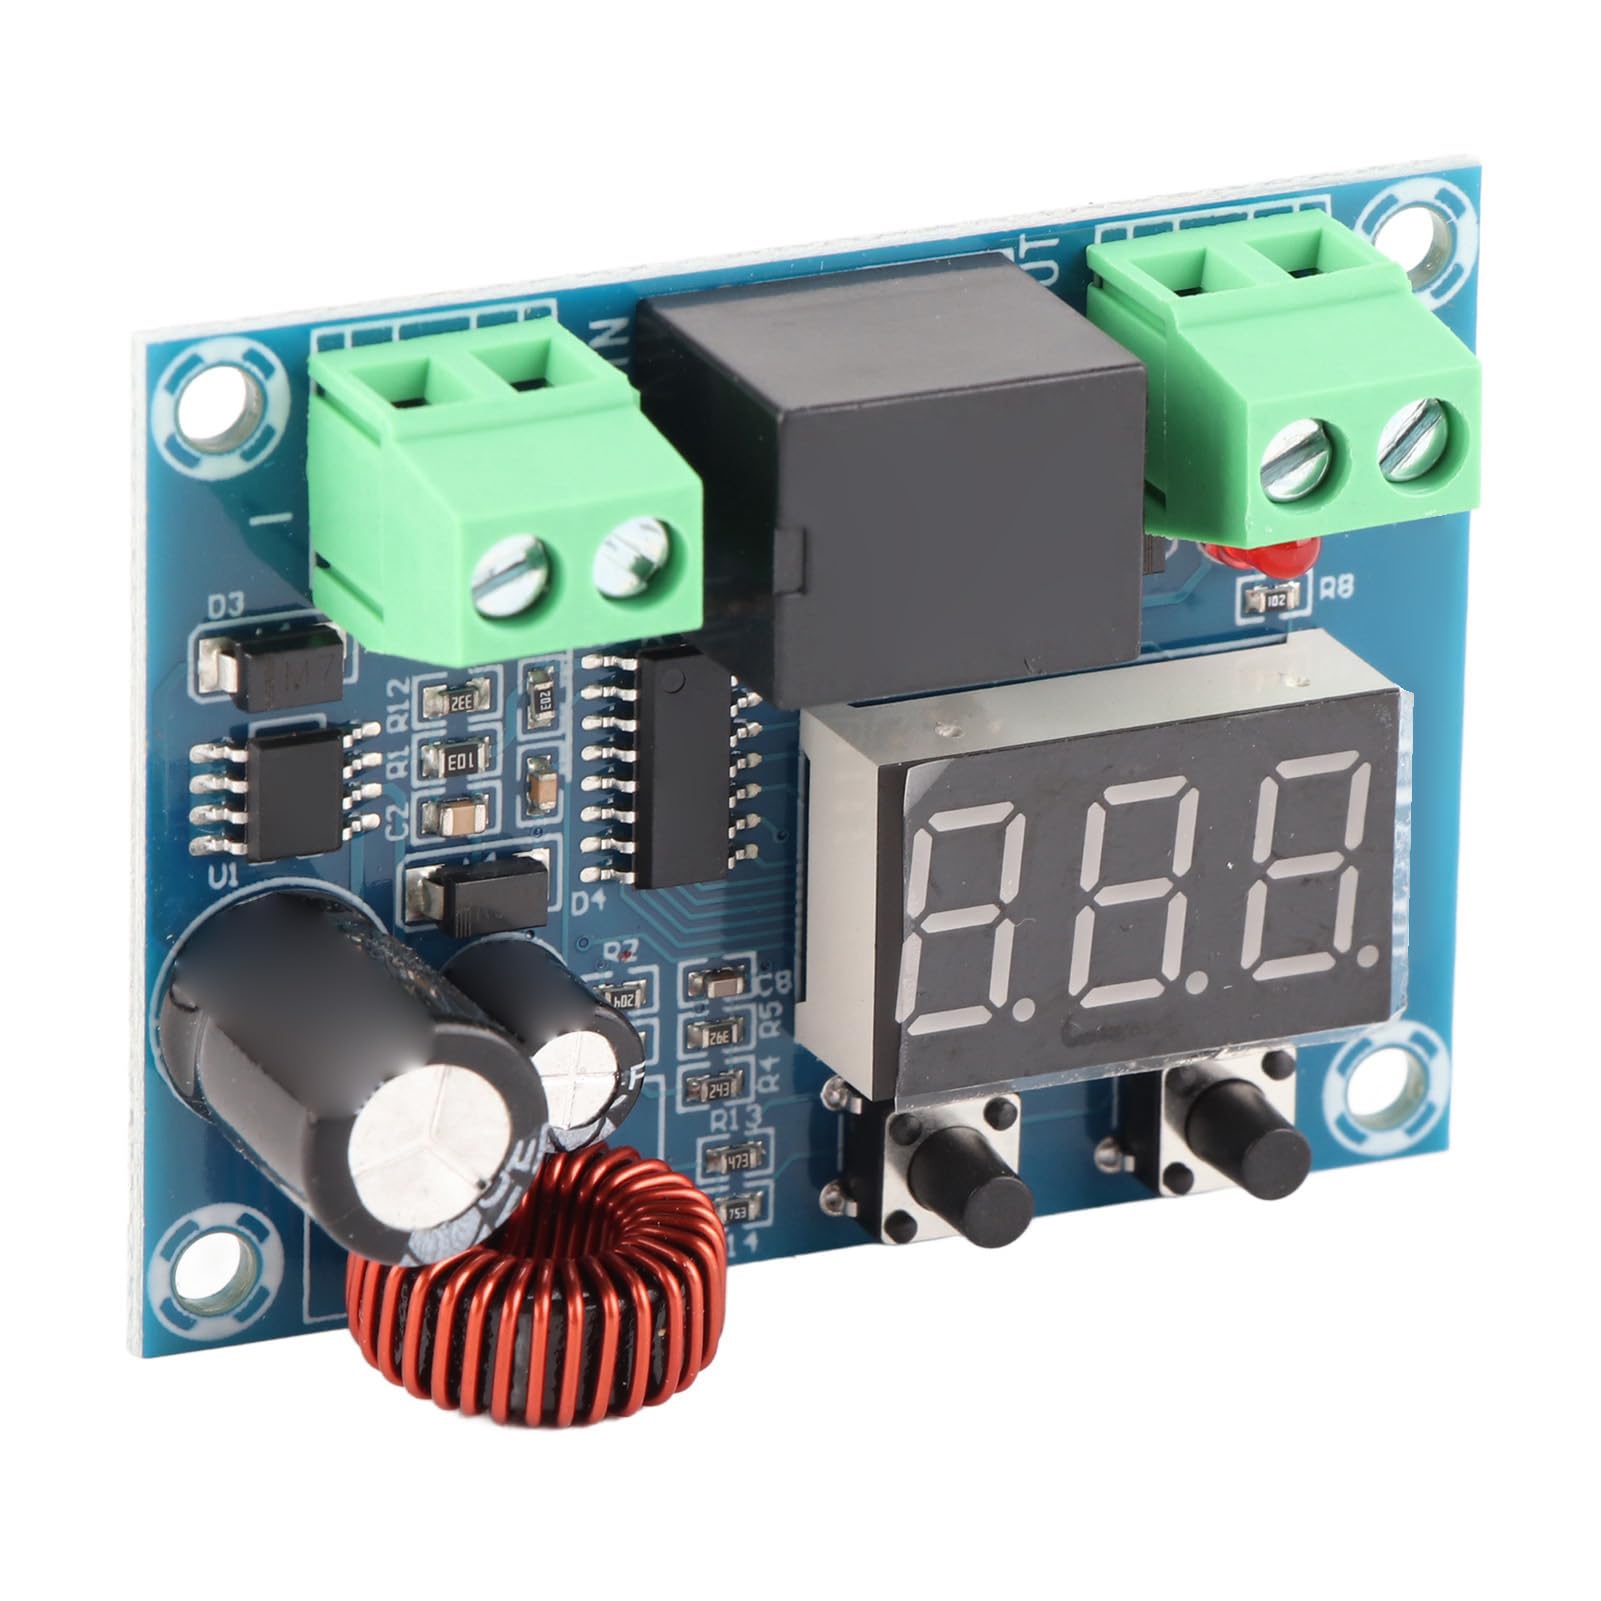
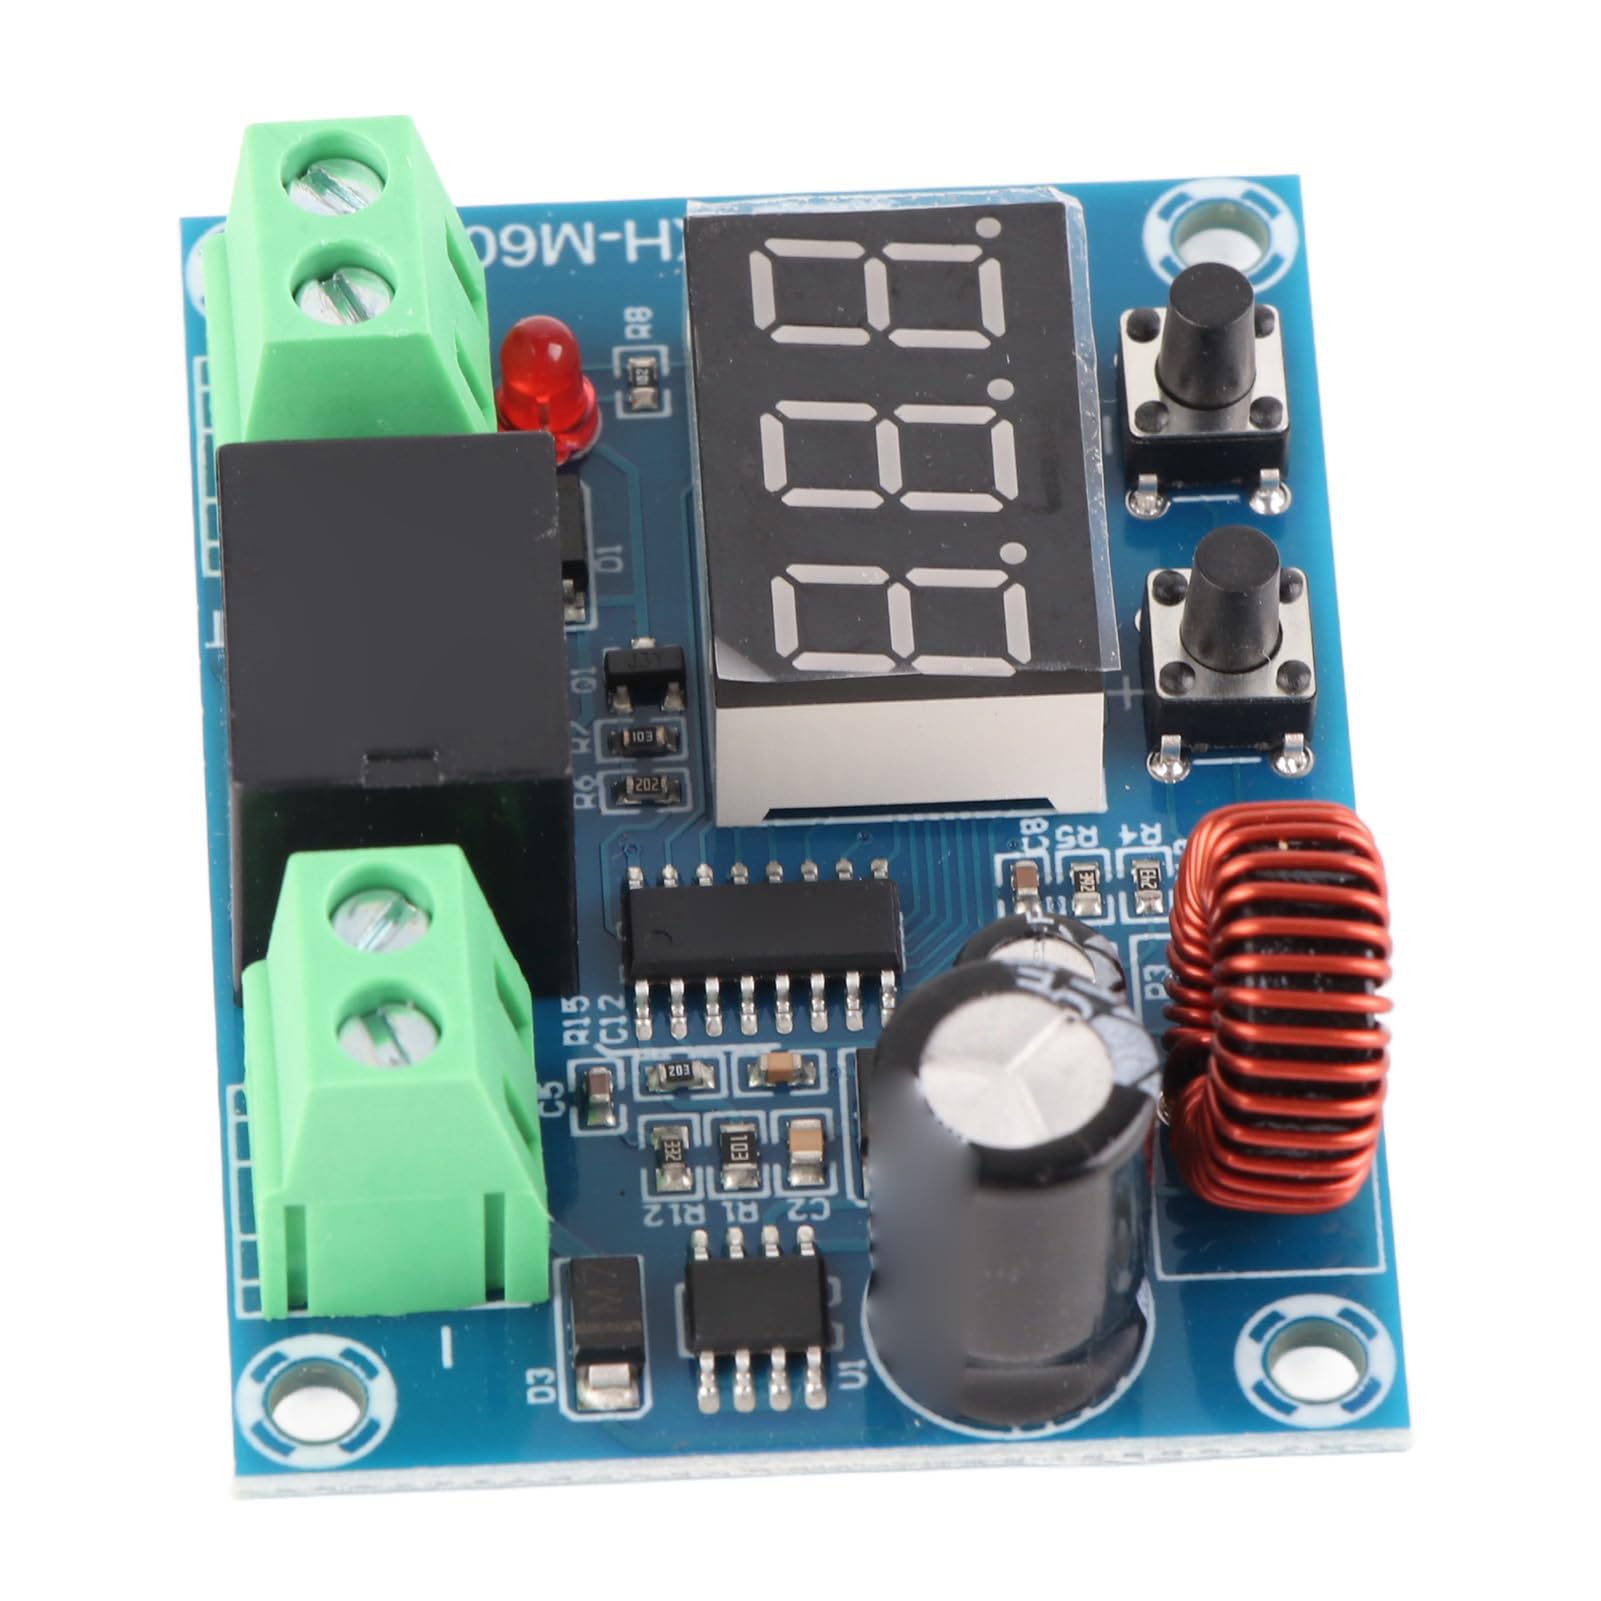
The XH-M609 Digital Low Voltage Disconnect Module is an essential device for safeguarding your 12-36V DC batteries. It features automatic disconnection during low voltage, comprehensive protection against overcharging, over-discharging, and short circuits, all while being built from durable materials for long-lasting performance. Its versatile design makes it suitable for a wide range of battery applications, ensuring your power source remains safe and efficient.
P**C
it works well but it’s confusing to use with no manual
it does what is described but i wish there was some documentationgood thing the other reviewer found out how it works cause that really helped
B**R
Lasted 1 month
After one month the output will not come on no matter what settings I set. it's not a failed relay from over current either because the Red light doesn't come on indicating the relay coil is energized. Its just junk like all the other people said.
C**E
Does exactly what it says
I'm only giving this a 4 star because the first one arrived not working. I put it on a power 13V power supply and it didn't turn on. However, it was easily replaced (after a wait) and the second one works perfectly. There are easy guides on how to use it on YouTube that help with the setup of this. I use it to turn off a plug that stays on in the back of my SUV when the car shuts off. That's nice for tailgating, but when you come back from the game and the car is dead because you forgot to unplug the cooler, you'll get one of these.Well an update- one week later it has died........one star!!!!
M**E
Received non-functional unit.
Poor quality control. Components on the board not securely attached.
B**G
It’s good
It worked.
D**L
Funciona perfecto.
Se puede ajustar el voltaje mínimo de corte y la histéresis de reconección. Exacto como se describe. Facil de programar. Mantiene la programación aunque este sin corriente mucho tiempo. (semanas ?)
F**S
No instructions provided but Got it to work from Information from other users reviews
Some other reviewers instruction helped but I did the following to get mine to work1. TO CALIBRATE THE UNIT, HOOK UP YOUR POWER SUPPLY AS WELL AS A MULTIMETER. LONG PRESS (3 SECONDS) THE LEFT BUTTON UNTIL THE DISPLAY IS FLASHING. USE THE LEFT AND RIGHT BUTTONS TO RAISE OR LOWER THE READING TO MATCH.2. ADJUST THE UNDERVOLTAGE CUT-OFF. DOUBLE PRESS THE LEFT BUTTON (2 QUICK CLICKS), THE UNDERVOLTAGE VALUE WILL BE DISPLAYED FLASHING. USE THE LEFT/RIGHT BUTTONS TO ADJUST THE CUT-OFF VALUE.3. ADJUST THE CUT-IN VALUE. DOUBLE PRESS THE RIGHT BUTTON (2 QUICK CLICKS). THE CUT-IN VOLTAGE WILL BE DISPLAYED WITH DECIMAL FLASHING. YOU MAY NOW USE THE LEFT/RIGHT BUTTONS TO ADJUST. THIS VALUE IS ADDED TO THE CUT-OFF VOLTAGE, SO IF YOU HAVE 12V SET AS THE CUT-OFF AND 2V SET AS THE CUT-IN, POWER WILL BE RESTORED AT 14V4. ADJUST THE DEBOUNCE TIMER. LONG PRESS THE RIGHT BUTTON (3 SECONDS). THE DEBOUNCE TIMER WILL BE DISPLAYED IN MINUTES. IE 0 IS INSTANTANEOUS, 1 IS ONE MINUTE.ALL SETTINGS WILL BE WRITTEN TO THE CONTROLLER BY ALLOWING THE SPECIFIC SETTING TO TIME OUT TO THE VOLTAGE DISPLAY (NUMBERS AND DECIMAL STOPS FLASHING). RED LED WILL LIGHT UP WHEN OUTPUT IS ON. SETPOINT VALUES WERE SAVED IN MEMORY AFTER DISCONNECTING INPUT POWER.
M**I
Excelente funciona cómo tienes que hacerlo
Excelente funciona cómo tienes que hacerlo1 Para el corte de Voltaje, un click al botón izquierdo, luego doble click a ese mismo botón hasta que parpadee el punto, lo mismo para la diferencia de voltaje de reactivación, en YouTube sale el mismo modelo pero se configura diferente, este es más nuevo
A**L
They work great!
There was no instructions with them, but thanks to another buyer, he had posted how to set them up and they are actually super easy once you know. I had bought two in the past and neither worked. Bought four this time and they all worked.
ترست بايلوت
منذ أسبوع
منذ شهرين