معلومات عنا
دعم العملاء
احصل على التطبيق

قم بتوجيه الكاميرا لتنزيل التطبيق
حقوق الطبع والنشر © 2024 Desertcart Holdings Limited


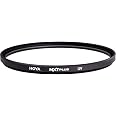
The Hoya NXT Plus UV Filter is a multi-purpose filter that is most commonly used to protect the front of your lens, a first line of defense against scratches, rain, dirt and dust. Hoya's NXT Plus UV is a powerful upgrade to the best-selling NXT series. This filter applies a waterproof top coat to Schott B270 glass polished smooth for maximum sharpness. There are two advantages to having a premium waterproof coating: (1) Water beads-up quickly, and easily slides off the surface of the filter for streak-free shooting. (2) It also makes the filter a lot easier to clean when dirt, water, and smudges make their way onto the surface. Hoya applies 10 layers of patented anti-reflection (AR) HMC multi-coatings to the NXT Plus UV filter for improved contrast, color, and sharpness. The coatings deliver a 98% light transmission so you don't have to worry about contrast-killing glare. The NXT Plus filter frames are precision milled from lightweight aluminum for a slim profile that makes it perfect for all lenses including super wide-angles.What else does a UV filter do? Most photographers leave a UV filter attached to the lens all the time as a form of protection. But the filter also plays an important role in filtering through UV Haze. Haze is not a huge problem when you are taking pictures at sea-level, but as you hike into higher altitudes, the filter definitely helps cut through the haze to increase contrast and improve color. The NXT plus has a UV Cut Point of 360nm or L36 which is superior to most filters at this price point.Key Features: • Waterproof top coat for easy cleaning • Schott B270 clear glass • 10-layers of HMC multi-coatings • 98% transmission rate for sharp, clear images • Low-profile aluminum frame
L**E
Fab!
Boyfriend was very happy with it! Does everything it says on the tin!
V**A
Amazing trustworthy company
The product is excellent as describe !But the best is the service the company offers (five stars).thank you.
J**T
Quality not good
Very disappointed. Did not do any polarising and pictures blurred more. Better without.
C**G
This lens reduce about 2-stop in exposure.
Good fit, easy to remove if not over tightened. A little pricey for this range of CPL glass. To note that this lens reduce about 2-stop in exposure.
N**O
Fits and spins on Sony RX10Mk4 with factory hood and lens cap
I get so tired of trying to sort through conflicting reviews on things and trying to pick out a new circular polarizer for my new Sony rx10 Mark 4 was getting frustrating. I finally picked this unit, especially for its low profile construction and threads on both sides. It will indeed fit onto the Sony's lens and yet still allow you to install the factory lens hood and lens cap. And yes, if you are careful with your finger, you can reach in around the lens Hood and press on the grippy ridges of the front edge of this polarizer to rotate it without putting a fingerprint on the filter. Yes you have to be careful but it does work nicely. I have been a photographer for a long time, since the early 80s, and have used many cameras with different polarizers. I decided against a 'warming' polarizer because now with digital photography, color adjustments can all be done in software after the fact. The polarization effect is beautiful and quite noticeable and I do not notice much added lens flare artifacts. The multicoating seems to be doing its job. There is no vignetting with the Sony rx10 Mark 4 at its widest lens magnification setting. And finally, there are enough threads on the front of this filter for the factory pinch grip lens cap to fit securely.I do not use this with a UV filter. I think that is unnecessary. I use the polarizer directly on the front of the lens as needed. Let me share a couple of secrets to make this polarizer more useful: 1) Absolutely do NOT screw this on tightly to your lens, which will cause it to jam. You will see this happening to people over and over with screw-on filters. It's very simple: only screw it on lightly until it just stops turning. Do not tighten it! After that, no worries. It always comes off easily, thanks to the nice grooving on the outside diameter. 2) With the filter off of the camera, find the white triangle index mark on the outside diameter. Use a small file to grind off a tiny portion of the black finish on the front facing part of the rotating polarizer, adjacent to the index mark (see photo). Tip: the index mark is the spot that lets you know which way the polarizer effect is oriented. You point this generally toward the sun position to darken the sky when looking 90° from the sun. Or you set the index point to top center to block reflections from horizontal objects like water. Or you can just spin it around and look through your viewfinder until you achieve the effect you desire for foliage, clouds or other compositions. The trick is to be able to see the index mark from the front while still using the lens hood, which prevents you from grabbing the outside of the rotating portion of the filter normally. The serrations on the front of this filter, visible in the photo, let you turn it by touching it with your finger from the front, and with your new shiny index mark visible from the front, you are all set and will not have to remove your lens hood to make adjustments. Super convenient!
ترست بايلوت
منذ شهرين
منذ أسبوعين