We remain fully operational. Our teams are working around the clock to ensure your deliveries continue safely.

قم بتنزيل التطبيق


معلومات عنا
حقوق الطبع والنشر © 2024 Desertcart Holdings Limited
قم بتنزيل التطبيق
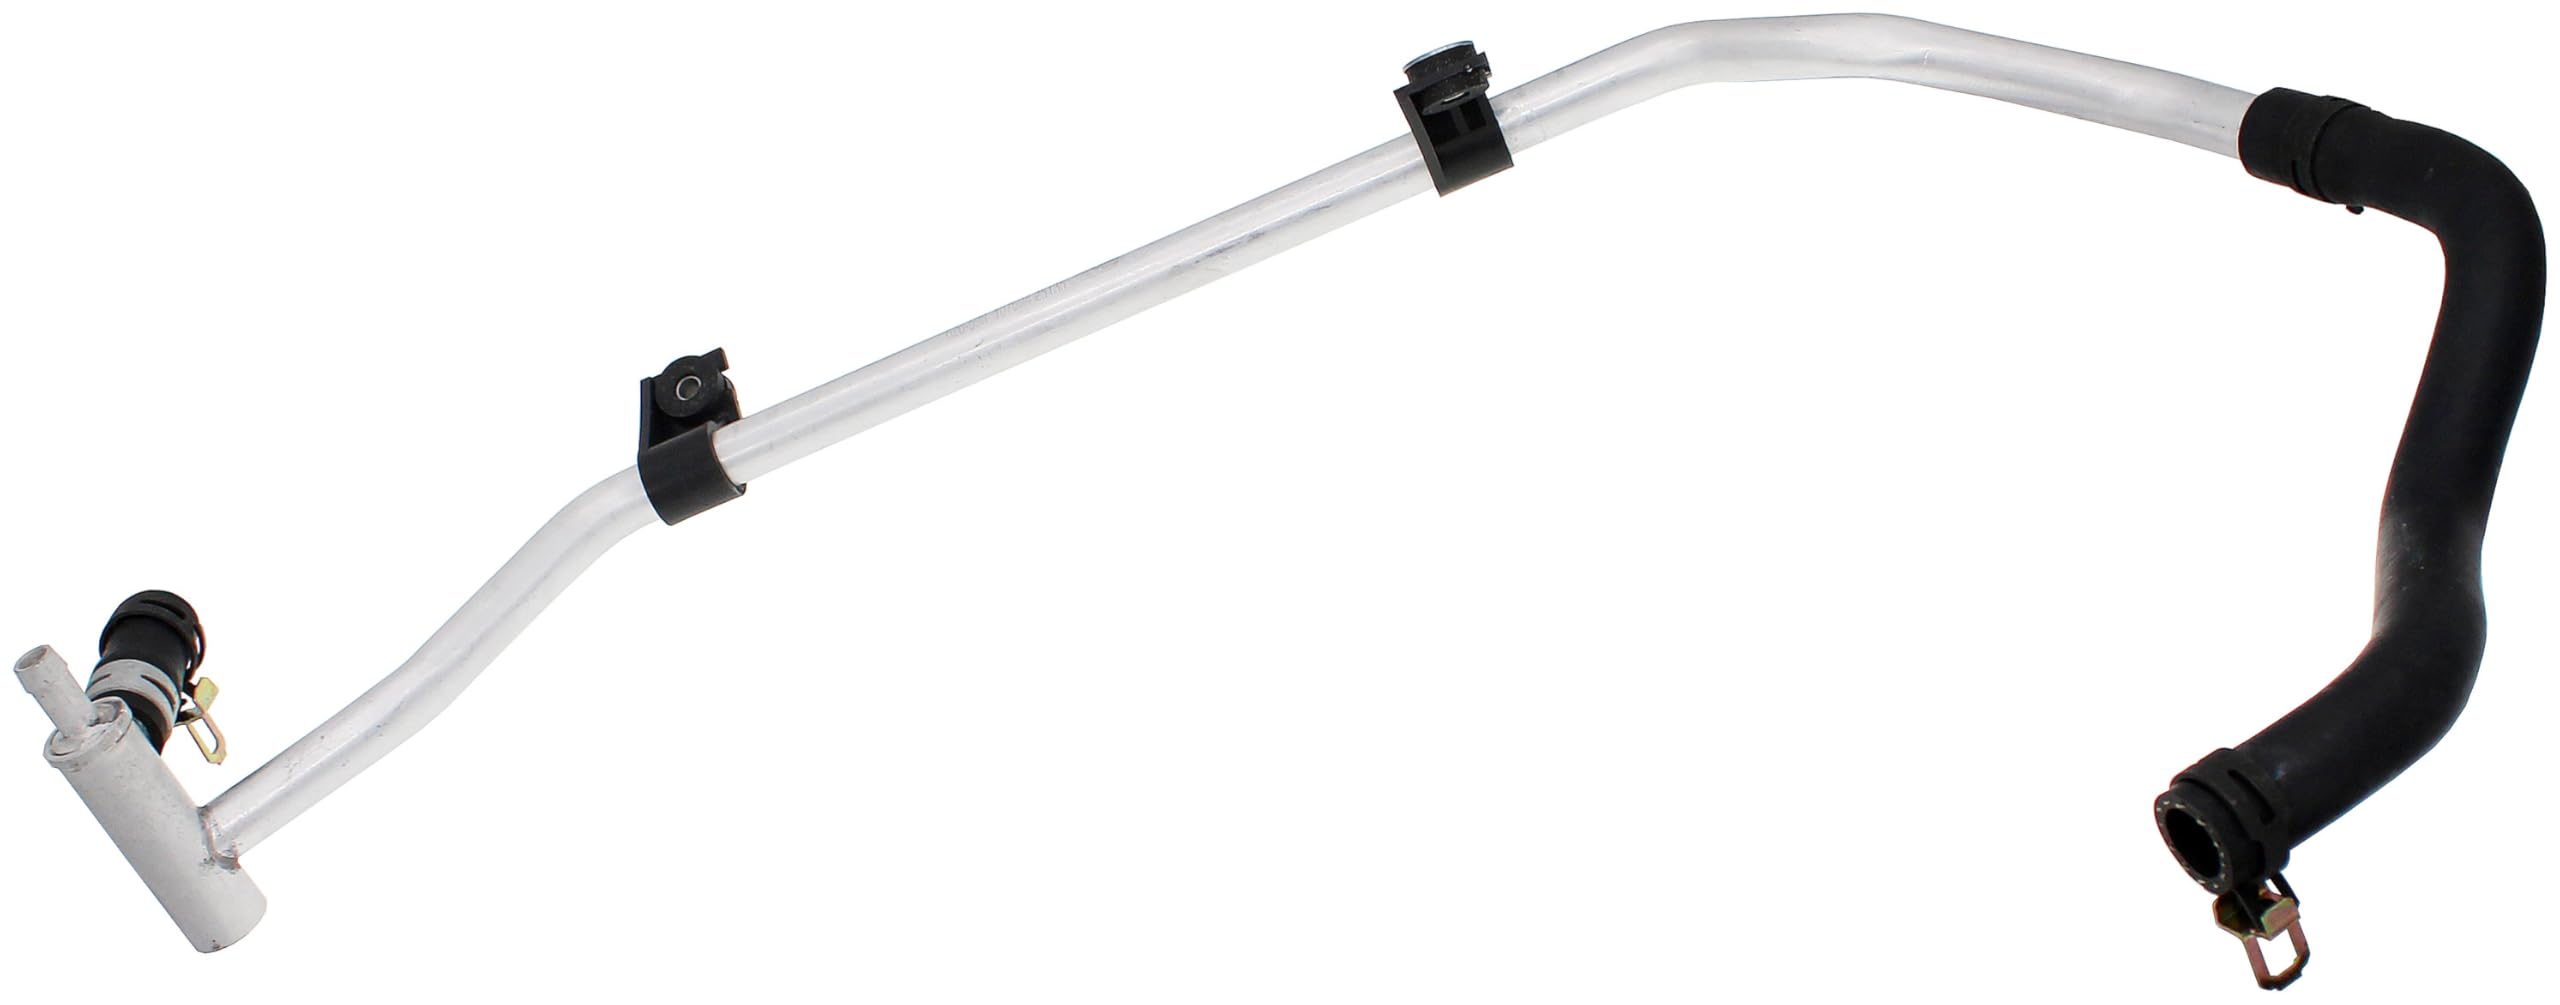
🔥 Upgrade your Nissan’s heartbeat with rock-solid reliability! 🔧
The Dorman 626-598 Engine Heater Hose Assembly is a direct OE replacement designed specifically for select Nissan Frontier, Pathfinder, and Xterra models. Featuring a durable aluminum T-connector and complete with installation clamps, this US-engineered assembly eliminates the common plastic connector failure, ensuring long-lasting heater hose performance and peace of mind on every drive.


| ASIN | B00KQJ1YOQ |
| Best Sellers Rank | #29,068 in Automotive ( See Top 100 in Automotive ) #16 in Automotive Replacement Heater Hoses |
| Brand | Dorman |
| Color | Orange |
| Connector Type | Tee |
| Customer Reviews | 4.8 4.8 out of 5 stars (298) |
| Date First Available | April 6, 2020 |
| Item Weight | 1.2 pounds |
| Item dimensions L x W x H | 44.49 x 19.69 x 6.1 inches |
| Item model number | 626-598 |
| Manufacturer | Dorman Products |
| Manufacturer Part Number | 626-598 |
| Material | Aluminum |
| Number of Pieces | 1 |
| OEM Part Number | 92410EA200 |
| Product Dimensions | 44.49 x 19.69 x 6.1 inches |
| Size | 0.366 inches |
C**Y
Mandatory upgrade for Xterra owners. Don't wait until it explodes.
If you own a Nissan Xterra, the original heater hose assembly is basically a plastic time bomb waiting to go off under your hood. I learned this the hard way on my first Xterra while beach driving. It started overheating, I noticed the original plastic connector seeping at the firewall, and I made the rookie mistake of barely touching it to check it. It immediately disintegrated and sprayed hot coolant directly into my face. Zero stars for that experience. Five stars for this Dorman replacement. I’ve since bought this part for my second and third Xterras. It replaces the cheap OEM plastic connectors with actual metal. It’s a super easy install that permanently solves one of the most common failure points on these trucks. Do yourself a favor and replace it proactively before you end up stranded (or scalded) like I did.
P**N
Exact Replacement for Nissan's Stupidity
The OE Nissan heater hose has a plastic tee molded in ( non-replaceable ), that cracks & then leaks when it gets age hardened and brittle. This Dorman piece is great, direct drop-in replacement but all rubber and metal, no junk plastic moldings. You will need to replace the spring clamp at the firewall side, with a stainless steel aircraft worm gear clamp, as the spring clamp they supply has an installation "holder" tab that's supposed to be removed to let the clamp relax into place. However, this doesn't work as the tab hits the AC line that's just above the heater outlet pipes. A minor nit to pick though here, really, as the rest of the assembly is top-notch and should last the life of the truck. I gave the assembly itself a 4 star for installation due to the mentioned tab above, but I give Nissan a 1 star for making the OE assembly such junk, and then making it so so so difficult to field repair. Be prepared to lay on top of the engine cover while attempting to wrestle off the OE spring clamps, they were obviously put in place before the engine went in, as getting them out is a nightmare. I ended up using a water pump pliers, another needle nose pliers and a specialty spring clamp pliers set ( another king Jeffrey of AmazonWorldLand purchase ) to work these little buggers outta place. So be warned, and be prepared. You will need to replace both fittings at once, as getting this one off without removing the other heater extension, is well nigh impossible as well as I could see. And that one contains plastic as well, so do 'em both at the same time. You will also find threading this assembly back through behind the engine will be a huge challenge as there is a large wiring harness back there, that I got hung up on, five or six times. It was an exercise in patience, for certain.
F**O
Great part for the price
Fit my 2010 Nissan frontier V6. Pretty simple to install. Cheapest I could find, Less connections and feels higher quality than the original part, although the original part did last 180,000 miles.
A**R
Better than OEM Nissan part
It’s metal and better than plastic OEM Nissan part.
O**Q
Good quality, exact fit
Bought this to replace the heater core connector on a 2006 Xterra, the OE plastic barb is known to break over time. I installed this as preventative maintenance for my friend, and no sooner did I go to pull the hose clamp holding the original part in place did the 18 year old part shear and crumble in my hands. Very inexpensive preventative maintenance part to ensure more years of reliable service. Install is a little more involved for this part, flex head ratcheting wrench and spring clamp pliers are a must to make this easier to install.
J**E
Debating if this deserves 4 or 5 star...
As you can see, I have givien this a 4 star. Why? This thing is great! This thing solves Nissan's problem of being cheap. There is no plastic (well, besides from the firewall mount). There is no leak anywhere. So that begs the question of - Why the 4 star? This is a great replacement. However, the clamps that they use are the problem. Especially the upper one (the short one if you can't tell which is upper and which is lower. Also, you probably shouldn't be doing this if you can't tell which is which.) The upper clamp is so tight that it doesn't allow the hose to expand as you are trying to connect it to the heater core. The only way to connect the hose to the heater core is by removing the clamp. But then, you must have a clamp! Otherwise, the coolant will go everywhere. Here's the deal, you think you can squeeze the clamp open wider so it allows you to push the hose in. No. Not enough clearance. Nevermind the awkward position you are in. Now you question if you need to hit the gym more. Listen, this is not about how buff you are. A monkey could've get this done. It's the clamp. You must remove it... BUT WAIT! This part is important... First, you must replace it with your old clamp from the old hose. Old clamp worked beautifully for me. As you try to remove the new clamp off the new hose... Just yank the white plastic piece off (The clamp holder) and throw it against the wall to take some of your frustration off. Then use a vise grip, or a hose pilers if you have a 3rd hand. Squeeze the clamp open and slowly pull it off the the hose. Oh wait a second... why is this clamp stuck on the hose even after you squeezed the crap out of it (this is why I used vise grip because I need 2 hands to do what I'm about to do) and it looks loose enough that you should be able to pull it out. This is where it lost a star for me... Because the clamp installed at production line either glued or just it clamped onto the hose for too long. I think it was glued in my opinion. Because the clamp would've just fallen out and shipped to you that way. Then some people will install the hose without the clamp and not realizing the clamp is needed. Anyways, remember that white plastic clamp holder I told you to toss away? That kept the clamp loose so you can install the hose with ease... so they thought... But at least the thought was there. DO NOT muscle the clamp off the hose like I did, because I ended up ripping the hose where it was glued and had to get a new one. What do you do? You do not need to do what I did, but I'll tell you what I did after I learned my lesson. I used a thin picker (a metal toothpick would work, if there's such thing) and apply lube or grease on it. Stick it in between the clamp and the hose. Then slowly work back and forth on the stuck area until the hose is free. At the time, I didn't think it was glued on. Now looking back, I might be able to soak it in WD40 or something to loosen the glue up. That could've worked and could have a better result without the risk of damaging the hose. Once you get the clamp out, throw it across the driveway and wish it luck. Put your old clamp onto the new hose then route the unit behind the engine. Basically, you are just setting it up before you plug the hoses in and mount it onto the firewall. Install the upper hose. Congrats! You're HALF WAY DONE! For the lower hose (the long one)... Oh man... have your dog grab you a beer now and sit down for a second. Because this part, you are gonna have fun. DO NOT REMOVE THE PLASTIC CLAMP HOLDER! "WHY NOT?!?" You ask. Because the hose will fit on without issues. It may or may not have glued on to the hose. But seriously, it doesn't matter. (Although, now that I think about it as I'm typing this... it might matter a lot in the future if I have to pull the hose off...) After that, pull the clamp holder off and you are done, for real. This is not the easiest job. Mainly because of the clamp situation. Difficulty scale of 1 to 5, 1 being the easy and 5 being the most difficult. I would give this a 2. Again, that's only because of the clamp. Had I know what I know now. I would rate this a 1.5. Because it's still harder than doing an oil change or changing a light bulb. OH YEAH! I almost forgot! Make sure you drain about 1.5 to 2 quarts of coolant out first before you tackle this job! Unless you like mopping the floor. Okay good luck! You have my respect for reading all of this and being a DYIer.
K**R
Excelente
V**N
Exact fit thank you
A**I
Very good product and it has alluminum parts that replacing the palstic parts of the OEM
R**O
Mi mecánico me dijo que la manguera es muy buena. Y en el uso va muy bien. Lo recomiendo.
S**C
Perfect fit and better quality then original part since it is in aluminium. I only neede to use a screw colar on the top hose since it inner diameter was slitly larger the du to the wear. Great buy
ترست بايلوت
منذ 3 أيام
منذ يوم واحد