معلومات عنا
دعم العملاء
احصل على التطبيق

قم بتوجيه الكاميرا لتنزيل التطبيق
حقوق الطبع والنشر © 2024 Desertcart Holdings Limited

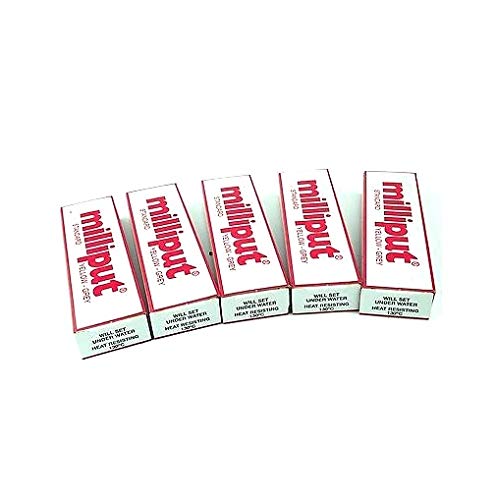
5 x Millput Yellow/grey
T**T
I am The Stuffitect, and I have a problem...
Ok so full disclosure - I am officially a Milliput junkie. Sorry if this sounds strange, but my Counsellor tells me that the first step towards being healthy is to admit you have a problem...And I most definitely have an addiction...This stuff is a tinkerer's dream; if you're anything like me and like to make or modify things, you really must have at least one box of this in your arsenal. It will stick to almost any dry, well-prepared surface and sets to an incredibly hard and robust finish making it perfect for repairs (this is particularly true of the white Milliput - all colours vary - for example the black is quite granular and much less versatile).If you like to make models you will appreciate the good adhesion to wire armatures and the range of surface finishes which can be achieved. However if you are going to model with this for the first time please note that once mixed, the compound undergoes fairly distinct stages as it begins to cure. As I see it, there are five stages:Stage 1: Sticky!Once mixed thoroughly the substance will be at it's stickiest, which is your best opportunity for forming a complete bond with an existing surface (an existing model or item for repair). Warning: This is not necessarily the best stage for sculpting into a 'free' form as it will be difficult to work with.Tip: when the putty is fully mixed you will feel a slight warmth - more than you would expect from your hands alone - which is the exothermic reaction between the two elements; this is a good indication that you have mixed it thoroughly enough. I have had someone come to me because they left it all night and it still wasn't set, which it turns out was due to sloppy mixing!Stage 2: SoftFairly quickly after the initial exothermic reaction subsides, the putty will go through a phase where it is not quite as sticky and responds well to the use of water (a bit like working with water on a clay surface, but imagine the consistency/'give' more like a medium/firm polymer clay such as Premo). This is your opportunity to get your overall form together and get sculpting! Your sculpting tools will serve you well here, just dip them in water and clean them immediately!Stage 3: FirmJust before the putty sets it will be *very* firm but can still be altered. This is your opportunity to get in there and, once again using plenty of water where required, push in any deep surface details and possibly refine around areas such as eyes, etc.Stage 4: SetBefore a 'full cure' your putty will be hard, but it will still be possible to have at it with a scalpel and add sharp surface detail, carving with relative ease.Stage 5: CuredYou may still carve at this stage, however it is incredibly hard and responds better to the use of small hobby power tools, such as those made by Dremel or Foredom. With the WHITE milliput, you can go right down to the finest detail, just be careful not to snap anything off!I hope this is useful to somebody. I have attached images of a couple of things I have made with the white Milliput to give you an idea of what can be achieved (and a glimpse into the extent of my problem...). FYI the objects are an eagle head walking cane and a 'tooth fairy' from Hellboy II. Enjoy!
D**K
Great value, READ THE DESCRIPTION
Milliput is great stuff and I jumped at the chance to purchase what I thought was an example of each of the varieties but no, this is 5 of the original standard Yellow Grey stuff. Which is fine, had I read the description I would have realised that this is NOT a sample of all the types but why do they include a picture of all five varieties. Seems to me this should be a picture of 5 Standard tubes, not 1 of each like this listing.Yes, my fault for being in a rush...Just for reference, this is the listing with all 5 grades:https://www.amazon.co.uk/Milliput-Epoxy-Putty-Silver-grey-Terracotta/dp/B07GT68SNH/ref=sr_1_18?ie=UTF8&qid=1553076951&sr=8-18&keywords=milliput
J**S
knead them together for about 2 minutes and you have at least an hour or two to work the putty into whatever shape you like. The resultant putty will set rock solid after ...
I use Milliput for sculpture,making props and models.Simply mix equal parts of the two sticks of epoxy putty, knead them together for about 2 minutes and you have at least an hour or two to work the putty into whatever shape you like. The resultant putty will set rock solid after about 6 to 10 hours depending on localised atmospheric conditions, humidity, temperature etc.You can use water to smooth or shape the mixed putty and once the putty has solidified it can easily be sanded and painted.I can't praise Milliput highly enough and the deal offered of 5 packs for £10.70 was a bargain and I would buy again at that price.
N**R
Wonderful stuff
All of a sudden I have this obsession, with this stuff. It's brilliant. I am using it to make little ornaments and decorative toys 😂 I only needed it to fill a hole at first but I love it.5 boxes just isn't enough lolIt drys fast but not too fast. Sometimes it drys faster than I expect it too but I think that me getting distracted. Great for detail work and easy to smooth. Brilliant in mouldsGreat for repairs.I am running out so will be buying more of it. I haven't found anything else like it yet
W**Y
Love this stuff
Milliput is brilliant stuff, which I've been using for years. The fact that it's still being made, appears to have remained unchanged from the original product and seems to be as popular as ever speaks volumes for it.Each box contains two sticks of a putty like material wrapped in plastic, each a slightly different. To use, an equal amount is pinched off each stick and is mixed until a uniform colour is achieved, in this instance a pale greenish yellow. Whilst still makeable, it can be moulded, shaped and smoothed out with water until the desired effect is achieved.I've used us indoors and out; filled plastics, wood and metal, sealed a petrol tank and a toilet cystern. It has so many uses that it's impossible to imagine them all. One of my favourite uses is for oversized screw holes in wood, masonary etc. Mix a little Milliput, roll it into a small roll and push it into the hole. You can then either wait until it hardens and re-drill, or make a hole with a cocktail stick in the centre of the putty before it goes hard and voila - instant wall plug.Brilliant stuff
W**G
Beware , you are not buying the 5 mixed tubes in the picture.
Bought these expecting what’s in the picture , although when they turned up it’s was 5 standard tubes , annoyingly it’s not that clear , although it does say it’s 5 standard tubes in the text , why on earth do they show a picture of 5 different tubes , very decitfull and stated on other reviews.
R**S
Good Alternative to liquid resins.
Good alternative to liquid resin in craft work. Avoids difficulties with measuring and air bubbles. Just break off a piece of each coloured putty supplied, in equal size and mix together by hand until one uniform colour. You can then press into silicone mold and leave until it cures. Great for head sculpts and can be used itself for sculpting - clothing, body parts etc.
M**O
Essential! I love it
I absolutely love this stuff. I can’t live without. I’m making all the stuff I’ve always wanted ro make for ages, but never had a chance to buy it before as I lived in another country. As soon as I discovered it I adopted it in most of my work. It has also helped my YouTube Channel grow.Love it!
ترست بايلوت
منذ شهر
منذ أسبوع