Some deliveries may take a little longer than usual due to regional shipping conditions.

قم بتنزيل التطبيق


معلومات عنا
حقوق الطبع والنشر © 2024 Desertcart Holdings Limited
قم بتنزيل التطبيق

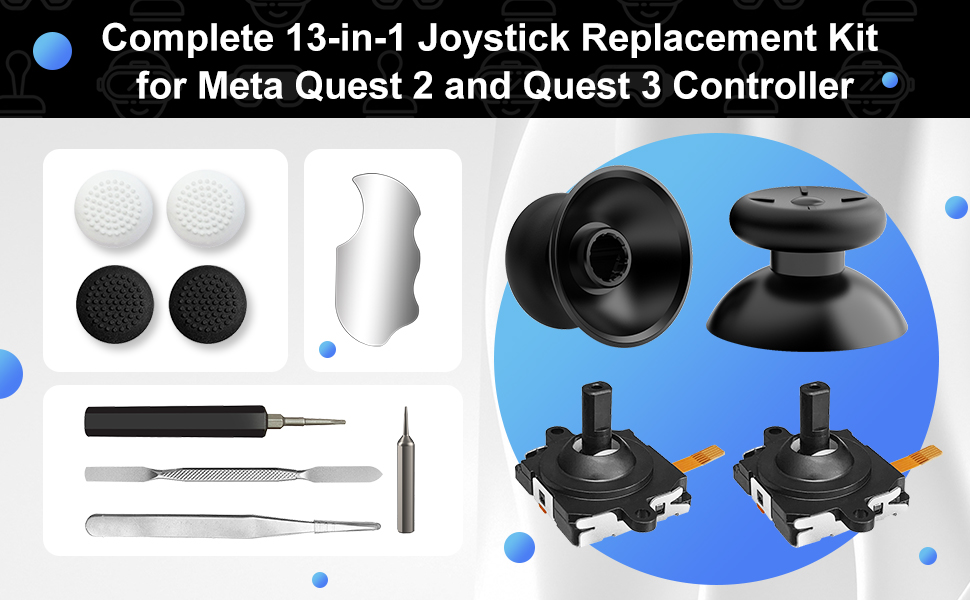
🎮 Upgrade your VR game — don’t let worn controllers hold you back!
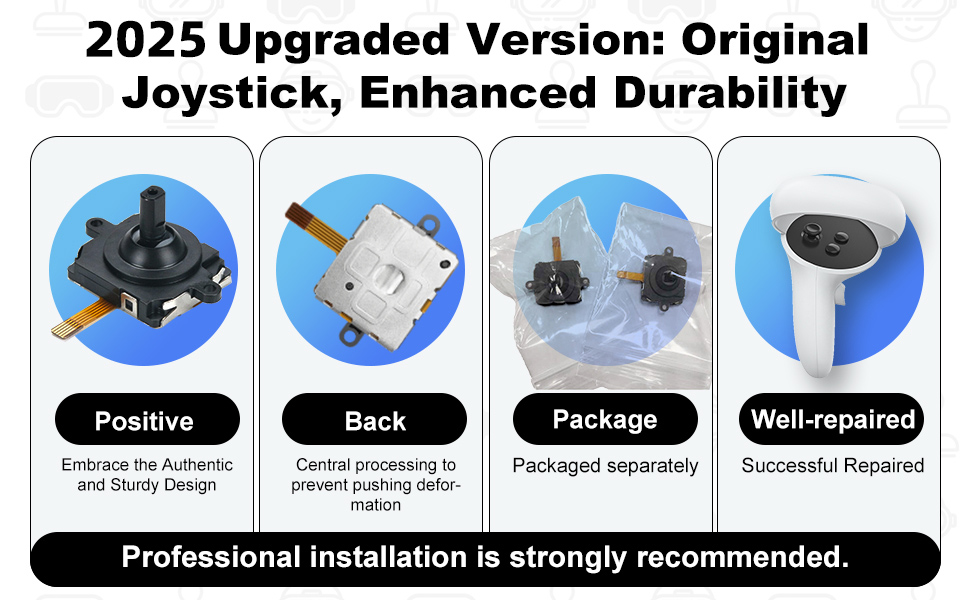
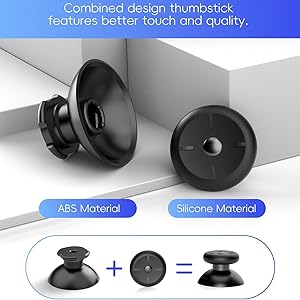
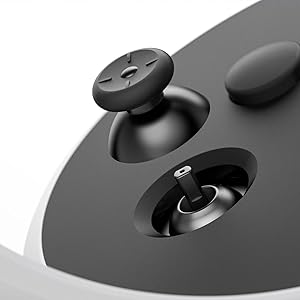
The OLCLSS Thumbsticks Replacement Kit is a comprehensive 13-in-1 repair solution designed specifically for Oculus Quest 2 and 3 controllers. It includes 2 replacement joysticks, 2 thumbsticks, 4 thumbstick caps, and essential tools like T5 screwdrivers, tweezers, and pry tools. This kit fixes common issues such as stick drift and wear, delivering improved grip and precision to restore your VR controllers to peak performance—all at a fraction of the cost of buying new.


| ASIN | B0CJ6QY1NR |
| Additional Features | Ergonomic, Wireless |
| Best Sellers Rank | #2,063 in Video Games ( See Top 100 in Video Games ) #58 in PC Virtual Reality Accessories |
| Brand | OLCLSS |
| Brand Name | OLCLSS |
| Button Quantity | 13 |
| Color | White-13-in-1 |
| Compatible Devices | For meta quest 2 controller |
| Connectivity Technology | Bluetooth |
| Controller Type | Joystick |
| Customer Reviews | 4.3 out of 5 stars 776 Reviews |
| Hardware Platform | pc |
| Included Components | For meta quest 2 controller |
| Item Dimensions | 3.54 x 2.76 x 0.39 inches |
| Item Weight | 0.04 Kilograms |
| Manufacturer | OLCLSS |
| Model Name | RM |
| Package Quantity | 1 |
| Power Source | Battery Powered |
| Warranty Description | 2 |
L**E
Small parts but doable
The kit gives you everything you need, but you need to have a lot of patience. I had to take it apart fully twice because I seated the joystick wrong the first attempt. It took a good hour to take apart and put together the first time. Mainly because I was trying to be super careful and not break any of the plastic. The second attempt I had it apart and back together in roughly 20 minutes. Just make a layout of where all the screws go, especially the ones under the black cover that covers the buttons, because the length on them varies. I actually got two joysticks and accidentally damaged the ribbon on one on the first attempt but luckily the kit I got comes with two replacements. If you have it seated right though they pop right in. When taking it apart make sure you don't pop any of the other ribbons out of place. One of the ends of the ribbons on the ring popped out on one side and I had to reseat that, but it wasn't too difficult. Just be mindful of those, you'll see the ends connect to the board on each side under the trigger button. It's easy to jar that one loose just a little bit. I'm not sure what the metal pad tool is used for other than sitting there looking shiny on your work area. I really only needed the pry tool to help pop things apart, the large t5 screwdriver, and the tweezers. The tweezers help placing the screws in place and can be used to very carefully line up the end of the ribbon. Don't damage the ribbon out of frustration with the tweezers like I did! When putting the ribbon in, there's a really tiny black retainer clip on the top of the ribbon housing where it connects. It's super tiny and really hard to see if you don't have quite 20/20 vision. I flipped that up to insert the ribbon then flipped it back down to lock the ribbon in. The new joystick seems to work really well and the kiddo is happy there's no longer any drift.
C**R
Stick Drift Fixed
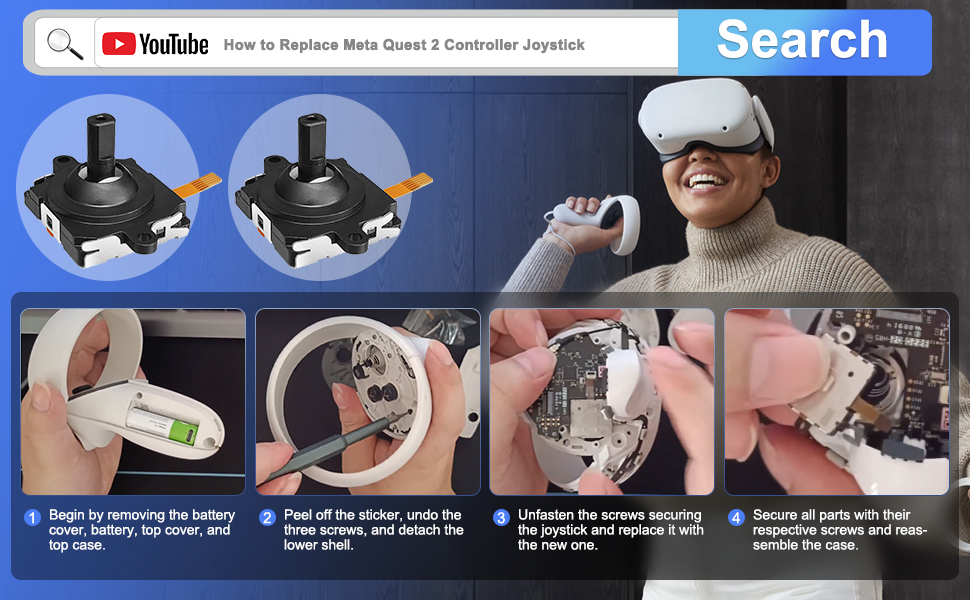
This fixed my problem. I was having major stick drift issues but after installing, I ran it for a while on heavy moving games and it works great. It is slightly difficult to replace (not hard) but difficult. It's small parts but everything fit well and they gave you all the tools you need. Just look up a youtube video of someone fixing it (that's what I did) and it's fairly straightforward. Plenty of screws but WAY cheaper than buying a new controller. It took me about an hour to complete. Great value for what it is.
R**U
They Work
They work well. Fits like the original. Process was a bit difficult, but follow the iFixIt tutorial for replacing the sticks on your controllers and you'll be okay. Minus 1 star because the kit does not come with any replacement adhesive unfortunately. Much cheaper than buying a new controller (nearly 1/20 of the price). I recommend fixing them yourself with a kit like this.
J**O
Works!
Drop in replacement. No issues.
J**H
Easy install and stick drift GONE!
The best replacement joysticks to buy they work perfectly like original , And all the stick drift GONE fixes the problem And you could watch tutorials on yt its not that hard to install
D**E
Works! Had to fight for it though.
I play a lot of Pop 1 so when my quest controller left thumb stick broke, so did my heart. At first I considered just running to the store to buy a new headset but that was vetoed by the joint tenant on my checking account. Ive heard about folks buying replacements thumb sticks so I got on Amazon looked around at the replacements (they all have the same components) and then read all the positive feedback. I was quickly sold on the idea so I took the plunge and purchased it (wanted to act quickly cause game withdrawals are real yo!). It took about a week to get the components and the second it landed I pulled up the installation video (on high speed) and got the kit out. The kit comes with everything you can possibly want or need to do the job. I would just recommend a paper and pen so you can write which screws go where. So after quickly realizing the video provided here is way too fast to follow I looked up the process on YouTube. A nice British fellow got on and started taking apart his controller as he had reportedly done several times to clean it (what he does with his controllers is completely sus). As he’s working he explains everything quite well except he had no idea what he was taking about when it came time to pull apart the hand grip. I pushed and pried at that damn thing for ten minutes before I finally yanked it apart almost cutting my hand up. I thought that was rough but the fact that I was able to do it with only cracking it a bit was pretty freaking impressive (as you will find). Then you have to clip out and eventually back in this ‘connection ribbon’. Okay so it pops out when you get the handle off cause finding the release tab requires you to be physically inside the handle but try and put that lil stinker back in and that’s when the fun really starts. I found that the easiest way to do this is to hang your phone (with flashlight on) off the edge of the table and then fold yourself into a C shape. Squint through your dominant eye while using the tweezers as you swear each time you can’t cram it into the cram hole. Pivot, open and reclose the handle several times to try and get a better angle before realizing there’s no good angle and you have to snap it all together again and use the tweezers for the next 30 minutes as you jam and poke at the receiver with the tape 500 times. It will land on the 499th attempt. After putting all the screws back into the motherboard you need to check to make sure everything works (buttons, toggles, etc) during which time you will find that one of the buttons is stuck so then you will unscrew it again for fun. Clipping this sucker back together is just as annoying as taking it apart. I won’t get into it because it just makes me anxious. So here is my final recommendation. It works!!! Can’t beat a like new controller after being cut off from your favorite pastime for a week. Negatives; if you have fat fingers good luck, if you have limited skills with tiny tools beware and if you have no patience just go and buy a new controller because your just gonna throw this one against a wall while trying to fix it. Good luck-play safe!
P**S
Broken controller
This is what I ordered but taking the controller is vert hard ti get apart without breaking.
K**Y
Do not buy.
Took the time to replace the joysticks and they operate worse than before.
ترست بايلوت
منذ يومين
منذ يوم واحد