Desertcart purchases this item on your behalf and handles shipping, customs, and support to EGYPT.
💅 Elevate your nail game—fast, flawless, and fearless.
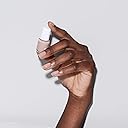
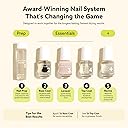
The Dazzle Dry Mini Kit – Chiffon Moment is a 5-piece, 4-step nail system delivering salon-quality manicures in just 5 minutes. Featuring a sheer warm taupe lacquer, this non-toxic, cruelty-free kit offers 7+ days of chip-free wear without UV lamps or harsh chemicals. Perfect for busy professionals seeking quick, durable, and clean beauty solutions.

| Asin | B0DKGB1Z98 |
| Manufacturer | VB Cosmetics Inc |
| Product Dimensions | 5.75 x 4.75 x 1.5 inches; 4.66 ounces |
| Upc | 666134001124 |
User
Amazing! Believe the hype!
tl;dr - Amazing results! As advertised it dries super fast and super hard, looks professional, and lasts a LONG time. I'm throwing away all of my old nail polishes and only using Dazzle Dry from now on!I'm not one for manicures. I'm VERY hard on my hands, and have never had a manicure survive the first 24 hours without a gouge, scrape, chip, smear, or thumbprint no matter how hard I try to be careful, and then by one week they look like garbage and I remove what's left. BUT - I had a manicure on my last vacation and upgraded to Dazzle Dry. OMG! Just as the manicurist told me, it was dry in 5 minutes, super hard, and still looked just about perfect 3 weeks later. The only reason I removed it was because my nails had grown out so much that the gap between the still-perfect polish edge and my nail bed was huge and my nails were longer than I liked. It came off easily with acetone polish remover, no special extra treatment needed. The pedicure I had done at the same time, now 4 weeks ago, looks as good as it did on Day 1 - shiny, neat, no chips or peeling.Out of curiosity I looked to see if Dazzle Dry was available to buy and use at home, and found it here on Amazon. DON'T LET THE HIGH PRICE FOOL YOU! Even though the starter kit is small, you'll get your money's worth! Since the manicure will last you many weeks, you won't have to keep removing and re-applying. Be sure to watch the YouTube video for tips and tricks first. The entire process from start to finish took me 10-15 minutes, and that includes the 5 minutes for the top coat to dry. THAT'S IT! SO FAST! I gave myself a professional-looking manicure in 10-15 minutes, it was dry and rock-hard, and then I was able to go about a normal day. Laundry, cooking, dishes, knitting, typing, lab work, petting the cat, etc. without even trying to be careful - all without any chips, smears, gouges. It's really amazing!I'm so impressed that I might now be a manicure convert. I am looking at the color "flights" for more colors to try, and I plan on throwing away all of my old nail polishes. I'll never look back!
User
Expensive, but a magical product that is worth every penny.
Why isn’t everyone talking about this magical, mystical product?!Three weeks ago, I got a pedicure and my nail tech used Dazzle Dry. the picture I’m attaching (sorry in advance for the feet!) shows a three-week-old pedicure that still looks amazing. I was so impressed by the finish and how quickly it dried in the salon that I ordered the mini kit for myself right away.Yes, it’s a bit pricey, which is why I started with the mini kit, but after using it at home, I can confidently say: it’s worth every penny. The photo of my manicure shows my nails after two full weeks: no chips, still glossy, and they look like I just painted them. It’s seriously impressive.I used gel for years even though it ruined my nails, mostly because I hated waiting for regular polish to dry. But removing gel became a nightmare, and I started getting concerned about the UV exposure too (especially after reading about skin cancer risks from curing lamps). I wanted to switch back to regular polish, but wasn’t thrilled about the long dry time, until I found Dazzle Dry.As long as you follow the directions (can’t stress that enough), your nails will dry fast (less than 5 minutes) and last way longer than traditional polish. For prep, all I did was push back my cuticles and follow the steps in the kit—nothing fancy and the results were salon-worthy.I just ordered more colors, and once the mini kit runs out, I’m absolutely getting the full-sized system. Bonus: it’s cruelty-free, which I love. I’ve already told all my friends and family about it, and we’re all hooked.Give it a try, you won’t regret it (your bank account might though).
User
A must try!
I had to find out if this product was as good as the reviews and WOW! Very easy and dries soooo quickly! The color I got was Forbidden Passion Raisin which mimics Wicked and the color is even better than Wicked! It really is worth the try and now I will be buying the larger polishes to add to my collection!!!
User
Save Your Money
I might as well have burned $35. I carefully followed directions included with the product, but on the second day after my manicure the polish began lifting off.I wanted a refund, but they aren't available for this product. I wrote to the seller explaining the issue, and I kid you not... They sent the following instruction manual for getting a "flawless manicure" Now, I don't know if all of the instructions will fit in this review, but I'm going to attach them so you can see for yourself what is expected. The message began with:Are you making sure to follow the proper application for a flawless manicure?Step #1 Nail Prep-Wash hands with soap and water to remove any contaminants.-Saturate 2 lint-free cotton pads (or gauze) well with Step #1 Nail Prep and scrub each nail (pay particular attention to the cuticle area, sidewalls and free edge), removing ALL remnants of oil, lotion, and other contaminants.-Use 1 lint-free pad per hand to avoid transfer of oils from one hand to the other, ensuring optimum cleanliness of the nail plate prior to polish application.-As you move on to the next nail, rotate your pad to find a clean spot to ensure you are not pushing around oil/ lotion.-Do not touch nails once they have been cleansed with the Nail Prep to avoid transfer of oil/lotion onto the nail plate.Step #2 Base Coat-Apply first layer of Base Coat, encapsulate the free edge and allow to dry matte.-Repeat the second layer of Base Coat, encapsulate the free edge and allow to dry matte.-Don’t apply Base Coat heavily as it can flood the side walls and come in contact with skin, which could lead to premature chipping.-Skip encapsulation of the free edge if nails are short.Step #3 Nail Lacquer-The key to applying the DD Lacquer is having more polish on your brush, using minimal pressure on your brush, working more with the tip of the brush, not fanning out the bristles (you are pressing too hard if the bristles are fanned out), and not over-stroking to avoid disrupting the previous layer.-Apply the first layer of Nail Lacquer using about a medium consistency, not too thin and not too thick and cap the free edge. Dip -the brush in the bottle for each nail and swipe off excess product using the inner neck of the bottle. Allow to dry matte prior to applying the second layer.-The second layer may be applied generously. Dip the brush in the bottle for each nail and swipe off excess product using the inner neck of the bottle.-Be mindful of not applying too heavily so that the Lacquer does not roll to one side or pool.-Encapsulate the free edge of each nail with the Lacquer and allow to dry matte.-If you get it on the skin, clean up with pure acetone and a detail brush as you go. Waiting until the end will make it more difficult to clean as it dries so quickly.-If nails are short, no need to encapsulate.Step #4 Top Coat-Generously float Top Coat by dipping the brush in the bottle for each nail and swiping off the excess product using the inner neck of the bottle. Use minimal pressure and work with the tip of the brush to glide over and burst any air bubbles that may have formed. Encapsulate the free edge of each nail, sealing in all the layers.-Wait 5 minutes and voila – Lacquer is hard set.-If nails are short, no need to encapsulate.-Do not use drying drops or sprays (drying drops and sprays are an added cost and do not help in drying the layers underneath any polish), or fans (could cause wrinkling) to accelerate dry time. Also avoid blowing on the nails (could make polish foggy).Please let us know if you need anything else. Have a great night!So....if you follow not only the included directions, but also the "extras" mentioned here, then perhaps your manicure will last more than 2 days.
User
7 days
This product lasted for this full seven days with no major issues. You can skip step one. I tried it both ways and it didn't make a difference. The finish does start looking a bit flat after a few days.
User
Best Nail Polish on the market for Low Maintenance Girls
This nail polish definitely lives up to the hype. Most of the time with my job in healthcare my nail polish last two days max. With this nail polish I can keep it on up to a week and a half with no chipping. Now if I'm really being lazy and I don't retouch them up it can last for up to a month.
User
Not worth the money
Not as good as described. The polish itself does not apply evenly . It dries fast but it chips at about 2 to 3 days
User
The polish just didn’t last long enough
I wanted the milky white shade and while it did look good, the polish chipped and flaked within just a few days.
User
Good nail polish but thick
I am a first time user of Dazzle Dry. I was looking for a long lasting solution to gel because gel damaged my nails badly. There is a video online with instructions which I watched twice before applying the nail polish. I must admit I’m not great at doing my own nails and the nail polish (colour was Boss) was very thick so it was patchy. I used the ‘revive’ solution to make it thinner and saw a little bit of improvement. Overall though it is long lasting but I need to get better at application so it doesn’t look like a DIY job!
User
Good product with a caveat.
The product is good but the supplier, Fast Media Renewed is the worst company ever to deal with. Avoid them at all costs.
User
Great Product! VERY POOR Customer Service!
Dazzle Dry nail system was recommended to me by a friend. Her nails look lovely & mine needed a change from damaging gel polish. I ordered a DD Mini Kit. It had to come from the US ($105 CA with exchange rate, taxes, duty, etc.) & when it finally arrived, the little Revive bottle was almost empty & the entire package had a VERY STRONG “nail polish” odour & was stained & discoloured. I contacted Amazon & was told I needed to contact DD directly. After 3 weeks of emails going back & forth with DD (I was asked 3 times to be patient while they considered the problem with my order) they told me to return the kit via registered mail (so that it could be tracked) to the Canadian DD distributor AT MY EXPENSE. When I went to do this I learned that this would cost about 50% of the $105.00 CA that I had paid for the kit! I gave up! 🙄I now have a Mini Kit with no Revive! And NO SUPPORT from the company that makes Dazzle Dry! I would still like to try using this product but without one important component, I am unwilling to do so!This is a fairly expensive nail polish system (for us Canadians!) & I am VERY DISAPPOINTED with how this issue has been handled 🙄
Trustpilot
4 days ago
3 days ago