👀 See Clearly, Work Smart!
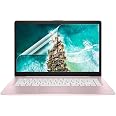
The F FORITO 2 Pack 14 inch Anti Glare Laptop Screen Protector is designed to enhance your viewing experience by blocking glare and reflections, while preserving the original screen colors. With a hydrophobic and oleophobic coating, it effectively reduces fingerprints and scratches, ensuring your screen remains clean and clear. This protector is compatible with various 14" laptops, making it a versatile choice for professionals on the go.


| Standing screen display size | 14 Inches |
| Brand | F FORITO |
| Series | FM-SPU14-AG |
| Item model number | FM-SPU14-AG |
| Item Weight | 3.04 ounces |
| Product Dimensions | 1 x 1 x 0.5 inches |
| Item Dimensions LxWxH | 1 x 1 x 0.5 inches |
| Color | 14" -Anti Glare/Transparent |
| Number of Processors | 1 |
| Computer Memory Type | DIMM |
| Voltage | 0.01 Volts |
| Manufacturer | F FORITO |
| ASIN | B01LEC2WLW |
| Is Discontinued By Manufacturer | No |
| Date First Available | September 2, 2016 |
Z**A
A very nice screen protector
I recently received a new laptop through my employer, to use to work part time from home. We live in a magic time of technological joy.In order to protect the investment that my company has made, I purchased a keyboard cover, a vinyl skin, and these screen protectors. Overkill? Probably. But with cats, a kiddo, and regular travel between the office and home, it's a cheaper option than paying for repairs on a machine that I can't afford to replace.A flat, hard screen protector with the protective film on both sides is, in my opinion, one of the easiest to install. As long as you do the installation properly, life is good. If you mess it up, you have a second sheet all ready to go.The most important thing to remember is TAKE YOUR TIME! Clean the screen completely. Think you have it clean? Wipe it down again, either with an anti-static wipe or a microfiber cloth. Go ahead and hit it with some canned air, too, just to make sure that all the dust and cat hair is removed. Peel the smallest amount of the back film that you can, and tuck the screen protector in place on one edge of your screen. Slowly peel the back film away while using the squeegie card to smooth out bubbles as you go. Do not remove the last of the film until you've got the entire screen protector down. Once you get it down and smooth and bubble free, you can take off the top protective film.This fit perfectly on the screen of my 14" laptop. You can't see it at all, except way up at the very corner where it is a curved corner instead of square. You really have to look to see it at all.The edges stuck down perfectly after the first day, but did require some fussing at first.Is it anti-glare? I'm not sure what that means. It is a slightly soft appearance, so maybe? It doesn't make the screen look fuzzy, but it doesn't look like smooth glass either. It doesn't affect colour quality or my ability to read what I've got to in order to do my job.My computer is not touch-screen, so I can't speak for texture or how it affects touch screen functionality.
C**C
Great antiglare screen
Easy to install. Eliminated glare on laptop screen. Fits perfectly IdeaPad. Touchscreen still works well.
J**Y
Nice screen protector. Perfectionists beware.
I'm a perfectionist, so installing this was basically the worst day of my life.I got this for a Lenovo T440, to keep the keyboard from putting wear marks on the screen. The product itself is good, but I was expecting too much from it.The Bad:Unless you're in a clean room, it's impossible to apply this without bubbles. This wasn't really the fault of the product itself, but more a limitation to what's physically possible. It's easy to install a bubble free screen protector on a small rigid screen. But on a large display like this, the size of the protector moving around is enough to kick up dust no matter what you do. You basically need a clean room.My particular laptop doesn't have a strong glass front on the display, so forcing the bubbles out without damaging the LCD panel was very difficult. Because I'm a perfectionist, I finally eliminated all bubbles and dust on the 3rd attempt... and damaged the LCD panel. That part is my fault. I got a decent result on the second try, but I HAD to go for perfection. Lenovos are easy to work on, so I just replaced the panel and moved on.The GOOD:OK. So aside from my ridiculous expectation that the protector go on as flawlessly as a rigid, tempered glass, phone screen protector, I think this is a great product. The matte finish looks indistinguishable from the matte finish on an OEM display panel. It came with everything you'd need to apply it, and I'm sure it would protect your screen from scuffs, scratches, and the keyboard wear marks just fine.So, if you don't mind a few tiny specks or bubbles at the edges or in the corners, this is a great screen protector. If I was to do this over again, I would get screen cleaner and use the wet application method. This method worked best for me, but by the time I figured this out, the multiple tries had taken their toll on the LCD display. If applied carefully, I think this method would give the best results.
ترست بايلوت
منذ يومين
منذ أسبوع