Desert Online General Trading LLC
Dubai, United Arab Emirates
Desert Online General Trading LLC
Dubai, United Arab Emirates


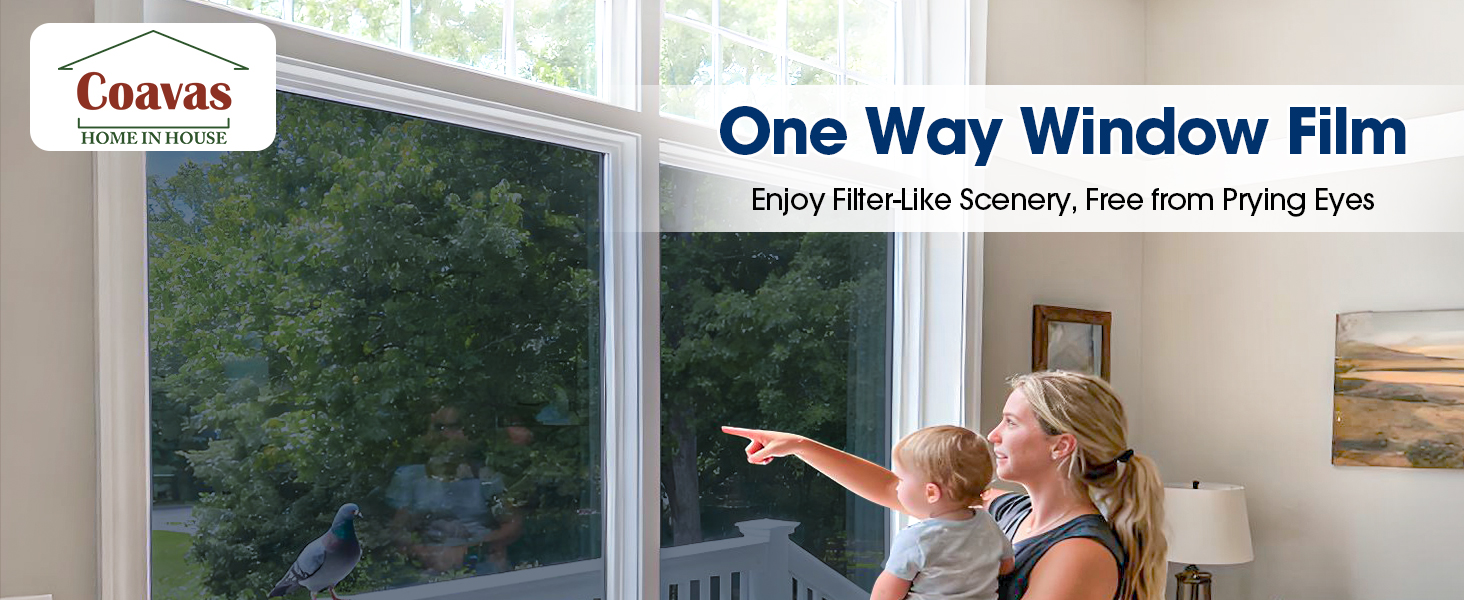
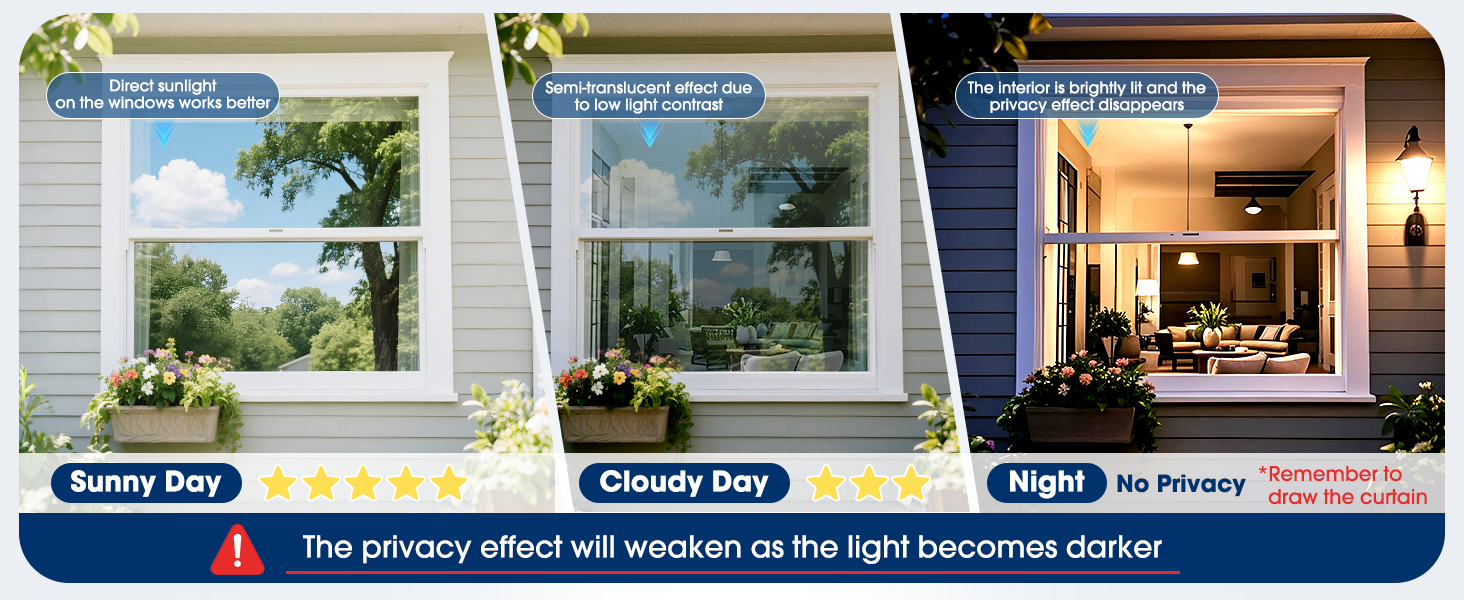
🖤 See out, not in — privacy and cool vibes, all day long.
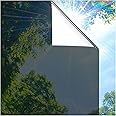
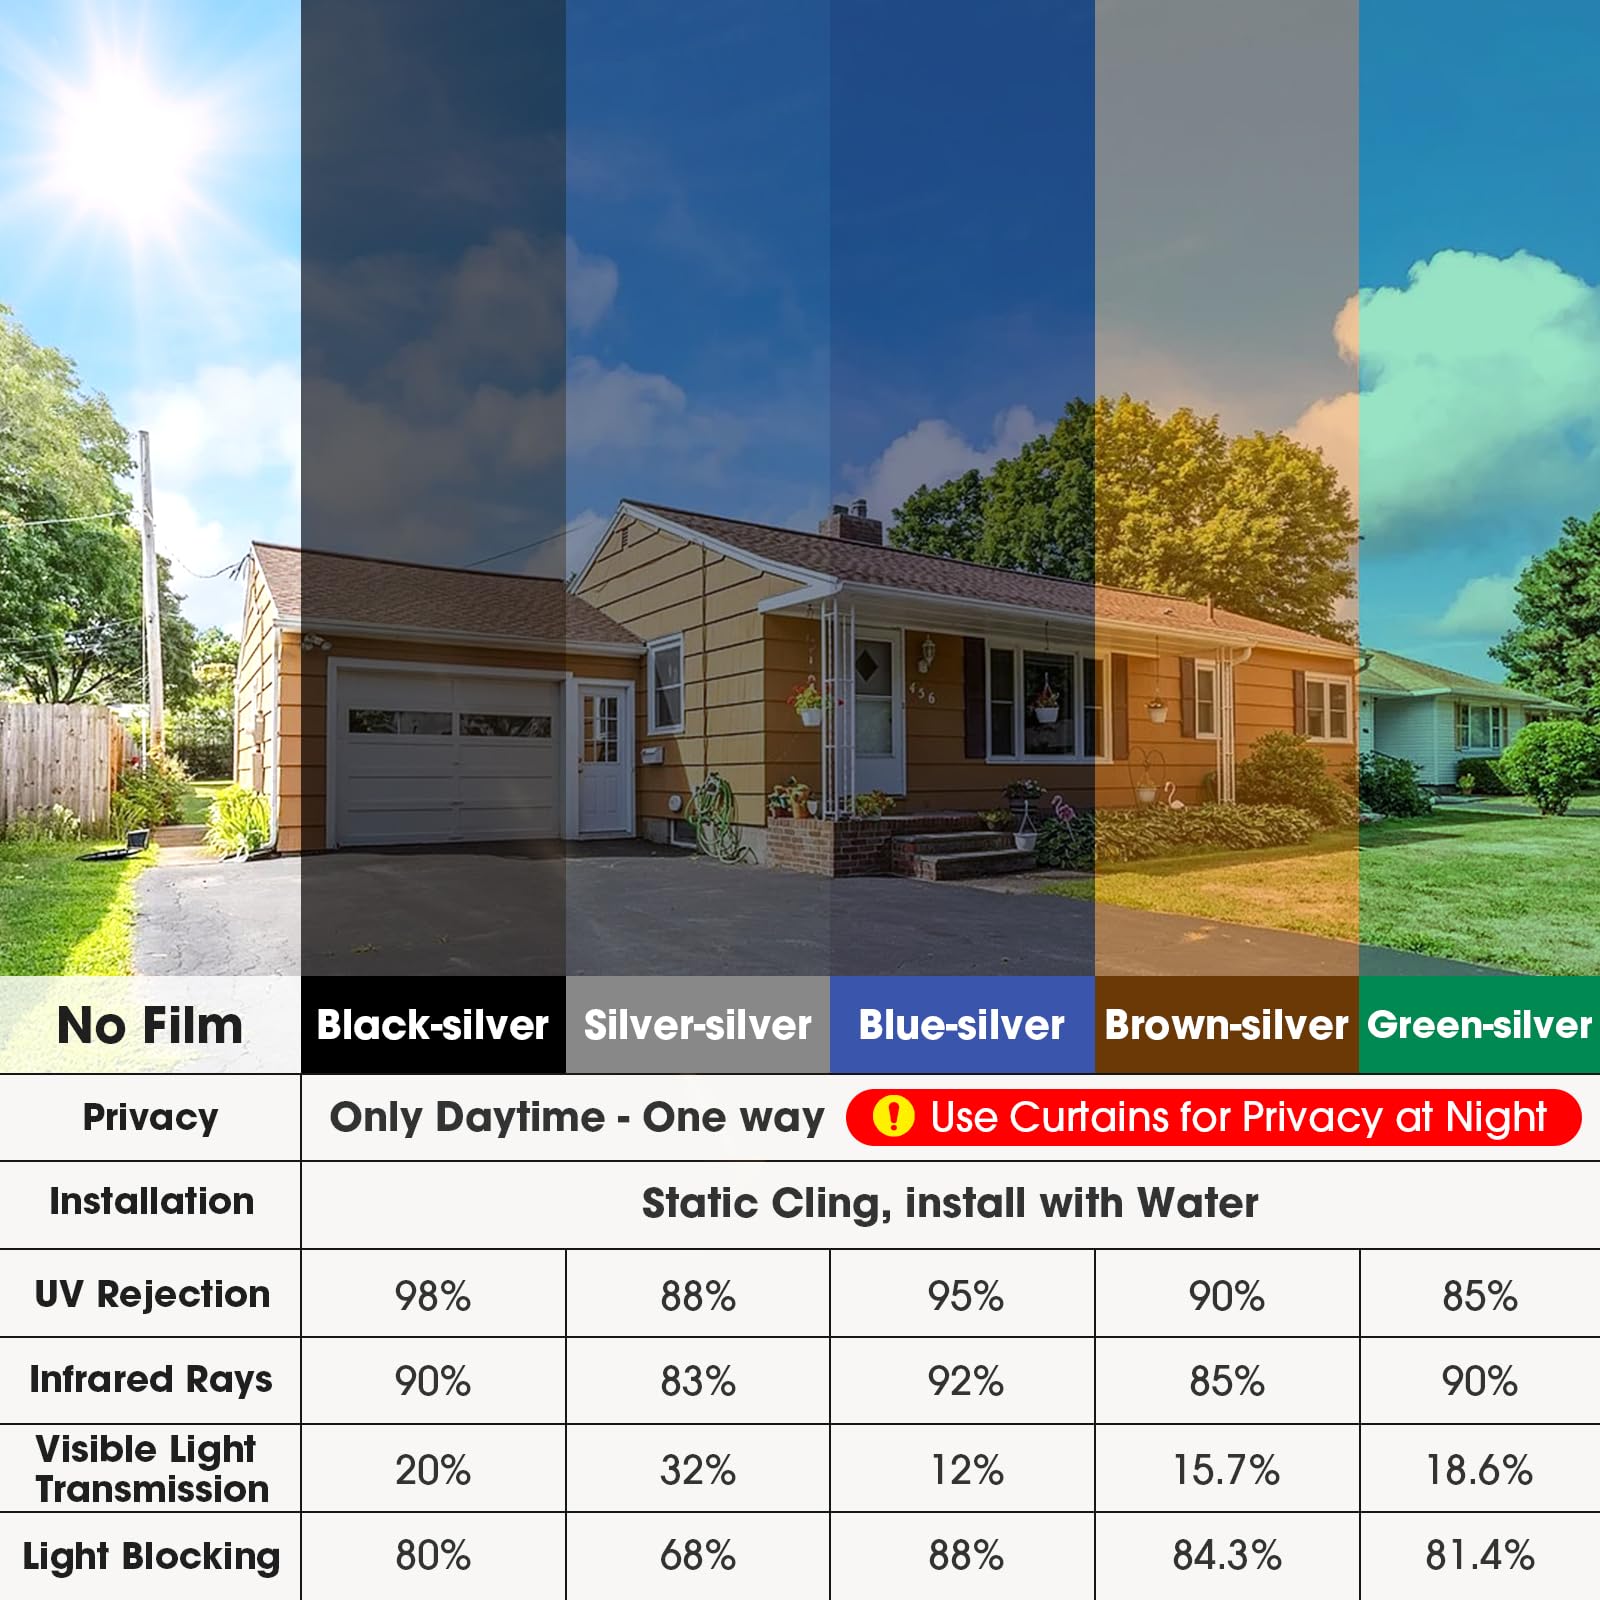
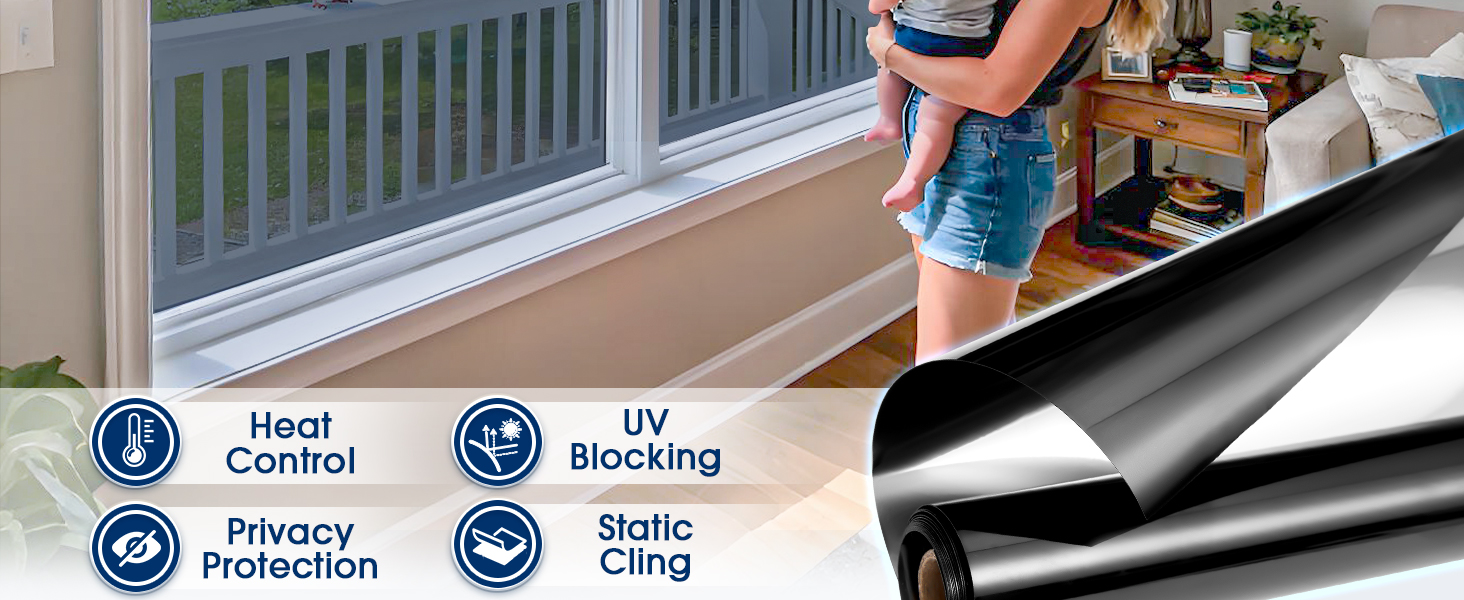
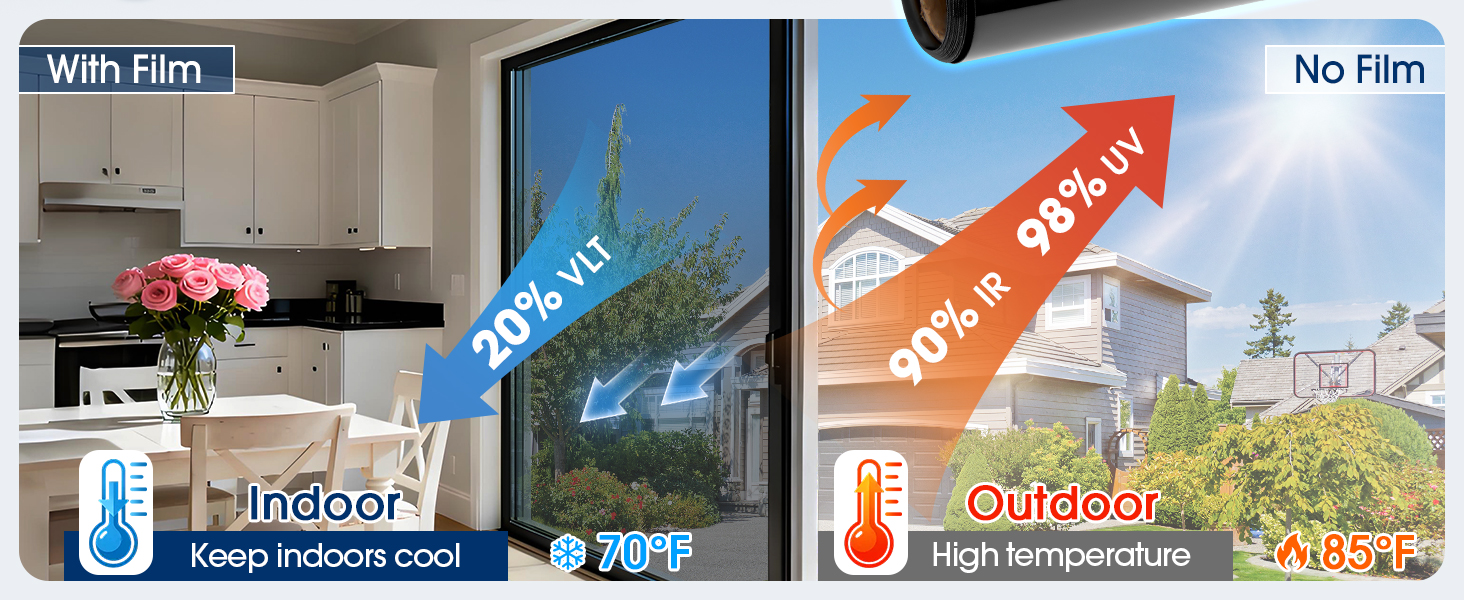
The Coavas One Way Privacy Window Film is a sleek, black-silver static cling vinyl film measuring 23.6 by 78.7 inches. It reflects 85% of infrared rays to reduce heat and energy costs by up to 30%, blocks 95% of harmful UV rays to protect your interiors, and offers daytime privacy with a mirror-like finish. Easy to install and remove without residue, it’s ideal for renters and anyone seeking stylish, effective window tinting for home or office.

| Item Dimensions L x W | 78.7"L x 23.6"W |
| Size | 23.6 x 78.7 Inch |
| Installation Method | Static Cling |
| Color | Black-silver |
| Ultraviolet Light Protection | UV protection 90% - 99% |
| Material Type | Vinyl |
Trustpilot
1 month ago
4 days ago