Description
🚗 See More, Stress Less — The Ultimate Backup Vision Upgrade!
- CUSTOMIZABLE VIEWING MODES - Switch effortlessly between mirror/non-mirror and guide line options to suit your style.
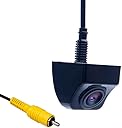
- SLEEK OEM MINI METAL HOUSING - Discreet, durable design that blends seamlessly with your vehicle’s aesthetics.
- CRYSTAL CLEAR 900 TVL ULTRA HD - Experience razor-sharp, vibrant images that redefine vehicle safety.
- UNMATCHED NIGHT VISION AT 0 01 LUX - See clearly in near-total darkness without annoying LED glare or distortion.
- MILITARY GRADE IP 69 K WATERPROOFING - Built to withstand rain, fog, and pressure washes—reliability you can trust.
The COOLINT CT-107B Backup Camera delivers ultra HD 900TVL resolution with a 170° wide-angle lens, ensuring crystal-clear front, side, or rear views. Its cutting-edge 0.01Lux night vision technology provides glare-free visibility in near-total darkness without LED lights, preserving image quality and camera longevity. Encased in a rugged IP69K-rated solid metal housing, this camera is shockproof, weather-resistant, and built to last. With built-in multifunction switchers for mirror image and guide line customization, it offers versatile installation options tailored to your driving needs.