Desert Online General Trading LLC
Dubai, United Arab Emirates
Desert Online General Trading LLC
Dubai, United Arab Emirates


⚡️ Revive your classic VW with precision power and flawless starts!
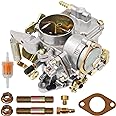
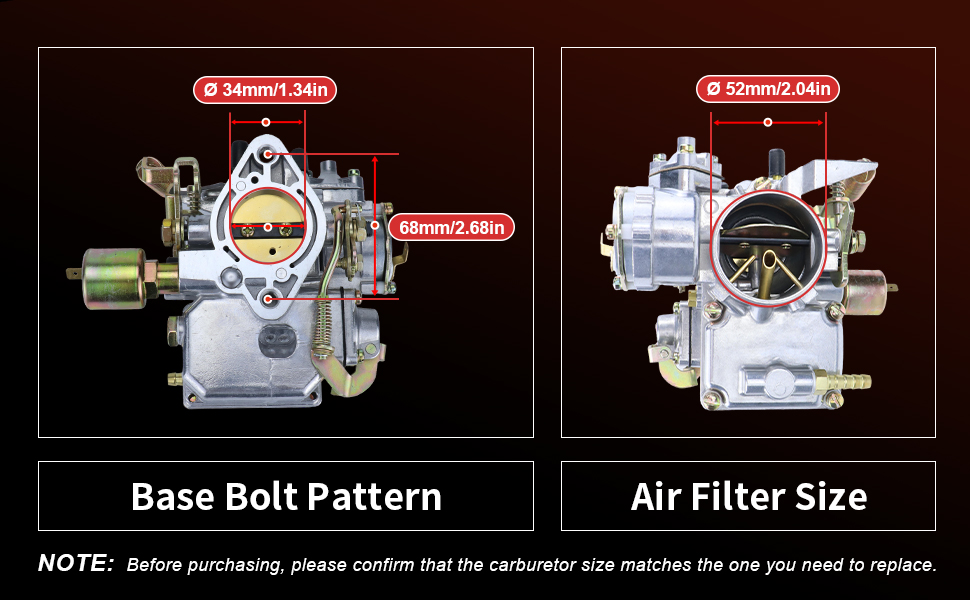
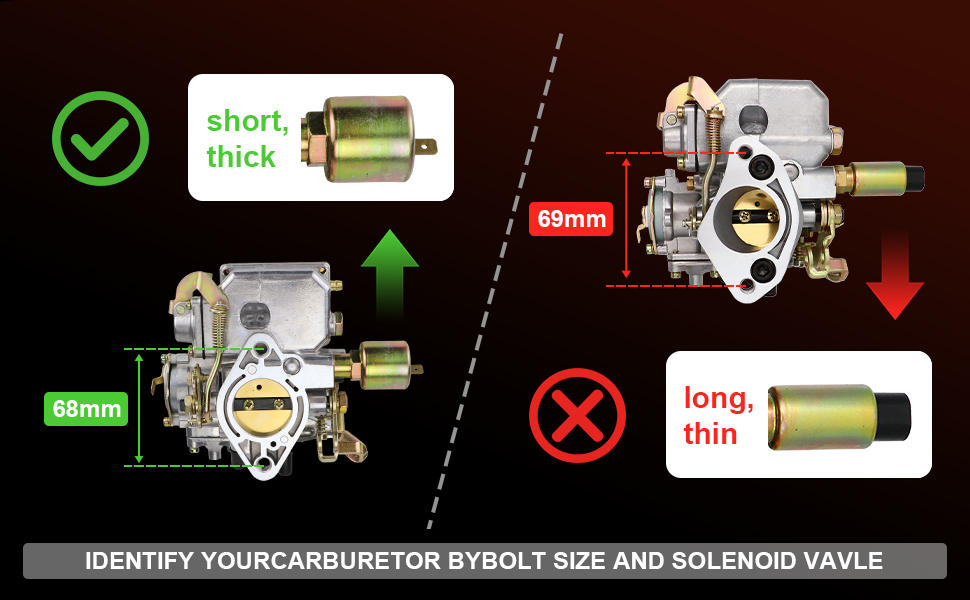
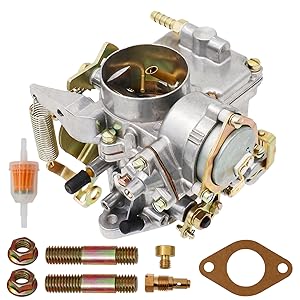
The THUNDERMINGO 34 Pict-3 Carburetor is a direct-fit, high-precision replacement designed for 1600cc air-cooled VW engines from 1971-1979. Featuring a 34mm dual port design, electric choke with fuel cutoff, and optimized throttle response, it restores vintage Volkswagen performance with reliable, durable construction and a polished finish.

| Brand | THUNDERMINGO |
| Vehicle Service Type | Car |
| Flange Type | Bolt On |
| Fuel Type | electric |
| Specific Uses For Product | Performance |
| Manufacturer | THUNDERMINGO |
| Model | 113129031K |
| Item Weight | 3.16 pounds |
| Package Dimensions | 7.91 x 7.08 x 6.38 inches |
| Item model number | 113129031K |
| Exterior | Polished |
| Manufacturer Part Number | 113129031K |
Trustpilot
2 months ago
3 days ago