

⏰ Own your time, control your world.
The IS Timer Relay by Icstation is a programmable digital time delay switch module designed for precise ON/OFF control with a wide timing range from 1 second to 999 hours. Featuring a dual red-green LED display and tactile buttons, it offers easy programming and multiple working modes including timing and cycle functions. Supporting up to 10A load at AC 250V/DC 30V, it’s ideal for automating lighting, water pumps, and engines. Compact and reliable, it retains settings after power loss, making it a must-have for professional-grade DIY automation projects.


| Brand | IS |
| Model Number | 870901 |
| Color | Dc 12v |
| Product Dimensions | 7.09 x 3.99 x 2.39 cm; 41 Grams |
| Material | Plastic |
| Special Features | power memory |
| Item Weight | 41 g |
A**S
Easy to program
C**N
I found this unit did exactly what it was described to do. My application needs to flash a strobe every 15 seconds. This unit is just right for this task. I set it to go on for 1 second every 15. One of my requirements is low power consumption. The seller did a good job discribing the power usage and through testing it was spot on. It uses 12ma to count down the 15 seconds then spikes to 50ma for the one second on. This is due to the solenoid closing the contacts for that one second. After the one second the contacts release and it goes back to 4ma. The click of the contacts is loud and the display is bright but those were secondary and thus 5 stars. Another item to note is that if your Vcc running the timer goes down to just abouve 3 volts DC, the unit goes into convulsions. The display flickers and the solenoids do not close. This does not mean it is any less quality but you should have a solid 12 volts. Pros: Unit is easy to set. Display makes it easy. Uses low power in count down mode. Wire connection points are clearly labeled and tighten nicely with a small screw driver. Programming stays in unit even after the power is shut off. Con: Loud Display cannot be turned off Instructions did not come with the unit but were sent to me later. I had already downloaded them.
T**O
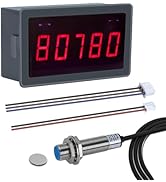
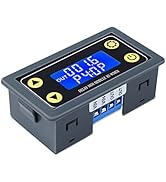
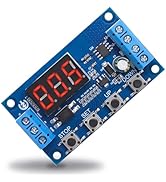
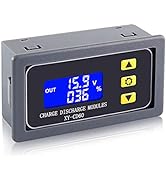
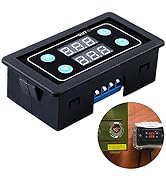
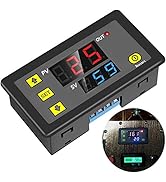
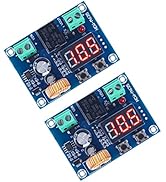
I'm a retired RF test engineer and designed many a project doing similar capabilities. My particular application is to turn on a pump for a given amount of time then shut off until manually reset. First, let's get the good out of the way. Excellent packaging, clear markings , bright display. spacing between controls is good even for fat fingers like mine, Functions as advertised. Current rating of relay more than adequate for my project. Price is very good. Ok, let's start with the instructions. Like so many it is sparse and very poorly constructed. I spent hours rewriting them to completely understand how the device completely works. Second, once the instructions were clarified the available functions were curious, in some modes, but more than adequate for most any scenario. There are a couple of major faux pas, in my opinion. First, of course, is the instructions. Second, the instructions fail to mention any changes made, on initial setup or later will cause the timer to startup sequence for the time given on T1 and the time period selected with P0, seconds, minutes or hours. This isn't terribly bad for low time settings but would be terribly annoying if minutes or hours have been selected in P0. Because of this, it is wise to set T1 to 0 at the beginning, which is should already be. Because the device does a single sequence on any change, be aware that may cause some problems with your application, the relay either being closed or open for that first time period. Once the timer starts there is really no eloquent way to stop it and if you try it will just start another count down time sequence. My particular usage requires a 17 minute time delay for the relay close then open until 'reset' is pressed. Not really impressed with waiting 17 minutes for the relay to open before I install the controlled device. Finally, I foresee a time when the brightness of the LED's could be a problem. I have found no way to reduce the intensity. Overall it's above average, but certainly not perfect. You need to study the various modes carefully and understand your needs. Above all remember the timer restarts every time you change something. It could be either annoying or destructive.
P**Z
- construction is flimsy - no surface mount option - poor terminals: too small for even 16 AWG with ferrules, best to use solid conductor - no serial number implies no QA, so caveat emptor - product is simple to use, but not if you try to make sense of the instructions (that are not included) - first timer tested OK, then never worked again: programs ran correctly, but there was never any voltage on the load terminals. Promptly received a replacement that had the same defect and never worked. - Best part of the product is the Amazon product page with dogs and cats. Cute, but everything else is a bust.
S**E
This timer is able to do many timing tasks since it is programmable. Bright displays make it easy to see in just about any light. Wide range from 1 second to 999 hours. Easy to wire up. The instructions are not very clear at first so I wrote up an instruction sheet that might help if you get confused Timer Easy Setting Instructions The upper display is referred to as (T1 or PV) and the lower display is referred to as (T2 or SV). The LED labeled "out" indicates that the relay contacts are closed when it lights up. Time set mode: Short Press the SET button and use the up and down buttons to set the time in the Top display(T1 or PV) short press the set button to set the time displayed in the bottom display (T2 or SV) short press the set button again to save and run. Time unit setting Mode. You can set the timer to work in seconds, minutes or hours: Long press the SET button for 6 seconds or until P0 is displayed in the top display. Press the up down buttons to set the time unit mode in bottom display (T2 or SV) Top display=P0 bottom display=0 - seconds Top display=P0 bottom display=1 - minutes Top display=P0 bottom display=2 - hours There are 5 timer sequence modes: Long press again to set the operating mode when P0 is displayed press set to display P1 then press the up down buttons to display 1 or 2 or 3 or 4 or 5 to set the type of timed operation you want. P1-0 Load is off until (T1 or PV) time counts down to 0 then the load will come on and stay on. P1-1 The load comes on as the power button is pressed. After PV Time the load will go off. P1-2 The load is off for (T1 or PV)(delay time) then the load switches on and runs for the time set in (T2 or SV) then switches off until power switch is pressed to cycle again. P1-3 Load is on until PV Time runs out Then after SV time runs out the load will come on and stay on. P1-4 Load is off until (T1 or PV)(Delay) time counts down to 0, then load comes on until SV time counts down to 0 then the load is off then it cycles again and again-auto cycle. P1-5 The load is on until (T1 or PV) time counts down to 0 then powers down and after (T2 or SV)Time counts down to 0 the load will start working and cycle again and again-auto cycle. Done
Trustpilot
1 month ago
1 month ago