Desertcart purchases this item on your behalf and handles shipping, customs, and support to EGYPT.
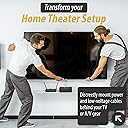
🔧 Power up your wall-mount game with invisible cable mastery!
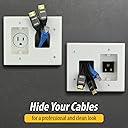
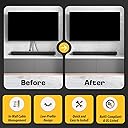
The DataComm Electronics Recessed Pro-Power Kit offers a professional-grade, UL-listed in-wall cable management solution designed for wall-mounted TVs. Featuring a low-profile recessed power receptacle, Romex wiring, and a DIY-friendly installation process with molded mounting wings, this kit hides power and low-voltage cables behind ultra-slim screens. Complete with all necessary components and a 10-year parts warranty, it transforms cluttered entertainment setups into sleek, modern focal points.


| ASIN | B001PB7UVA |
| Best Sellers Rank | #26,001 in Electronics ( See Top 100 in Electronics ) #418 in Audio & Video Power Cables |
| Brand | DATA COMM |
| Built-In Media | Electrical outlet boxes (2)^ 6 ft ground extension cord^ electrical building wire^ recessed cable plate with straight blade inlet^ recessed cable plate with power^ wire nuts |
| Color | White |
| Customer Reviews | 4.6 out of 5 stars 5,685 Reviews |
| Enclosure Material | Plastic |
| Global Trade Identification Number | 00660559007990, 10660559008277 |
| Indoor Outdoor Usage | Indoor |
| Indoor/Outdoor Usage | Indoor |
| Installation Type | Screw-In |
| Item Type Name | DATA COMM 50-3323-WH-KIT TV Cable Management Power Kit |
| Item Weight | 2 pounds |
| Manufacturer | DATA COMM |
| Material | Plastic |
| Mfr Part Number | 50-3323-WH-KIT |
| Model Number | 50-3323-WH-KIT |
| Number of Packs | 1 |
| Number of Pieces | 9 |
| Style | Kit with Single Power Solution |
| Style Name | Kit with Single Power Solution |
| UPC | 617689107632 660559007990 |
| Unit Count | 1 Count |
| Warranty Description | 10 year - parts only. |
P**S
Jeez...it actually works!
I've had this kit sitting next to the TV for a week and finally decided to get going and get the TV set mounted today before the wife got home. She was tickled when she saw the nice results. Like the other reviewers I found the kit easy to install and the internet video provided a great walk-through. I would however offer the following tips: 1. Before you begin you should test all cables that will be going behind the wall and ensure that they working perfectly. Don't wait till the end and hope everything works out. You should also carefully measure for the needed lengths of the cables that will be hidden. It's frustrating to almost get to the finish line only to realize that your HDMI cable is 2' short. Add a foot or two to your measurements; you can always tuck any excess into the wall. 2. The kit supplied power connector (the upper one that your TV's power cord plugs into) is rather stiff. I found it useful to plug and unplug the TV's power cord into it six or seven times before mounting it, and that payed off with a smoother connection at the end of the installation. 3. A pair of needle-nose pliers is very useful for bending wire ends into "hooks" for the screw-down connections to the upper power connector, as the supplied electrical wire is very rigid. 4. The product installation video shows the "Wings" of the electrical boxes and plates as being secured with a turn or two of the supplied screws. This gave me the impression that the screws for the wings just needed a couple of turns and then the wings would then pop into position and lock the box or plate into place. My experience was that the screws have to be continuously tightened until the wings at last are snug against the drywall and the plate or box is locked into place. This might be a no-brainer to some but I thought I'd point it out for the rest of us. 5. Take your time and measure and mark the locations of your cut-outs carefully so that both plates line up neatly. You get bonus points if you use a small bubble level when tracing your cut-outs so that both are nice and plumb. I mean, why not do the job right? Yep, you are doing this job yourself to save money, but don't let anyone looking at your work think, "Hmm...a pro would STILL have done a much nicer job!" 6. If this is your first time mounting a TV on a wall you might be tempted to try and finish the job by hefting the TV into place by yourself (if working alone). Unless your TV is very small this is a mistake. Mounting this 40" TV by myself was a real pain and a bit foolish. Bonus Tool: An oscillating multi-tool makes beautiful clean cuts in drywall like a hot knife through butter. They can be had for as little as $40.00 bucks these days. Amazon sells them at a good price. Not necessary, but quite useful for a number of household projects. I love mine and it made this job all the easier. When you are all finished, have a sip of your favorite drink and pat yourself on the back for the hundreds of dollars in TV installation and electrician costs that you just saved!
C**G
Great In-Wall Power Kit — Easy Install & Professional Look
I’ve installed the DataComm Electronics Recessed Pro-Power Kit a few times now, and I really like it. The quality is solid, the layout is smart, and it gives any wall-mounted TV a clean, professional finish. The recessed design hides everything neatly, and the included Romex and straight blade inlet make the wiring straightforward. Installation is definitely DIY-friendly—clear instructions, good fit, and the kit sits flush for a clean look. Every time I’ve used it, the results come out great. Highly recommended for anyone wanting to clean up cables behind a mounted TV.
J**D
Perfect! (Except a couple of nit-picks...)
In our last house I paid an electrician (and friend) $100 just to install an AC outlet behind our wall-mounted TV. This kit was roughly half that cost! Now, you WILL need a little sheet-rock saw (which I had), stud finder (had that too) and a few other common tools. Using the supplied paper template it's easy to mark the wall and make the cuts. Again: USE A SHEET ROCK SAW. Do not try to use something else or you will hate life real fast. (They're pretty cheap.) I ran into a couple of unexpected obstacles behind the wall but nothing I couldn't work around. NIT PICK #1: The two gang boxes that came with the kit (the plastic 'boxes' that sit inside the holes in the wall to support the exterior face plates/outlet) had to be replaced. Out of the box, the screws were jammed and couldn't be loosened. GOOD NEWS: These things are under $1 at your local Lowes/Home Depot/ACE/etc. Just buy those if needed. Get a couple in advance - and take 'em back if you don't need them. NIT PICK #2: As seen in the photo the power cord and HDMI cables would criss-cross behind the wall, which can be hard to work out. I simply installed the bottom plate 180° around. IMPORTANT TIP: Do NOT tighten the face plates to the gang boxes until AFTER you've run your cables through the face plates. It's a LOT easier, otherwise you will find yet another way to hate life real fast. FOLLOW DIRECTIONS PROVIDED IN THE KIT. Feel free to review a summary of the steps I took... 1. I used the template to mark where I wanted the boxes - but CUT NOTHING. (Also, made sure I positioned the top of the top plate below the top edge of the TV. Triple-Check this measurement!) 2. Used my stud finder to scan the wall to check for possible obstructions. I should've scanned top to bottom though. 3a. The wall has no insulation. I cut the bottom square first. Here's why: I used my phone's camera to CAREFULLY take some inside-the-wall shots with the lens facing up (and flash on) - and a video. (If you spot any obstacles you may be able to move to another spot and have one square to patch instead of two. Also, if your phone slips and falls inside the wall, it SHOULD land a few inches below the hole and within reach.) 3b. If a wall DOES have insulation,... you're sorta flying blind now. Good luck. 4. I cut the top hole. Again, took photos/videos from the top to check for obstacles. 5. Ran the HDMI cords (and any other AV cords) through (A) an unmounted face plate, then (B) an unmounted gang box, (C) through the top hole and down the wall through the bottom hole, (D) through the back of the other gang box, and (E) through the other face plate. 6. Ran the kit's electrical wire through the top and bottom holes and gang boxes - but not through the face plates. 7. Attached the wire to the backs of the electrical connectors at each end. 8. With wire and cables running through them, I installed the gang boxes. 9. Inserted the face plates in/over the gang boxes and hand-tightened screws. 10. Why yes, as I matter of face I *did* run the vacuum at this point. 11. Connected the HDMI cables to the TV and devices. 12. Connected the external cord from the bottom to a power supply/surge suppressor. It's been a few months now and this has been working fine. Note that the AC plug that is now behind my TV is NOT suitable for plugging in more than one item. Do NOT add a power-strip behind the TV and plug it in here as that may overload it. The main things are (a) avoiding surprises INSIDE the wall, (b) you may want to pick-up two gang boxes locally just in case you need them (and return them if not needed), and (c) run the wire and cables before getting the gang boxes and plates installed.
N**Y
Works well and Easy to Install
After never doing an in-wall installation before, I was just a little intimidated by this kit. But, I was working in my gym and really didn't care about screwing things up, so I went ahead and took the shot. This kit worked out really well. The instructions were pretty simple, perhaps requiring a bit of assumption to fully comprehend, but I was able to work out what they meant well enough. Note that when it says "designed to be installed between studs," it means that there are no stud mounting points for the in-wall electrical boxes, so you want to keep a bit of distance between them and the studs. Based on some reviews, I cut out the provided template just a tad small and really used it just to establish the corners. Wanting things level, I used a large level to draw the final square on the drywall where I wanted the plates to go. Then, I drilled some initial guide holes in the corners and used my drywall saw to cut out the wall. Once I had the holes, I roughed in the plates to check fit and level, and then refined the cut a bit to get everything right. Note, though, that the plates use little "flappers" that tighten against the inside of the wall when you screw the plate in to hold it in place. The top flapper extends just a bit outside of the square when set in the initial vertical direction, so I had to notch the wall a bit on the upper right-hand corner of the square to set the plate on the wall. Next, I installed the electrical boxes. Easy enough using the same "flapper" hold system as the plate. The instructions are not really explicit that the boxes are for covering up the left-hand side of the plate that holds the power, plate only has screw holes on that side for mounting the plate to the box. The boxes secured to the wall easily. I then checked for plate fit one more time and filed the wall a bit more in the necessary places. Another thing not explicitly stated in the instructions is that you need to punch out holes in the back of the box to allow the wire through. Easy enough to do, but I suggest doing it before you install the box. When it came to the wiring, it was fairly easy to manage if you have a good wire cutter. The outer sheath is very strong and the wire seems to be good quality. I ran the wire through the wall first with a wire pull rod, put it through the punched out holes of the electrical boxes, and then did the stripping. The instructions were then perfect for matching the wires and wiring up the power sockets. Then, I ran an in-wall rated HDMI cable through the wall and then through the plates. After that, I secured the plates. Everything is tight and level. A couple of notes that cut a star off of the rating. First, I was disappointed that the low-voltage ports on both plates are pointed in the "down" direction. I would have preferred the lower plate (the one you generally put power to) were pointed in the "up" direction to more easily facilitate future cable runs. You could always flip the plate, but then the power would be upside-down. More cosmetic than anything. Also, the power cable sticks a good bit out of the wall. I would have preferred the end to be a bit smaller to put the bend a little more flush with the plate.
R**.
Like "sliced bread!"
This is my first Datacomm product, but I am highly impressed. At first I was going to buy the Single Gang Low Voltage plates for audio/video and then run the electrical myself. But, fortunately I discovered this kit here on Amazon. It sure looked like it would make my install/life much easier, and it did just that. I love the look of our Samsung UN60D7000 60" LED display hanging on the wall with no cables in sight. I did run into one minor issue, that got resolved easily. The extension cord that comes with the kit has a straight female end that attaches to the lower plate. This sticks out a fair amount. I wanted the option of being able to move our Bush Furniture Sonoma Large TV Stand, Mocha Cherry Veneer (media cabinet) closer to the wall. I searched and pondered, but couldn't find a ready solution. So, I contacted Datacomm's Customer Support by email. Kristin D. was quick to reply. At first she could only state that is the way the kit is manufactured. I asked if it were possible to get another top plate to put in place of the bottom plate. That way, I could build up a right angle cable using a NEMA male plug on one end. This would plug into the recessed plate just like the right angle plug from the TV did into the recessed top plate. Btw, I could have searched for the parts needed to build my cable locally, but instead I found exactly what I needed here on Amazon: Whirlpool W10278923RP 3-Prong Dishwasher Power Supply Kit and Leviton 000-515PR-000 15 Amp Black Rubber Plug Grounded 125 Volt . Easy! Anyway, I fully expected Kristin to direct me to a point of purchase, if the plate was available separately. Instead, she asked for my mailing address so she could ship a new plate free of charge. Thanks, Kristin/Datacomm! The plate arrived within a few days, I installed it as planned and gained 2" more clearance! Our media cabinet is only 1 1/4" from the wall now. Better for hiding the mass of cabling behind it. I noticed a few negative reviews here before placing my initial order. Based on my experience with Customer Service, I would highly recommend purchasing this product.
M**C
Great Idea with Purpose!
I got this kit as a recommended item through Amazon.com when I purchased my LG 42" Smart LED TV(Best price I have seen Since "Black Friday".) They also through in a LG BlueRay player for Smart T.V.s for $50 more which qualified me for the "Magic Motion Remote" by LG for FREE!!!(another $75+ value) But onto the review for the Flat Panel kit (Reason why Your here) The concept was awesome for this Kit. Only two drawbacks I found(Me, not exactly Theater Sound Savvy) Could not run all of my connections through the allotted openings. I have my BlueRay Player connected(1 HDMI), HDMI cable(Xbox), Ethernet Cat5(Xbox), one Component cable(Wii), and my Sat. cable all run through it now. But no room to add my Kinect camera cord, Wii sensor cord, or my Turtle Beach wireless head set optical cord.(Don't want my game systems hooked up through the Theater system so I can play Late at night quietly) Only other flaw I had was the wire hookup for the power plug on the bottom was done backwards(reversed). Didn't realize this until after I had run all my lines through the opening and went to install into the wall Correctly and noticed it was upside down. When I went to loosen up the brackets to reinstall I lost one of the flip out plastic pieces that help lock it into place.(improvised and made a new one from one of the knock-out pieces from the grey power box) Other than those two things....Works Great and is VERY easy to install. When I told my wife that I was going to cut holes into the wall She FLIPPED out! She was very impressed that you can't even tell that it wasn't professionally done. **HIGHLY RECOMMEND GOING TO YOUTUBE AND LOOKING AT HOW TO INSTALL A WALL MOUNT TV** Very helpful info.
J**E
Easy to use as long as u have a little experience
As long as I have a little experience with basic wiring it's easy to install I used a multi tool ( oscillating tool) to cut the holes but a job saw would work just fine only other tool you need is a level and a screwdriver...I used thumb tacks to hold the template on the wall used a level to make sure it's straight and level on the wall outlined with a pencil and cut it out with my multi tool then repeated the process on the bottom of the wall then used glow rod to fish the cable down the wall put in the j box's screwed the dog ears in to attach them to the wall used a screwdriver to connect the wires and used the included wire nuts on the other end screws everything down and was done in less then 20 mins just make sure the top and bottom hole are in the with in the same stud and check for fireblocks in the wall before you start or your gonna need long drill bits and possibly some drywall patch if you don't know what I'm talking about might want to have someone with experience do this or watch a bunch of YouTube videos til you do
G**G
Great kit!
This is exactly what you need if you have just a little wiring experience or are willing to spend a few minutes to learn. As currently priced, this kit is a bargain and quite a bit cheaper than if you tried to buy all the components separately (not feasible for the bottom plate) or bought one of the more expensive kits at a local hardware store. All the components provided are high quality in my opinion, and I've done a lot of low-voltage and high-voltage wiring in my homes over the years. The complaints I saw on here are mostly silly and I had a good laugh reading through a lot of them. I needed a kit that I could install behind a 100 lb TV that was already mounted and this worked perfectly. The one complaint that applies to this one and to every other product like this is the cable connecting to the outlet not having dual 90-degree ends to allow for furniture to be placed tightly against the wall. Just order one of these cables when you buy this kit and make sure to get the new plate close enough to your outlet to use the cable. https://www.amazon.com/dp/B0B498Y1ZC
S**S
Never call an electrician again! Amazing...
I’m a 28 year old female and was able to do this installation by myself with no help. So easy and provided the same look of hiring an electrician to install a new outlet but at a fraction of the price. I live in a condo and this mechanism is code-compliant. 100% would buy again.
T**N
Works great!
Really enjoyed installing this. The fit was simple enough and the plug on the bottom was a real time saver. I've cut open walls in previous homes before to run wires for wall mounted TV's but this was even easier! Such a cool product and well designed -- though I did use my own, larger gauge, higher quality wire to use behind the wall. Now all my wires are hidden and it only took a few minutes to install (after cutting the holes).
S**1
Good all in one solution
This is a good solution for running both low voltage (audio and video signals) as well as AC current. Running an AC power cord through a wall from a TV without something like this would be very dangerous as those cords are not rated for being inside a wall. I found installation fairly straight forward but I've got a fair bit of experience. While as their advertising points out you don't need to be an electrician, you will be responsible for making AC line voltage connections that if done incorrectly could cause a fire, injure or even kill. Read and follow the manufacturers directions and you should be fine. Here are some installation tips that might make it easier. 1. This unit would be best used on an inside wall. Use on an outside wall especially in a cold climates, will break the vapour barrier which could lead to condensation moisture in the wall. 2. It is very important that you don't cut the openings too close to a wall stud as the cams on the box and the cover-plate need to be able to move to be secured to your wall. 3. Try using small pieces of painters tape to hold the pattern to the wall then trace around with a pencil. 4. Lightly scoring the outline with a sharp razor knife before using the drywall saw can minimize tearing and breaking. 5. Make sure you are mounting the bottom box low enough where it will be fully concealed by your furniture. When I did mine I wish I had dropped it a couple of inches and I also forgot to take into account a cross bar that is right in the centre of my component stand meaning my furniture is farther away from the wall than I'd like. 6. Once you are done, you defiantly deserve a beverage of your choosing and some unrestricted binge watching of your favourite show!
I**O
DIY friendly
very easy to hide tv wires on wall mount tv application, unique product , no drywall repair required , best for interior wall with no cross braces, use a stud finder to determine before ordering , so you will be aware of any obstacles that may require extra work (cut drywall) , watch U-tube for simple instruction
T**E
Good Product, Easy to Install
Installation Tips: !With Power Off! 1. Work Top Down 2. Cut holes 3. Run wires (through both wall and plastic pieces < both the boxes and their white inserts) 4. Connect wires - to connectors 5. Fix top box (the electrical and white one) into wall < make sure the connectors for your TV/Monitor are easy to get at. 6. Connect your TV/Monitor (including tv plug) and mount it to wall < I assume you have a bracket already there 7. Push (or pull from below gently) any excess cable into the wall behind your TV. 8. Mount / connect (NOT THE POWER CORD!) the bottom box - leave excess cable sticking out (i.e.) HDMI/Coax) alone. 9. Connect HDMI etc, to devices, move furniture back and push any excess cable back into the wall at the bottom end. 10. Plug in the power cord to the wall socket, test and you're done!
Trustpilot
3 weeks ago
1 month ago