Drive with Confidence! 🚀
The Loveso Hand Controls are a high-end driving aid designed specifically for disabled drivers, featuring easy installation without drilling, universal compatibility with automatic vehicles, and a user-friendly mechanical control system that enhances driving independence and safety.
| Manufacturer | Loveso |
| Brand | Loveso |
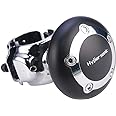
| Model | Hand Controls-classic |
| Item Weight | 11.43 pounds |
| Package Dimensions | 21.5 x 13.58 x 5.78 inches |
| Country of Origin | China |
| Item model number | Hand Controls-classic |
| Manufacturer Part Number | QCFZQ-CLASSIC |
J**N
Quality unit.
Arrived early. The unit looks good, works flawlessly and is made of quality materials. I did get instructions, but they were for a similar but different unit. Installation took some time, plenty of hardware furnished, not suitable for my use in a 2010 Chevy truck. I altered and fabricated mounting brackets and linkage rods. I am a fabricator / machine builder. Although expensive, I am pleased with it. It is a very nice unit.
W**S
Printed instructions should be included.
This is a good product. It requires some mechanic skills to install and adjust properly. It would be a lot better if printed instructions were provided. There is a video which helps a little, but printed instructions with pictures would be much better. As expensive as this product is, it makes sense to include them.I paid a man to install it and it seems to work well for my need, which was only for continued pressure on the brake.
A**0
Pricey but Worth It.
I installed into a 2017 Ford Fusion.DOES NOT COME WITH INSTALLATION INSTRUCTIONS! If you’re not mechanically inclined, you may want someone skilled to install.This set does not require any drilling or vehicle interior modifications. The main mounting bracket goes under the front seat frame and uses existing front seat frame attaching bolts.The accelerator and brake actuating rods ARE NOT directly attached to hand control. Once hand control is installed, the gas and brake pedal may be used normally with the foot. The actuating rods are two piece. A threaded rod with bolt eye attach to each pedal. The threaded rods slide into tubes attached to hand control. When gas and brake is depressed with foot, the threaded rod simply slides in and out of the hand control tubes. The hand control does not move forward and back with the gas and brake pedal when depressed with foot.The hand control only exerts forward pressure onto rods attached to pedals. My customer was concerned that the hand control would be moving back and forth when the vehicle is driven with the foot. This does not happen due to design.The unit is very well finished and looks factory once installed. The operation of the hand control is very smooth and solid feeling. Applying slight gas or brake, such as being in traffic, is easy and extremely controllable.The hand control has a lock which can be applied in the braking direction by punching forward on control and pushing thumb button. This allows temporary hands free brake pedal pressure to allow push button starting and gear shifting. Pushing forward on the control releases lock and relieves brake pressure.Hand control has spring return to release accelerator pressure when had is removed from control. Everything operates just as using your foot.The unit rods are fully adjustable and well built.
M**N
No instalation instructions.
No @#$%& instructions. No easy instalation even for a auto mechanic.
C**T
"Instructions" here.
***** Pre-install review *****I've seen people comment "there's no instructions because it's meant for a pro installer"...Well - AS a pro installer I want to scream "FALSE!". Pro installers ESPECIALLY demand parts lists AND instructions to ensure we have what is needed to do the job!Pros don't guess, don't assume - it's our time AND liability AND reputation on the line.In this case, "handicap controls" aren't my usual thing.I bought this to install for my father's car, as he developed neuropathy.I returned this when it first showed up BECAUSE it had been re-sealed and with no paperwork inside I couldn't confirm if it was complete.When a second, perfectly sealed replacement showed up again with no instructions, I at least had odds in my favor that it was complete, and the quality looked good enough for me to want to move forward.So - I walked through a pre-install mockup to see if it was safe to try to install without instructions.I've included those pictures here as a substitute for a parts list and a "how does it go together" visual - consider it IKEA instructions.The parts really only go together one way, as in my photo - other than the pedal connection options where I have two observations:1) the brake pedal has an extension rod to reach over the gas pedal, and there's two brackets that slide over the extension rod, and I believe sandwich the brake pedal arm be installing two bolts in the smaller holes - one above and one below the arm. The hole for the extension rod has tight tolerances which is nice so it won't vibrate, but might require some sanding or slight filing inside those holes. It's tight and I wouldn't hammer it on.2) the gas pedal has a similar design BUT appears to offer two options - one right-angle bracket to presumably sandwich across the gas pedal if you need to go that route, or one offset bracket to squeeze the gas pedal arm if you choose to do that instead. Whichever bracket you choose, there should be a bolt and nut in this hardware bag to go through the heim joint on the threaded rod to mount your chosen bracket.The third, smaller flat bracket in my pics will be used with two more bolts from the bag to either capture the gas pedal as the meat of the sandwich using the outer holes on the bracket, or will capture the arm using the closer set of holes. That's how I'm hoping to do it.Also, the plastic cosmetic cover has two tiny screw covers pre-installed that you need to pop out to free the two mounting screws inside, then install the cover, then replace the screw covers for cosmetics.One more thing - the bracket that mounts across the seat bolts looks mostly straightfoward: remove the front seat nuts, mount the bracket, replace the front seat nuts. I hope there's enough thread on the studs or that they are bolts with enough thread to facilitate this - maybe the hardware bag holds options.There's also a metal part with two slots that appear to match the slots where the lever unit attaches to the seat-mounted bracket. I believe this is to give you options (using more bolts) to optionally use this to raise the lever higher, if you choose to use it. It could also be used as a spacer to push the lever slightly sideways in one direction or the other depending on where you install it. That's a nice touch.Ok - off to install it now that I think I have it figured out. Sharing this for future DIY-ers. All it requires beyond this guide is some mild assembly skill, wrenches, and common sense IMO.I'll update this review after I install and test drive. Initially 4 stars - ONLY dinging one star for the lack of paperwork as it appears to be high quality otherwise.
B**S
Order the set that brackets to drivers seat
The set that’s mounts to the driver seat is the most stable set we have purchased. Easy install works great.
Trustpilot
3 weeks ago
1 week ago