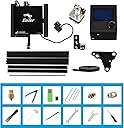
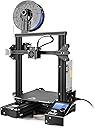
I love this printer! I have a CR-10s and wanted to add another printer as I'll be selling parts and need to increase my print capacity. Overall, I'm more impressed with this little powerhouse than I am with my CR-10s though they use much of the same components and are built using very similar hardware. I'll outline the similarities and differences below. I print PLA and PLA+ from Hatchbox and eSun (200c and 210c respectively) but otherwise my Cura settings are the same for both (tweaked default Cura profiles). While it's nice to have the extra print volume, I prefer the Ender 3 and for the price I will probably be buying several more! Similarities include: frame parts and hardware (sizing differs), hot end, bowden tube, X and Y axis motor and drive belt. Differences: Smaller print volume (Ender 220x220x250; CR10 300x300x400) All-in-one design (doesn't have a 'ball-and-chain' control box like the CR-10 does) Single Z axis motor and rod (CR-10 has a dual Z motor/rod) Coated print bed (CR-10 comes with a glass bed) Large, easy to adjust bed leveling knobs (CR-10 has annoying small bed leveling knobs) Filament spool mount at the top of the frame (CR-10 mounted on control box) No color inserts, straight black frame *UPDATE: My hot end seems to have died after printing great for a couple days. I will be returning and re-ordering because I loved this little printer so much while it was working. Unfortunately, the hot end is permanently wired into the control box so a part swap wouldn't be easy. Re-ordering a new printer is the way to go on this one. It started as under-extrusion halfway through a print. Then I noticed the extruder gear would push filament and then snap back like there was resistance somewhere along the line. I ruled out the extruder gear by running the extruder without filament, it worked as expected. It would only do this when it tried to push filament through the nozzle. The next logical step was to clean it out in case there was a partial clog, unlikely since it was a brand new printer. All cleaned and still no luck. It actually seemed to be getting worse. The more I tried to trouble shoot, the less filament would come out of the hot end. Eventually, the hot end no longer reach a temp capable of melting the filament and I couldn't even hand feed filament through. The screen read 210c but the hot end was barely heated at all. Return processed, printer re-ordered. The assembly was a breeze and I'm sure I can get the new one printing in an hour or so now that I've gone through the assembly once already. I'll edit with another update soon... UPDATE 2: The new printer has been running like a gem for a few weeks now. I LOVE this little thing. I won't post a long-winded update. I'll just say that returning and re-ordering through Amazon was a breeze as always and in my opinion makes it work the extra money over some other lower-priced options outside of Amazon. That's all folks! Now I need to get back to printing!