Desertcart purchases this item on your behalf and handles shipping, customs, and support to EGYPT.
🪱 Turn your kitchen scraps into black gold—no fuss, just fertile soil!
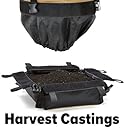
The Urban Worm Bag Version 2 is a premium worm composting bin featuring a patent-pending zipper-free bottom for easy harvesting, durable 900D oxford fabric construction, and a lightweight iron frame. With over 5 cubic feet of vermicomposting space, it supports up to 8 lbs of worms and processes 3-4 lbs of organic waste daily. Designed for quick assembly without tools, it offers breathable moisture control to keep worms happy and productive, making it an ideal solution for sustainable urban gardening and waste reduction.
| ASIN | B078RHPWZ4 |
| Best Sellers Rank | #803,005 in Home & Kitchen ( See Top 100 in Home & Kitchen ) #175 in Indoor Compost Bins #38,087 in Kitchen Storage & Organization |
| Brand | Urban Worm |
| Brand Name | Urban Worm |
| Capacity | 150.75 liters |
| Color | Brown/Black |
| Customer Reviews | 4.4 out of 5 stars 576 Reviews |
| Global Trade Identification Number | 00867007000408 |
| Item Dimensions L x W x H | 26.75"L x 26.75"W x 31.75"H |
| Item Weight | 4.81 kg |
| Manufacturer Part Number | 4335523781 |
| Material | 900D oxford fabric |
| Material Type | 900D oxford fabric |
| Model Number | 4335523781 |
| Number of Items | 1 |
| Number of Packs | 1 |
| Product Dimensions | 26.75"L x 26.75"W x 31.75"H |
| Shape | Square |
| UPC | 867007000408 |
X**A
Why did I wait?????
Update 2021: I still love this thing. My worm population has grown substantially. The seam of my second bag split when I went to zip it up and while contemplating what to do next, the Facebook fan group said it was still under warranty. Amazing! I contacted Steve and he’s sending me the third version of the bag. In the meanwhile, I emptied my second bin (with much less worms as it takes that bin three or four times longer to process the same amount of food) into my first bin and now my first bin is full to the top. I’m thinking of leaving them there for maybe six months before splitting the bins again. When I emptied the bin, I put the contents into my first bin from the top, until I got to the layer that was more castings than bedding. I harvested two gallons of castings in this way. I normally harvest half a gallon from my first bin every three to six months (I started with only enough worms for a four gallon system). Worms are so expensive here in Hawai’i, there is no other item in my house that pays for itself like the Urban Worm Bag. While you can get away with not spending money on a worm bin, the time you save sifting castings is substantial and absolutely worth the time spent and strain on your body you mitigate. The volume of it considering is amazing, especially when you factor in the amount of space it uses. Let’s talk about Steve for a moment. Between his presence in the fan group, his blogs and YouTube channel, his quick response and excellent customer service, I can’t think of another owner that is so approachable, responsive and stands by his product. Considering that worm bins mitigate trash that could have ended up in a landfill and recycles valuable resources, I admire the guy quite a bit. On to practical advice. My little worm bins and my larger tote were all in plastic containers. The UWB is breathable cloth, so a new system (or a slow system, like my second bin that started with just 50 worms or so) is going to take some effort to maintain proper moisture. New bedding dried out faster than castings. I found my second bin would have dried spots of bedding in the corners, so I had to dig around and mix those spots frequently. My first bin got over the moisture issues much faster. This is the main reason I’m going to let my combined worms sit for several months before splitting. Feed in pockets and make sure to check the previous feeding sites (I feed using the clock to remember. 12, 3, 6 and 9). Feed when the previous site has a worm ball and the site before that is gone. Being cautious when feeding is important in a new bin, once the bin has been established (6-12 months), you can get more experimental. The bin should never smell anything but earthy. Any scents otherwise means you should cut back feeding. My worms were slaying their feedings, so I put a whole mini watermelon in there. Smelled awful in about a week. Only time that’s happened to me. I broke it apart and put some into my second bin and by the time I checked the following week, no smell. The first few harvests will contain worms. After that, it won’t. Just setting expectations. Why is this? You put bedding into the bin at first and it’s all at the same level of being processed. Worms wander around and leave cocoons. Those worms hatch and if the spot they’re at is moist enough, they’ll hang out. As the bedding is processed, you add another layer of fresh bedding with your food. Worms move up to follow the food. The higher layers are also larger and as they go down, they get compressed into a smaller area. So the layer you feed a few inches from the top will take a VERY long time to work it’s way to the bottom, unlike the first few harvests that started at the bottom. There just isn’t as much time for the worms to travel at first, but once the process starts, you’ll have worm free harvests. Especially if you open the bottom before you harvest and make sure it is running a little drier than the rest of the bin. I will absolutely buy a third one, at full price, once my other two are full. By that point, I’d be processing a LOT of produce and I’d probably be able to stop at three for my fruit loving household of four. Original 2019 review: I got my first worms two years ago. They are expensive here in Hawaii and illegal to import from out-of-state, so I got a handful from friends. I had visions of composting everything eventually, but my homemade tote was too big for the amount I had and other critters moved in. I scrapped that project and went down to a 1-gallon bucket. Easier to manage and I expanded to 3 buckets but harvesting was always a pain. I knew about CFTs and thought to make one myself. $30 for a sturdy enough garbage can, hopefully repurpose some pipes, but there's the time it takes, figuring out where to put it, when will I have time with two little kids.... Wheelie bins would have been ideal but ..... Anyway, as you can see, I've over thought the process for quite a while. And kicked myself for not jumping on the UWB2 when it was on sale for $89 on Prime day. Which is funny because there was an insane moment when I thought of getting the hungry bin two years ago. I think that's why I had it in my head to make my own. If I had known about the UWB, I would have thousands of worms already. So anyway, I ask Steve if he'll have another sale in a few weeks so I could be ready and he sent me a coupon. What a great guy. I bought it and it was so much bigger than I expected! So pleased! It was ridiculously easy to put together. In fact, turning it and pressing the joints in more over and over until they couldn't be pushed in anymore took longer than putting the pieces together. Also, I shred all the packaging to put in the worm bin, so no plastic waste. It's been going well. I live in a temperate area and I'm composting with blue worms. They're in the shade on my lanai. I followed the instructions for letting the moisture equalize for a couple of days before adding the worms, I Spritz the top every couple of days because the top bedding dries out in my location (did the same with the buckets, I don't get it since it's so humid here). I have no idea how hard or heavy it will be once there's castings to harvest, so I'll have to come back and edit once I've done that. But I'm looking forward to picking out as many worms as I do to harvest my little buckets. Oh, and this Prime Day (2019), it went down to $89 again PLUS an instant coupon. So, now I have two.
E**A
Had it six months, and still love it!
***beginners read this carefully***I've had my bag going since April (about 6 months) I wanted to compost horse manure and food scraps. This is my very first attempt at composting... So this is what I did: I bought the urban worm bag, along with another comparably priced non worm related tumbling composting bin. I followed both of their instructions carefully. And I can honestly say that the worm bag is SOO much easier for beginners then the other bin. My worm bag is ready to be harvested! The resulting compost is beautiful (and it's true... It smells like dirt... And is darker and richer looking then any dirt, natural or store bought, I've ever seen in Colorado. Also, a fun bonus, I have a few backyard chickens, my worms multiply really fast, so I have a self sustaining "treat" source for the ladies! As for the other non-worm composter...ugh, it is dry where I live... So almost daily I would have to drag the hose over and add water... Only to watch it and the nutrients come out of all the holes in the bin.. Why are there so many holes!!! I still have no compost(it would go in the trash if I didn't feel so guilty.. So I'm having to make major modifications and try one more time) Here's what I like about the urban worm bag: It's very well made. The canvas is thick, the zippers are high quality and (I think I have the second version) because my stand is very sturdy and well designed. I contemplated buying the bag without the stand and making my own... I'm so glad I bought the one with the stand... It's so much easier then making your own! The bag is very big. I remember being surprised by the size and quality of the bag for the price. But what I'm most impressed with is the customer service! I contacted them and quickly got answers to all my questions! It really feels like this little company is trying to encourage more people to compost, over making excessive profits. We need more companies like this!!! If you already know how to compost using worms.... Buy this bag guys., You won't be sorry. If you don't know how to worm compost, here are some tips from someone with six months experience: I didn't use any "starter" or store bought worm castings. I just had to be a little more patient at first. I bought 1000 red Wiggler's from another Amazon company. I used shredded paper from my office shredder as my initial bedding. I soaked it in water for a few hours. I put the paper, with maybe a half gallon of dirt from my yard, in the bottom of my urban worm bag. I read (I think on the worm company brochure), that your worms might run away if you over feed them right after you put them in your bag... So I just put them in The worm bag on top of my shredded paper/dirt then I put a slice of bread and some peas in with them. I left it like that for about a week until I noticed the worms seemed very happy and crawling all around the food. Then I added more food scraps and some horse manure. And waited .. Like for months...I kept an eye on moisture levels (again it's dry where I live... And horse manure is a lot dryer then you would think) so I never had to add more paper... But I'm guessing this is not normal. I only kept my bag about half full.. But I'm thinking a few months ago I should have filled it completely up. My only problem has been that my first harvest attempt had a lot of worms in it still. It was beautiful compost though! So I kinda picked out the worms and threw them back in the bag. I contacted the urban worm bag company and they helped me figure out my issues (worms are attracted to moisture and the bottom of my bag was much more moist then the top) so I unzipped the bottom zipper.. Which wasn't easy because I had it too wet from actually adding water directly to my bag😬. For a couple of weeks I have left the bottom partially open to dry out... And I have filled my bag up closer to the top, with less horse poop (which really dries things out on top) and more table scraps. This way the worms have moved more to the middle of the bag, so I can harvest from the bottom. Anyway, very long story short! It's taken some experimenting... But I think I've got it! I'm going to wait a couple more months, and probably start another bag! So yes, I would recommend this product, this company, and purchase again!
C**Z
Just be patient
You could say that I have been interested in raising worms my entire life. Starting out in my adolescence, I gathered earthworms and a salamander from nature and put them in a fish tank only to find the tank empty of worms after a couple weeks. Needless to say, I murdered them in a pit of lions, but the salamander always had a smile, whoops. On to my high school years, I tried again with a homemade approach of composting straw and dried hog pin manure. This was probably my worst attempt. The worms (1lb red wigglers) fled for the hills. The (dry) straw and (dry) manure were poorly moistened and in such vast quantities they really had no chance. If I recall, they lasted 3 days. Shortly after college and my last failed attempt, I purchased 1lb of red wigglers and followed some instructions for a compost bin for totes. If you've made it this far into the review section you've also thought about using the totes and drilling holes in them. I must say the totes are a pain to manage. They constantly are leaking, you have to watch the moisture I eventually became tired of maintaining the bin that I left them in my apartment balcony closet and let them drown/freeze. Again I cold blood murder these things. Now to the worm bag. So my last failure was about 3 years ago. I have been raising worms in the worm bag for about 3 months now. Likely my longest stent, for sure my healthiest. My advise to those with brown thumbs for worms. They can take a beating but you need to give them somewhere to hide. I purchase 250 red worms for this attempt. The logic is that I'm not out too much if I kill them. Well so far it's been good! The worm back solves alot of the moisture issues that other systems have. I have not had the need to clean it but from what I have seen the lack of a leaky bin should keep itself fairly clean. The worms are having a great time. (I can post when they make some of that black gold). One thing that I struggled with was worm management and nothing to do with the bag itself. Always keep some dry matter around in the case of a wet bin and DO NOT OVERFEED THE WORMS. Self control here is key, given bedding the worms do much better starving that overfed. The construction of the bin is solid. I believe the bag will last a long time and is a great starters container. If my population explodes I will likely build another flow through bin but keep this one aground as my stock. When it comes to experimenting with worms you can trust this bag to keep a healthy worm environment for you to pull from should your other experiments fail. Edit: After having a while I did notice that the bottom is filling up with liquids and stinking. I’ve added a huge amount of bulk material so far it mitigate this. The bottom zipper is impossible to harvest from. Unfortunately, us version 1 customers have to deal with our investment. Edit 2: I was able to get my hands on version 2 of this bin and the excess liquid issues are solved! Also the pull strings for unloading are pretty handy. Version 1 can be improved with grommets and strings/rope to wick the water away, though that wont help solve the excess weight on the zipper. It helps to start with more worms if you are impatient and would like to see progress. Those who are inpatient might still have issues with this bin (and really worm farming as a whole) if they overfeed a small population of worms in a cool basement. Wait till things warm up and your population grows then the water shouldn't be an issue!
B**H
Latest Version Works Well (Updated)
After my problems with the first version, the company quickly replaced my bag (excellent customer service) and I've been very pleased with the latest version (the 3.0, I think). Pros: *Sturdy stand (MUCH better than the original) *Very heavy duty bag material *Very roomy (I started the bin off with an existing 8 quart worm bin with about 2 pounds of worms and it just barely filled up the bottom couple inches) *The harvest panel is easy to access (the stand is about two inches taller than the original) and the liner keeps castings from getting in the zipper *The lid zips tightly and the double zippers make opening and closing easy Cons: None so far. The latest version is a huge improvement over the original, and the stand is nice and sturdy to hold the weight of the bag (I have it placed on a concrete floor and it does not wiggle when you zip and unzip the bag). The worms seem happy and, just like the previous version, there is tons of room for them to grow and multiply (the system can handle a LOT of worms!). Overall, with the new improvements I can definitely say that I recommend this sturdy, roomy, and well-designed new version for those who want to process a larger quantity of material. Original Review (Version 1.0): I’ve had my Urban Worm Bag version 1 for about six months now and I’ve harvested it twice. I had high hopes for this which were sadly not realized. Pros: * The construction of the bag itself is good and the bag is nice and sturdy and hangs from the frame evenly. * The top panel is easy to open and close which makes feeding easy and fast. * The surface area is great and provides lots of space for thousands of worms which process a lot of food scraps. Cons: * The construction of the frame is just plain cheap. Really, it was wobbly when I put it together and has only gotten worse as the bag has gotten more full and heavier. It has a distinct tilt to it now which is incredibly frustrating and disappointing. * Harvesting is a chore. It is very difficult to get the zipper open to harvest, and once it is open, harvesting requires crawling around on the floor to get your arm up in the bottom and get the castings out. Also, the space between the bottom of the bag and the floor is very small (less than six inches) so it’s hard to find a receptacle to harvest the castings into (I ended up purchasing a shallow litterbox to use for just this purpose). Also, due to the cheapness of the frame and its instability, you need to hold the top of the frame with one hand while you are trying to harvest out the bottom with the other which is not pleasant. Also, getting the harvest panel zipped again after harvest is nearly impossible. Overall, I have several other systems (storage bins, Worm Factor 360, etc.) and have kept worms for several years now and this is the only system I have so many problems with. It’s just not sturdy, and harvesting is a giant pain. This may be okay if you are are an experienced worm keeper AND are willing to upgrade the frame yourself, but for new worm keepers or those without the DIY skills necessary to alter the frame, I really cannot recommend this. Note: There is now a new version which supposedly has a different frame and harvest panel configuration, but I was not lucky enough to get one of those new models when I ordered.
E**.
Best Worm System I Have Run To Date
This is an outstanding system. I am so excited, the system exceeded my expectations. As a woman who is not very handy, I love the fact that the stand to hang the bag came with it. Similar systems require you to get materials and build your own base. I could probably figure it out, but I honestly think I would have needed to use a relative to cut PVC pipe for me at the very least. The UWB has a sturdy steel frame which looks like it will definitely be able to handle the weight which will inevitably be 100 pounds plus when full. Oh, and set-up took me less than 15 minutes. Super-simple and the instruction pamphlet had a great breakdown. The capacity on this bin is by far the largest I have at the moment. I have used the Worm Factory with 8 trays working and it was still much smaller than what this is going to be able to handle. Height-wise, it is taller and I don’t need to bend over nearly as much to feed. The moisture control seems bar-none the best I have had with any of my systems (Rubbermaid totes, or the Worm Factory 360). It shocked me that a bag which almost felt plasticy on the inside could breathe so well. I was definitely wary of the zippered bottom, in theory it sounded great but I felt that inevitably this zipper would break and fall off. I now feel like this is certainly not the case. I intentionally put some castings into the zipper and it still worked. I think maybe an old toothbrush would solve any problem if you get castings in the zipper. The zippered top is sleek (as far as worm bins go) and the logo is really cute. This could easily be slid behind a chair in a living room or a corner of the kitchen or bedroom and no one would know what it was. I fed a TON of fruit scraps the first 2 weeks I had the UWB. If I do this with my regular bins I usually end up with fruit flies. I didn’t bury the scraps deep at all and I felt certain when I unzipped the bag I was going to be swarmed. Nope. Not a single fruit fly. The zipper slides snugly into the canvas seam making the ability for worms to get out or bugs to get in nearly impossible. The customer service with this company is bar-none. I have reached out for advice on multiple questions and they respond very quickly and stand behind the product. If I ever have a problem I feel confident they would remedy it. I highly recommend this to anyone, it would make a great starter bin or even a bin to just “add to the collection”. I can’t wait to continue tracking this bin until harvest! This was my 2nd purchase of the bin. I might have a new obsession. Emily
C**G
100% Must Have
This is the gold standard of home composting—hands down. The Urban Worm Bag is not just a product, it’s a lifestyle shift. I’ve tried bins, totes, DIY systems—you name it—and nothing compares to this setup. From day one, I knew this thing was built with intention and quality. The fabric is strong, breathable, and holds moisture at the perfect level. The airflow is excellent, which means no smells, no overheating, and a healthy worm colony that’s thriving. The zipper access makes harvesting castings ridiculously easy—no mess, no stress. Just unzip, scoop, and boom: black gold. Setup was a breeze. Once you get your bedding layered right (shoutout to coir, shredded paper, and crushed eggshells!), the Urban Worm Bag basically runs itself. Add scraps, keep it moist, and the worms do all the magic. It's expandable, tidy, and looks good in any corner of the garage or porch—no gross plastic bins leaking mystery goo. This thing has become a core part of my garden ecosystem, my soil-building plan, and my daily rhythm. I check on my worms like a proud parent. If you're even thinking about vermicomposting—stop thinking. Get this bag. 10 out of 10. Would buy again. Will never need to. It’s that good.
C**N
Overall a good bag but extremely frustrating to harvest compost
* Please note that this review is for the first version of the Urban Worm Bag * I bought this worm bag slightly more than a year ago after stumbling on several YouTube videos extolling the virtues of this continuous flow through vermicomposting system. Pros and cons listed below is after more than 1 year of using it continuously * Pros: 1. Super simple to assemble - you don't need any tools to assemble it, just bang a few rods into the connectors and you're good to go. 2. Very little maintenance needed when feeding the worms (but not when extract the compost; more on that later). Unlike other vermicomposting system where you need to rotate the trays/properly harvest the worms etc, all you need to do is dump food and bedding in - much less complicated! You just need to make sure that you have adequate bedding AND to err on the side of underfeeding your worms when first starting out. 3. The material of the bag is extremely sturdy. After a year of intense using, there still isn't any rips or tears in the bag. The stand could be a little sturdier (it gets a little wobbly when there's a substantial amount of material in the bag) but overall, I'm happy with the build quality. 4. Small footprint for the amount of compost generated. We are a family of 5 that cooks almost dinner almost everyday and this worm bag can almost keep up with the waste produced. * Cons 1. Extremely frustrating to harvest. The zipper is always stuck and quite impossible to unzip OR to zip up. After the first time trying to unzip the bag, I just left the bag half-unzipped so I don't have to struggle with the zip for future harvest. To prevent worms from escaping/compost from leaking from the hole, I try my best to stuff it with beddings to seal the hole from half-unzipping the bag. 2. Compost at the bottom of the bag is always wet. No matter how much bedding I use and how little I feed, the compost at the bottom of the bag is always a lot wetter than the compost at the top. It's not so wet that it drips (on occasion, it does leak a little) but it's wet enough that it starts to go anaerobic and smell really bad especially when you're trying to harvest the compost. I am using thinly shredded newspaper as bedding and have tried using completely dry bedding/not feeding the worms as much but the problem persisted. The main reason why this gets a 3 star instead of a lower rating is because the experience of using the bag is positive on a day to day basis. The only time it really disappoints is in the harvesting process (which doesn't happen that often! maybe once every 2 months or so) EDIT: Jan 2020 I've changed the rating of this bag to 5 stars (for now), just to reflect the incredible customer service that Stephen provides. He reached out to me to explain that since my purchase was still within the warranty period, he will be sending me one of the version 2 bag. I've not had the chance to set up the worm bag yet and will update the review once I have a chance too.
S**.
looks flimsy
package came open. didn’t fit my needs. My simple tote is sturdier and can stay outside. This bag is definitely not for outdoors. the frame looked very flimsy. I ended up sending it back.
P**O
Una manera simple de hacer composta
-Facil de armar -Buena calidad en los materiales
S**Y
So much easier!
I had seen this on a lot of American YouTubers videos and wasn't sure if it was sold in the UK but very much wanted one. I should have known that good old Amazon would have them. I was drawn to the idea of the simplicity of continuous flow worm farming and the compact design of the bag. I've been using a worm tower for about 18 months but found it a bit of a faff. Rotating the trays and the weight of the individual trays had become difficult due to health issues and took what seemed like forever to do to get castings plus the population of worms was increasing to the point that I had needed to use plastic storage boxes to house the overflow. After watching several worm farmers successfully use the worm bag and get good castings after a couple of months while never having to lift or move anything seemed like the perfect solution. I was surprised at how compact the box was when it arrived the day after ordering and on opening I was impressed at the quality of all the pieces. It comes with a helpful instruction booklet and there are many YouTube videos you can watch also on how to put together and use. It took me about 15 minutes to build on my own and although it's much bigger than a worm tower (about 4 times) it's still a compact design for a continuous flow system. I have mine in my conservatory as they are not suitable for outdoor UK weather but if you have a small house it would take up a lot of floor space and you might do better with a tower system. The worm bag has been running for a couple of weeks now and I'm really impressed with how easy it is to add bedding and scraps to. The worms seem to love it in there and make short work of whatever I add. I'm not expecting to get a usable harvest until next year and I have seen that a lot of people's first harvest can be full of unfinished stuff and worms but they just put most of it back in the top and the next harvest is proper castings because it is then running in top conditions with both microbial and worm activity in full swing. I'll finish off my waffling by saying that I would definitely recommend buying this wonderful piece of kit. It is well made and well thought out and I much more enjoy the process of creating goodness to add to my garden and allotment in this way. Top product!
G**N
It’s Big
The big surprise is the size. It doesn’t look too big and then you put in 1000 worms and some bedding and it barely covers the bottom. It seems to breathe well so the whole thing doesn’t get manky.
D**C
Best worm system!
Very well made and well worth thw money! I recommend the Urban Worm Bag to everyoneI know. It's a much better system Then the compartment bins. You add to the top and harvest from the bottom you never have to take it apart!
P**D
Worth paying the money for.
I have kept worms for years and have had a bunch of different home made plastic bins. They worked well, but it kept coming to the one same problem. Collecting the castings and getting them free from worms or eggs. Plus keeping the castings 'alive' until I needed them. I tried various different things, but just got fed up with the problem of casting collection and holding, then I bought an Urban Worm Bag. Now, I don't need to collect castings until I'm ready for them, they stay moist and full of microbial activity, and the worms move away from the old casting as the bag fills. Yes, it takes some time before the bag fills enough to start extracting your vermicompost, but when you do, it's ready to use without effort or hassle. And do give it time, even if it takes you a year to get enough in the bag, it's better to wait, as that is how it is supposed to work. The first or second time you extract there will be the remains of the bulk bedding etc that you put in at the very start, this is normal, just feed it bact into the top of the bin again. Then you get to the bit you want - the ability to extract a microbial rich vermicompost, without worms (mostly), but still fresh and ready to use. There are some videos on YouTube from the Urban Worm Company on using the bag, it's worth watching them and learning all the details on how to assemble and use it, directly from the person who designed it. Certainly more expensive than a plastic box, but it solves the biggest issues that I had for years of keeping worms for making castings for my own garden.
Trustpilot
2 months ago
3 days ago