
🐶 Let your pets roam free with style!
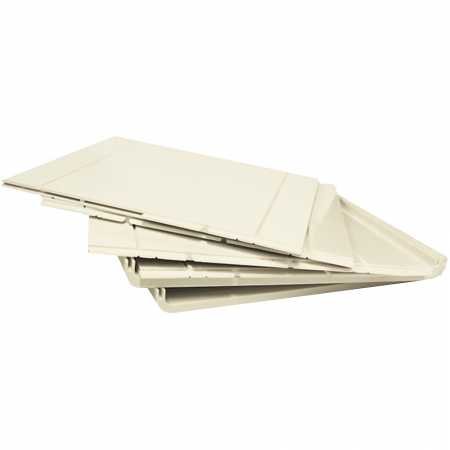
The Ideal Pet Products Ruff-Weather Pet Door Wall Installation Kit is designed for easy installation in walls, accommodating thicknesses from 4.75 to 7.25 inches. With a generous flap size of 9.75" x 17", it's perfect for pets weighing up to 90 pounds. Enjoy peace of mind with a limited lifetime warranty and a weather-resistant design that ensures comfort for your furry friends.
M**0
Trust me make sure you line up the two alignment holes or you will have issues.
First thing I am a perfectionist so everything I do always seems to take 3 times longer than normal LOL!I watched the YouTube 4 part video multiple times before attempting my install. The interior part of the install went according to the video perfectly. This is where perfect ended though. I have very nice Milwaukee power Tools so my problems weren't caused by lack of tools.I chose to remove both flaps to protect them during my install & make it easier to caulk at the end.Instructions say to use a 12 in. long 1/4 in. Masonry Bit to drill two holes thru center sides as guides for outside template. Sounds simple until you try to drill straight & level at the same time with a flexing masonry bit thru wood. I managed to get both holes lined up well side to side but the bit was off at least a 1/4 in. on an upward angle. This cause major mis-alignment issues that had to be fixed.I was able to use a saw tooth bit to elongate all 4 holes enough to line up exterior & interior holes. This modification caused no issues with installing though. Unfortunately I still had to fix the outside opening because it was too high to allow proper alignment of two panels & the wall kit. This forced the wall kit to slope towards the interior which was bad IMO in case of water intrusion. I fixed this by cutting a little more off the bottom of the exterior opening as I did the bolt holes. Now all holes, openings & wall kit lined up level & straight. I chose to dry fit without wall kit or cutting bolts to length first. It took a little adjusting but without the wall kit in-place I could see what needed to be done. after getting a good alignment I felt I was ready to try with the wall kit after assembling it & caulking all the seams front & back.Because I had dry fit it a couple of times everything went together smoothly with no issues. I had my wife on outside holding the door against wall & making sure all 4 bolt holes started a few threads before tightening any.Almost forgot I followed directions measured wall width added 2 5/8 in. to that measurement thread a ¼ in. nut on after marking but before cutting with a hand hacksaw.After making sure the door worked & was all tight & level I made a cardboard angled shield so as not to get any caulk on the sweep or magnets. I used a white window & door caulk & applied it around the wall kit inside & outside so if water entered it wouldn't get in the wall at all. There is a wider gap to fill on the inside wall kit than the outside because the wall kit design doesn't fit as well on the inside due to loose fit. Also you must make sue the flaps will swing freely with wall kit installed before caulking. The left inside side was protruding so much it would have interfered with free movement so I re adjusted & used the caulk to pull it against the frame tighter which meant having to hold it in-place for a few minutes.After caulking all sides & holding in place for a few minutes it was fitting nicely & looking good also.My thoughts on this Door & wall kit are. The wall kit is overpriced IMO for what it is. I do believe it would flex allot in a wider wall, mine was a 2x4 wall so it used the shortest option of the kit which ended up having very little flex after install. The wall kit fits OK on exterior side but not so good on interior side. Before caulking the kit is loose fitting in hole & would definitely allow water to infiltrate wall if it entered the door.The door itself seems fairly solid & will have a nice finished look inside & outside (Vinyl siding J-Channel for finished weather-tight look. I don't know how long this door will hold up to the extreme sun my house receives in the summer but time will tell.I'm not real sure about the flap design either with sun exposure & the possible stretching from the top clap loosening its hold over time.All in all if you take your time & have the proper tools you should be able to get a solid install without too many issues. Just try to make sure when drilling the ¼ in. holes you line them up well since whole install depends on these two holes.My opinion is this kit is worth no more than $20.00 for what it is.
L**A
Dog door and wall kit
I paid a "recommended to me handy-man" $80 to install the door and wall kit in my home. I guess he didn't read or else didn't understand the directions and most likely was the first doggie door he had installed. He put extra holes inside and outside as his measurements were off enough that the bolts wouldn't line up to go through. Then with me telling him the kit was an optional assessory to the doggie door and not to tear the two edges off, he went ahead and did so without even trying it for fit (as the direction stated to do) which left the kit approximately 3"; I guess he thought that's all that was needed to cover the exposed insulation. Well, it didn't cover the insulation on the bottom nor up the wall sides; he told me to get the heavy duty mailing tape and tape over it, which I did but is too slick for my dog and I'm sure it won't last any time at all. Oh, and he put two screws in the floor of the kit near the outside flap to hold the kit floor in place. At any rate the outside flap doesn't shut properly when the dog goes out or comes in, so I bend down and pull it to. The kit doesn't fit tight against the door anywhere; not sure why that is. This is not a complaint about the product, but a warning to others to make sure they get someone who knows how to install doggie doors. I thought I was saving money by ordering online from Amazon. If I had it to do over, I would pay the extra price at Lowe's and ask them for an installer! I've thought about going to Lowe's to buy artifical grass carpeting, putting carpet tape all over the areas, then applying the carpeting. If anyone has other suggestions, please advise. I have also thought of just buying another kit. Maybe I should buy another door? But this area is the only place to put the doggie door on account of house doors and windows onto the hardboard patio; the rest of the house is brick. Thanks! PS I tried not to click on any of the rating "stars" because of my experience, however the program wouldn't let me not do the rating, so I rated it 4 stars even though I do think if I had had an experienced dog door installer,the product would have been "excellent". I rated only 4 because perhaps the directions for installation could be simpler or plainer, especially the part about cutting the bolts as my handy man had nothing to cut them off with; instead he went to Lowe's and bought washers so instead of being inset, my bolts are "outset" outside. My dog was used to having the freedom of a doggie door and so was I, so after being without one for 3 months, we are happy at least to have a door.
L**E
... it at its full depth and it's made a beautiful, strong lining for the wall between the dog ...
We used it at its full depth and it's made a beautiful, strong lining for the wall between the dog door panels. excellent product, much more durable than the PetSafe one we had before.
J**T
Read Instructions
Wall insulation kit makes a nice finish for the Ruff weather dog door.Read the instructions! Quite straight forward when you pay attention!
Trustpilot
1 week ago
1 day ago