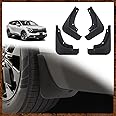
🌟 Protect in Style: Mud Flaps that Make a Statement!
The Muslogy Mud Flaps for Kia Sportage 2023-2024 are designed for easy installation without drilling, providing a perfect fit and robust protection against mud and debris. This 4-piece set is crafted in the USA, ensuring durability and style for your vehicle.
| Manufacturer | Muslogy |
| Brand | Muslogy |
| Model | KIA SPORTAGE |
| Package Dimensions | 33.4 x 22 x 10.69 cm; 680 g |
| Item model number | MUS-KIAMF4 |
| Manufacturer Part Number | MUS-KIAMF |
| Position | Front |
| Assembly Required | No |
| Manufacturer | Muslogy |
| Country of Origin | USA |
| Item Weight | 680 g |
C**E
Easy to Install
Purchased these for my KIA Sportage Hybrid as they were substantially cheaper than the KIA aftermarket splash guards. They were very easy to install. Took about 30 minutes max. I did buy a different wrench which was a rachet, "L" shape and did not use the one supplied by the manufacturer. Also saved me $200 installation which one auto shop estimated for installation. Will see how they last through the coming winter.
D**N
Garde boue
S installe facilement et fait exactement pour remplacer les petits garde boue d origine
R**S
Mudflaps
Nothing wrong with the mudflats at all The holes didn’t line up on my car but that was my model which changed the fixing so had to return Awaiting refund though which hasn’t materialised
J**U
S'ajuste parfaitment
Livraison rapide, S'installe facilement.
B**D
Perfect Fitment on 23’ Kia Spotage Hybrid
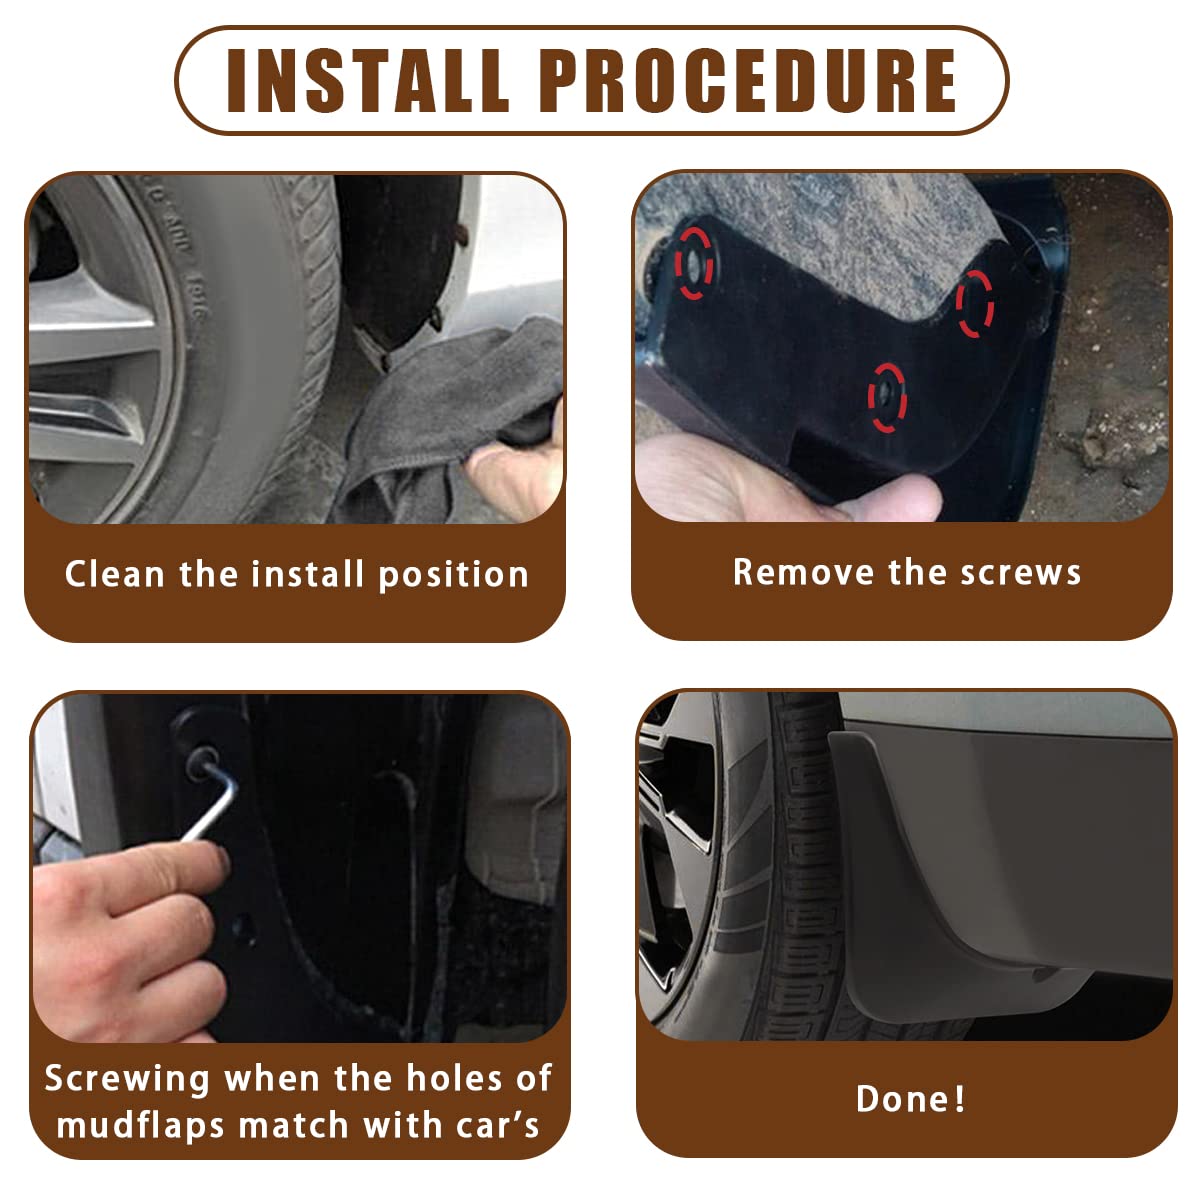
Perfect fitment on my 23’ Kia Sportage Hybrid.Front Flap:To gain access to the front install area, crank your front wheel alll the way to one side. This will give you enough room to gain access to the fasteners.The front has three fastener positions while on the car there are only the top two and they use plastic quick clips, not screws. Two remove the quick clips gently use a flathead screwdriver to pop the center button up with a twisting motion.The third hole will require you to drill and thread in one of the provided screws or go to the auto parts store and buy some quick clips like the ones for the first two holes.The third hole would be drilled into plastic paneling and harmless. I opted to skip the third fastener as the two OEM positions seemed more than adequate once the quick clips were pushed back in. I will update if I find out different.Rear Flap:For the rear flap it uses two screws and one quick clip underneath. If you can’t remove the wheel you will need patience as it will be a little tricky to install the flap. Most short screwdrivers will not fit. I used a small 1/4 ratchet with the correct screwdriver tip for the OEM screws. Another alternative would be just a screwdriver bit and small crescent wrench.Once you’re able to gain access to the area, two screws and one clip underneath and you are good to go. I did get the two screws 95% installed before fitting the clip. Without laying on the ground, the clip can be a little challenging to align and insert. I used a small screw driver to first align the holes and then wiggled the clip into place.In the end the whole job took less than 30 minutes. That included finding solutions to access the rear flap screws without removing my wheel. Most importantly, the fitment is great!
Trustpilot
2 days ago
1 month ago