


Desertcart purchases this item on your behalf and handles shipping, customs, and support to EGYPT.
🛠️ Build Bold, Cool Fast, Game On!
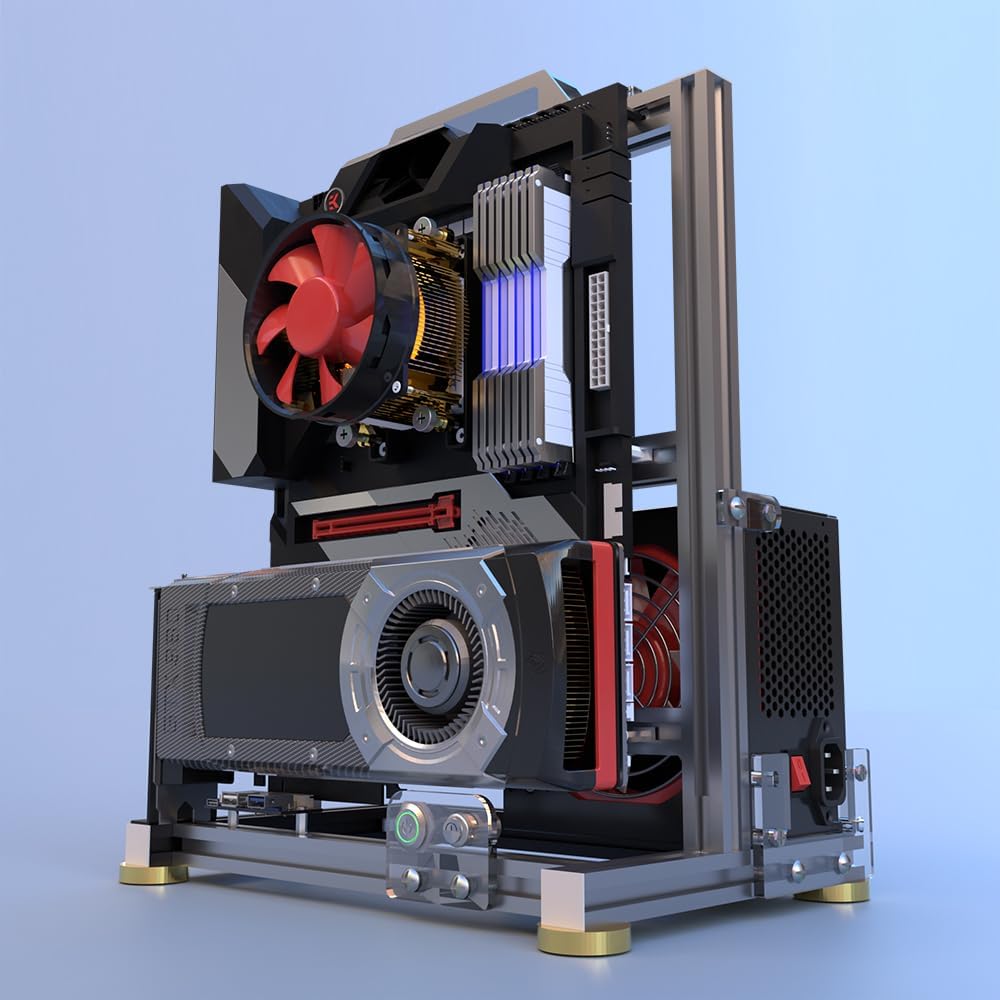
This sleek aluminum open-frame PC chassis supports all major motherboard sizes (EATX to ITX) and unlimited GPU lengths, offering unmatched customization for DIY enthusiasts. Featuring high airflow design, compatibility with air and water cooling, multiple PSU formats, and convenient Type-C connectivity, it’s engineered for powerful, portable builds that stand out in any setup.


| ASIN | B0D2DBD6D6 |
| Antenna Location | DIY test bench, open frame PC build, workstation, media center, general-purpose computing |
| Best Sellers Rank | #149,772 in Computers ( See Top 100 in Computers ) #1,165 in Computer Cases |
| Brand | DALAIBUKESI |
| Case Type | Desktop |
| Case type | Desktop |
| Color | Black |
| Colour | Black |
| Compatible Devices | Motherboards (EATX, ATX, MATX, ITX), Power Supply Units (ATX, SFX), Hard Drives (HDD, SSD), Expansion Cards (PCIe x1, PCIe x16) |
| Cooling Method | Water |
| Customer Reviews | 4.1 out of 5 stars 21 Reviews |
| Enclosure Material | Aluminum |
| Hard Disk Form Factor | 3.5 Inches |
| Internal Bays Quantity | 4 |
| Item Dimensions D x W x H | 20.1D x 30W x 36.1H centimeters |
| Item Weight | 2.04 kg |
| Manufacturer | DALAIBUKESI |
| Material | Aluminum |
| Model Name | DIY Open Frame PC Chassis |
| Motherboard compatability | ATX |
| Number of Fans | 2 |
| Other Special Features of the Product | High Airflow |
| Power Supply Mounting Type | Bottom Mount |
| Recommended uses for product | DIY test bench, open frame PC build, workstation, media center, general-purpose computing |
| Supported Motherboard | ATX |
| Total USB 3.0 Ports | 1 |
| Unit Count | 1 Count |
J**C
Fun to build looks cool but a little overpriced.
Parts come separated in bags inside a box with the instructions being a piece of paper with a QR code to go to a website. Instructions are not very clear but if you follow the pictures you will eventually build the base only to fine out you need to go back steps in order to add accessories like hard drives, water cooler, Power button and USB A and USB C ports. Overall I think it looks pretty cool once you build it and it's pretty fun to build it, but I wouldn't pay Full price $69 for it.
D**L
Worst Experience Putting Something Together
Greetings! I wish I would have followed what one reviewer did and returned this when I opened it and saw everything wrapped in a bunch of random packages. Some of the machining of these parts is ROUGH! Like they were made in Uncle Karl's Workshop. Watch out for shards of metal that will fall everywhere. I needed a few Band-Aids after unpacking. The instructions are a joke. You have to go to a sketchy website to get the instructions, as they just give you a QR code on a piece of paper. I probably got infected with some keyloggers by going to the website. I have no proof of that, but that is the vibe I got after experiencing the beginning of this project. These are the instructions they give you with the "case": "This case is really a test of hands-on ability and brain It's like we played with building blocks when we were young" Good grief. The actual instructions are a webpage of random cellphone pictures of the case in different states. There is no method to the madness. So I had to take things apart many many many times. I'm glad I gave up on alcohol because in the old days this piece of junk would be flying through a window near you. While some parts look nice, everything feels mismatched. The handle is a different gray than the frame. I think they showed it as black in one of the photos. They also give you a super generic tool kit with like 40 attachments. You literally only need a small philips head and hex key. If it didn't take me so long to put together I would have sent it back. After having it together a week all the joint pieces started to come lose. It is hard to get to most of these parts to re-tighten. Thanks for reading, I hope it helps someone!
R**S
Baaaaaad!!
I'm never getting those four frustrating hours back. Took all precautions, followed the instructions to the letter. The motherboard still ended up slightly crooked. It takes a tremendous amount of force to reposition the board even if you loosened the standoffs—far more than your board can handle. So, I took it apart, measured everything down to the millimeter, and put the board back on. Still crooked. I told myself, forget it. Let me adjust the angle of the GPU bracket to compensate. Sure, it’d look hideous, but at least I’d be done with this. So I did it. But two hours into assembly, the GPU bracket started to sag, despite being fully tightened. Would it hurt to make the bracket a little stronger? How many pennies did you save by making it so unrealistically thin and flimsy? Additionally, the main frame itself started to lean sideways in a few hours. Unless the weight of your power supply counters the weight of the gpu + motherboard + cpu cooler (unlikely) this is bound to happen. Ultimately, this is going to look hideous. There are better cases for less. And who writes instructions that begin with “Use your brain”? While the lousy bracket might not be an issue for dual-fan GPUs, heavier ones—like the 3090—will cause damage to your GPU slot and/or your GPU PCB itself.
Trustpilot
1 week ago
1 month ago