🖤 Elevate your Miata’s style with factory precision and weatherproof confidence!
The Sierra Auto Tops Convertible Top Replacement is a premium, factory-quality soft top designed specifically for Mazda Miata MX5 models from 1990 to 2005. Featuring hand-bonded Cabrio vinyl with integrated rain rails, this UV-resistant, durable top ensures a perfect fit and lasting style. Backed by a 1-year warranty and American craftsmanship, it’s the ultimate upgrade for Miata owners seeking reliability and sleek aesthetics.


| Manufacturer | sierra Auto Tops & Seats |
| Automotive Fit Type | Vehicle Specific Fit |
| Item Weight | 14.02 pounds |
| Package Dimensions | 43.5 x 17.5 x 4 inches |
| Item model number | 10-18-MIA-003R |
| Is Discontinued By Manufacturer | No |
| Manufacturer Part Number | 10-18-MIA-003R |
N**2
Great top for the money! Buy it and put it in yourself...
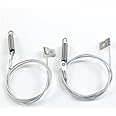
I was a bit hesitant about purchasing this top after hearing some of the reviews/horror stories of the Robbins economy top (no holes, alignment issues, thin material). This sierra top is nothing like those.The quality is excellent for the price, the ONLY issues I have with it are minor - there is a tiny blue tint to the rear plastic window and 2 of the pre-stamped mounting holes were about 5mm off their mark. Thats it. I consider those both to be irrelevant considering the price of this top. Everything else - vinyl quality, color, look, fit, etc are all SPOT ON.My dad and I installed this top ourselves and we were able to get the old top off and this one on in around 4-5 hours (we are both experienced mechanics). The installation of the top is very straigthforward, the trick is putting things on in the right order. We watched a youtube video (search miata top install) by mark golberg and it was extremely helpful. There are also some great writeups on miata.netAll said and done I spent less than $250 and one afternoon getting this top on. I highly recommend doing it yourself - what good is a miata unless you're going to work on it yourself?A few tips:- Make sure you get new cables - it's worth it. Found some on ebay for around $35- We didnt replace the rain rail - yes, it cracks but we recovered the whole thing with 2" Gorilla tape and it has performed flawlessly so far. All it is is a plastic slip designed to funnel water into the main rubber rail.- We put our top on in 40 degree weather and it was very hard to stretch once it got closed. Dont force anything, you have to let it work its way onto the frame over a few days. We had to extend the top latches all the way out (they adjust by hand) and also move the latch mounts on the visor out one bolt to get the initial latch purchase. After some time and heat we could then slowly return everything back to stock but it took a couple days - you dont want to force it.- Buy the right size rivets. I think they're 5/32"- Removing the rivets from the old top isnt the easiest thing because they like to spin when you drill them out. 2 man job here - one to hold the back, one to drill.- I didnt rivet the new top to the rain rail, its been fine so far. Dude in the video said he doesnt either.- There are a lot of little bits, brackets & parts - dont lose anything.- Dont forget any rivet holes, we did and had to backtrack a couple times...
E**O
Great product..but installation was a challenge!
The top itself is worth every penny. It is the budget top, there are more expensive ones out there, but it didn't make sense to pay a lot more for a top on a classic Miata valued at $5,000.As for installation. Wow What a project. My wife and I decided it wasn't anything a dumb guy with tools and a woman with boundless patience couldn't figure out, and we were right.The job from start to finish was 9 hours, with a one hour lunch break. One thing I will say, is if you are big person - by big I mean 6' tall, don't do this. I am 5'6" and my wife is 5'3" and we were barely able to wedge ourselves into position to secure the top to the anchor bolts at the rear. A taller person would have had difficulty, in our opinion.The instructions...well...they were very general. The top is made for model years 1990-1997. Our Miata is a 97 and I think there might have been a few variances in how they were done by each model year. There were parts of the instructions that were a little confusing, but we were able to figure it out. I suggest reading through the instructions several times before attempting anything, just so you have a clear idea of what is going on. Be sure to re-read each step as you proceed, to be sure you are clear on what needs to be done and read one or two steps ahead of where you are, that helped us figure out some of the confusing parts.There is a level of satisfaction that we were able to do this, but if we had it to do again, I'd probably pay someone to install it. The top itself is of very good quality and once installed it looks and performs great, but what a challenge it was to install ourselves.One final note, the top will be VERY tight and difficult to close for a while until the fabric stretches and relaxes. It took both of us to bring it over and secure it the first time.I give it 5 stars. It lives up to its billing and if you are courageous enough to take on this project yourself, may the Force be with you.
A**R
Red Miata with Tan Top
The quality of this top is great. It looks and feels like the original top I replaced on my son's 1990. I changed the color of the top from black to tan on his original red Miata. The tan looks fine. Let me say this is a very tough job for a beginner, but we did it. The online instructions are very vague, almost worthless. You will have to go to youtube to watch several videos. The upholstery shop we visited gave an estimate of $600 to replace the top. We said what the heck, let's try it. We are pretty handy and it took us about 15 hours all together. I am not sure it was worth the $400 we saved but the time we spent together will make memories. Let me give you a few tips if you are going to install it yourself. Number all your parts for right or left side when you take them off.Do not drill out the front cable rivets, just remove the crews holding the spring at the rear and let the cables hang. When you install them on the new top use a coat hanger making a hook on one end to thread them through the new top. There is plenty of room to carefully guide the cable and spring through the opening. I ordered the factory installed rain rail with the top. It will save you from riveting the rail to the top but you will have to work from the inside of the car. Removing both seats is a must for access. There are only 4 bolts for each seat. An old original rain rail will break when you remove the old top. The new rain rail is not very flexible so it is hard to line up the holes with the bolt studs so use a hot air gun to heat the rain rail so you can line up the holes. Hot air gun is $10 at Harbor Freight. When we were done the top would not close, so we put some weight on it overnight. Loosen some of the bolts at the rain rail to give you some slack and then close the top. Have fun (Ha Ha) and enjoy your new top.
Trustpilot
1 week ago
2 weeks ago