🪟 Reflect your style, block the glare, own your privacy.
WPCTEV One Way Mirror Window Film offers professional-grade heat insulation by blocking 85% infrared and 97% UV rays, reducing energy costs and protecting interiors. Its static cling, non-adhesive vinyl design ensures easy, residue-free installation. The 6 mil thick black-silver film provides daytime privacy with a sleek mirror finish, perfect for homes and offices seeking stylish, eco-friendly window solutions.


| Item Dimensions L x W | 17.5"L x 6.5"W |
| Size | 17.5 Inch x 6.5 Feet |
| Installation Method | Peel and Stick, Static Cling |
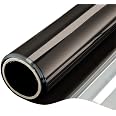
| Color | Black Silver |
| Ultraviolet Light Protection | Anti UV |
| Material Type | Vinyl |
W**Y
I did 10 windows in my house, and I am happy with the outcome
I have ten windows, and one of my neighbors is a bit nutty, so the privacy was the first concern. We also have a small 1935 house that heats up like crazy when it's sunny, so heat reduction was also a concern.When I started, I bought the gold silver, the blue silver, and the silver. The silver worked out best. I ended up ripping out the blue and gold. The gold was the worst for us. Gold translated into looking like a sepia tone fire watch. The sunlight had the same quality as the smoggy forest fire when smoke was everywhere. We replaced that with silver. The blue was better, but darker, and not great for the kitchen. it made the food blue tinted. So we ripped that out in favor of silver. The silver was only mildly visible, like a very lightly tinted set of sunglasses, and didn't do anything weird. It was the best option.Some things I learned.The color is only visible from the inside. It effects the color of the light coming in.The adhesive side is not remotely adhesive to the touch. I pealed the backing off the first one and thought I had done it wrong, but trust the process. It will work.Order more than you think, because you need a few extra inches on all sides for install. It's far easier to cut it a few inches larger and have more to slide the film on the glass if need be.Watch some YouTube videos on how to install. It can be tricky to get installed without bubbles.Buy an install kit with one of those fuzzy velvet squeegees. You'll also need some sort of metal flat thing, like a dough knife or putty spatula, to run the exacto blade across the edges.Don't skimp on exacto blades. I ended up using a fresh one for every single window, and it really helped.You can carefully peel back the film if you find some grit under it, but be super careful. That way lies madness.Be prepared that perfection is not gonna happen. I got mine 95% perfect. I have animals so there is an occasional pet hair or wife hair. I had one window with a weird latch that was super hard to cut around. However, 95% is good enough, and nobody can notice unless they are up there looking for errors.You literally cannot see in my home from right in front during daylight hours withe the curtains open, and certainly not from across the street where my nutty neighbors sell whatever it is they sell 24/7.The film also works really well with repelling heat form the sun. It made an enormous difference. Because of this I put some on my clouded glass windows in the bathroom, and it really really worked. I was shocked at how much it reduces heat. The cat is not thrilled by this, but the rest of us are.We are very happy. After the first couple windows we got into a groove, and it was pretty easy to put them up. I got better at it the more I did, so I don't begrudge doing the gold silver and blue silver first, then ripping them out. They were great practice windows, and helped me learn the process.It is very skill based, so there is a learning curve. Good luck!
M**L
Works well for heat reduction!
We have had issues with our apartment getting too hot, especially because our balcony takes in direct afternoon and evening sunlight. Our A/C just couldn’t keep up! So I ordered these after doing some research, and to my surprise it works quite well. The bigger rolls even came with a squeegee and exact blade to help with install (not the small test roll we got though)It didn’t 100% solve our heat problem, but it definitely helps A TON. Pretty sure the rest of our issue is due to insulation.10/10 would recommend if you’re looking for an easy, budget friendly solution like we were. Easy to install and even easier to remove when ready.
P**G
Easy to Install and Cools Instantly, but Adhesive Could Be Better
Installation was very easy, and the film feels thick and high-quality. I noticed the temperature drop immediately after applying it to the window. The outside view remains clear, and my cat is especially happy that he can still look out.However, the adhesive isn’t very strong. By the time I finished installing the 6th piece, the 1st one had already fallen off. I had to reapply it using soapy water and eventually used tape to secure all the corners. Overall, it works well, but the adhesive could use improvement.
O**L
Can't recommend this product
Let me start by saying maybe it's me. Or not.My key beefs:* The - very limited - instructions that come with the product make it look dead easy. Don't believe it.* I assume the instructions were a direct translation from Chinese, so they didn't always make sense to me. Not a racist comment: just a fact of life. My wife is Chinese and our kids half Chinese.* No manufacturer's website that I could find. Clips on YouTube provided more info than the manufacturer.* Nowhere do they address any of the issues I detail below or give you any help on how to deal with them.The instructions tell you to clean the window - check. So far, so good. Then you're told to cut the film 10 mm *wider* than the window, but nothing about the length. I'm assuming they meant the length. Lost in translation? Trying to cut the width of the film would make the rest of this a complete nightmare. Next peel the - very thin - protective film covering the actual window film. Okay. Nothing too challenging so far. Now is where it starts to get tricky. "tricky" isn't the right word, but I'm not sure what is. You're told to spray the window with water and then spray the "adhesive" side of the film with water as well. Assuming the window in question is vertical, the water immediately starts running down the glass. Basic high school physics here. Then you're supposed to spray water on the adhesive side of the film as well, but the film rolls itself back into the shape it came in - rolled around a cardboard tube. I don't know how you can possibly spray water onto the film unless you have several people helping you hold the corners down. The drawing on the instruction shows one person apparently "hanging" - that's what it looks like - the film onto the window as if it were a piece of cloth or paper. Which it isn't, and it wants to roll itself back onto its carboard tube. So while you're trying to position it onto the window, it's trying to curl up back into a roll. Eventually I had my wife help me and after several tries we managed to get it positioned more or less correctly. "less" being the operative keyword here. Then you're supposed to put the original protective film back on the actual film, now on the window, so you can push the few bubbles out. "few" on the illustration - your mileage may vary. After pushing as many of the bubbles out as possible, frequently lifting one of the corners to get the larger bubbles out, we have it on the window, albeit with several small "creases", I assume the result of me squeegeeing the bubbles out.Long story short, I didn't find this anything like easy.My recommendation: know what you're getting yourself into, make sure there are 2 of you as you'll need more than your own hands. Read the directions and get everything laid out in advance. Be patient - I'm not, which doesn't help. Actually - hire a professional and watch TV while they struggle.HTH.
Trustpilot
2 weeks ago
3 days ago