🛻 Lift your truck, elevate your status.
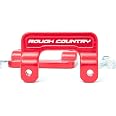
The Rough Country 2" Red Aluminum Leveling Kit (model 1313) is a precision-engineered suspension upgrade for 2007-2018 Chevy/GMC 1500 trucks. Featuring durable T6061 billet aluminum construction, it provides a 2-inch front lift that levels your truck’s stance without strut disassembly. Designed for easy installation at home, it maintains factory-like ride quality and is backed by a limited lifetime warranty, making it the go-to choice for millennial professionals seeking performance, style, and reliability.


| Brand | Rough Country |
| Auto Part Position | Driveline |
| Material | Aluminum |
| Included Components | (2) Lower Strut Mount Extensions, Hardware |
| Maximum Lifting Height | 2 Inches |
| Manufacturer | Rough Country |
| UPC | 843030151263 |
| Global Trade Identification Number | 00843030151263 |
| Automotive Fit Type | Vehicle Specific Fit |
| Model | 2" Leveling Kit |
| Item Weight | 1.4 pounds |
| Product Dimensions | 8.75 x 5.75 x 1.5 inches |
| Item model number | 1313 |
| Is Discontinued By Manufacturer | No |
| Exterior | Machined |
| Manufacturer Part Number | 1313 |
| Special Features | No Denali MagneRide|Use OEM wheels w/.25" spacer |
| Safety Rating | _ |
| Construction | Drilling Required: No |
S**6
Excellent way to level your truck!
Great way to add height to the front of my Silverado. Almost perfectly leveled out my truck and was very easy to install! The red looks great as well!
G**S
I’m leveled
Fast shipping easy to install. Great price and product.
D**N
Made my truck look great
The install was very easy after watching a video on You Tube. The video that I watched showed how to install without having to drop the upper ball joint. I was able to install with just very minimal work. It does require you have another person to pry the shock over while you align the bolt. Once you have the bolt up you can put the nut on and tighten it up. I did put the bolts in from the bottom up however they do come with nylon washer bolts that are supposed to keep them from backing out. I know there is a lot of people on here that have left reviews saying to never put the bolts in from the bottom. I have never had a problem with them backing out also the factory bolts are put in from the bottom up with clips that snap onto the shock. Those clips are the same thread as the bolts that come with the kit. The only problem with using the clips is they are too big and will hit the axles on the back bolt. Once you have bolted the shocks on the rear bolts on the shocks will be really close to the axles however, they don't hit the axle. This installation technique saves a lot of time and keeps you from having unbolt most of your suspension like the instructions say to. The really only big difference is your bolts will go in from the bottom instead of the top.
F**M
Great product
Made the front a little stiff but over all great product did exactly what I was looking for and the red was perfect for my build fitment was great and the look was definitely there
V**D
They work great!
I'm not an ASE Certified auto mechanic, but I am an A&P (Airframe & Powerplant) and I started working on cars, motorcycles, boats and airplanes when I was about 12. I'm 58 now and I have done a lot of auto-wrenching over the years. After reading Rough Countries instructions, watching their video, and other videos I found on the internet, I came up with my own plan, and then modified that plan bringing the install down to 20 minutes per side from almost 90 minutes for the first side. On this truck the whole thing can be done in 40 minutes! It takes two people though. I did this with my 15 year old son. Instead of telling you what we did that was a waste of time, I'll tell you how the other side only took 20 minutes:Once the tire is off, loosen the bolt & nut that connects the lower control arm to the stabilizer bar. You do not have to remove it, just loosen the nut about 1/2" (it's on the top). Next, remove the bottom strut bolts and the clips, they connect the bottom end of the shock absorber to the lower control arm. It will pop loose and give you about 1/2" to 3/4" as the control arm drops away! But still not quite enough. Have your 15 year old son (or any small adult) stand on the top of the disc brakes and master cylinder. Just make sure they understand they need to be careful and not slip off and to stay away from the brake lines. Its wasn't difficult for my 15 year old son so any normal person should be able to do it. When he stood on it, the lower control arm dropped more than enough to slide the lift-blocks under the shock mounts. You will need to use a large screwdriver or pry bar to align the holes, but once you get the front bolt in, the rest is a piece of cake. A third set of hands at this point would make it easier too. Aligning the shock mount was physically the hardest part. Do the front bolts first. You may need to tap on the bolt with a hammer to get them started. Once through just put the nut on and tighten it until it starts to emerge from the nut. DO NOT TORQUE IT DOWN YET. Using your favorite method, cut (at least) 3/8" off the rear bolts before you install them, this is so they will not touch or interfere with the drive shafts. RC bolts are too long for the rear bolts on the 4wd trucks. You may have to remove and cut more off. The bolt should not extend beyond the nut for proper clearance of the drive shafts. The front bolts will stick out 1/2" but thats ok, there is nothing there to interfere. On a 2WD truck you probably don't have to cut them all because there is no front drive shafts. But on the 4WD like mine, they will touch the drive shaft and you cannot allow that. Now torque them, first to 35 foot-pounds, then re-torque them to 37 foot-pounds. Tighten up the stabilizer bolts to 35 foot pounds, put the tire back on and lower the truck. Repeat this procedure on other side. Have a front-end alignment done as soon as possible to avoid excessive tire wear from the new suspension-geometry. Check and re-torque your two bolts ever 500 miles as the manufacturer recommends, at least for a few thousand miles. If they never come loose you can probably extend that time but include those in your periodic checks and maintenance schedules. Especially if you offroad like we do.
C**B
Simple install!
Pretty simple install for my 2018 gmc Denali. I did have to order the magnaride brackets which was like $15. Did not do all the removals in the recommended instructions, raised the truck one side at a time, removed bottom strut bolt then had someone apply downward pressure to the tire allowing enough room to slide the spacer in. Took about 30mins for both sides. Truck honestly rides the same as stock but I did lose 1-2 mpg as expected. Truck is not 100% leveled but most definitely took away the nosed dive look of stock.
J**E
It DOES fit new body style chevy and gmc
In bought this for my 2019 new body style 1500. Follow the instructions and it's a simple install. The bolts have to go in with the head pointing up and the nut pointed down and they ARE exactly the proper length. It leveled my truck perfectly. I may add a 2 inch block in the rear though to make a cheap 2 inch lift kit. As it is now, on stock 265/65 18s I'm 3/4 inch shorter in front than a stock trailboss. I'll gain that 3/4 and then some going to a 33 inch tire. Very pleased.EDITAfter alignment and settling in awhile this is still a great product and leveled the truck off nicely, but compared to stock only lifted the front end maybe an inch and a quarter. If you're trying to level then this is where it's at, but if you want an actual 2 inches, then look towards a strut top spacer. This only lifts the thickness of the spacer on the new Silverado
K**.
Works great, easy to install
At first I tried to follow the review that states you do not need to remove the ball joint, however I could not get enough clearance as the upper control arm hits the stops. I did not have to remove the tie rods. If you have access to a lift it makes it easy, or just jack up the entire front. Loosten the strut bolts from the engine bay while on the ground, then lift up, remove the sway bar brackets from the frame (not the control arm), remove ball joint and be careful of the hub wire, then install spacer while lightly pushing lower control arm down. Whole process took maybe an hour due to ball joint spinning and having to find an Allen key and cutting it down to fit.
Trustpilot
3 days ago
1 week ago