معلومات عنا
دعم العملاء
احصل على التطبيق

قم بتوجيه الكاميرا لتنزيل التطبيق
حقوق الطبع والنشر © 2024 Desertcart Holdings Limited


🍔 Elevate your burger game—because ordinary patties are so last season!
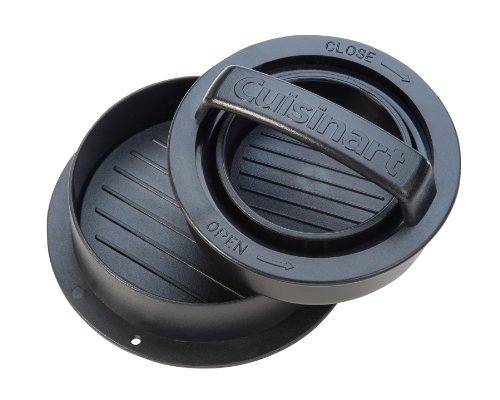
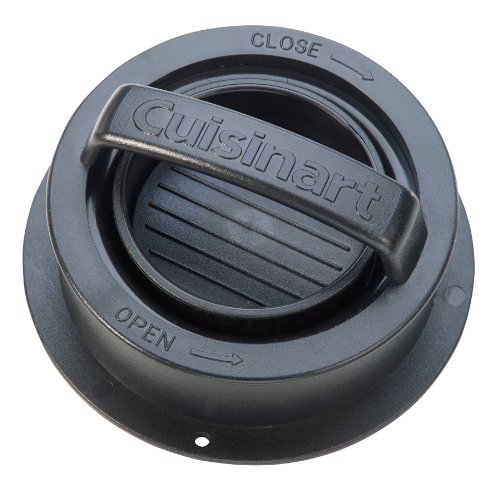
The Cuisinart CSBP-100 is a compact, manual 3-in-1 burger press that effortlessly creates stuffed burgers, sliders, and regular patties. Featuring a non-stick coating and dishwasher safe plastic construction, it combines convenience with versatility for the modern kitchen.
| Is the item dishwasher safe? | Yes |
| Material Type | Plastic |
| Color | 3-in-1 Burger Press |
| Item Dimensions L x W x H | 5.11"L x 5.9"W x 2.6"H |
| Item Weight | 2.4 ounces |
| Is Electric | No |
| Operation Mode | Manual |
| Number of settings | 1 |
G**L
Stuffed burgers are Cool!
I have had this for a week or three now and have made a couple of batches of burgers with it. I will say that overall I like this tool and would only wish that I had one identical but made from stainless steel. The plastic is really durable and has no effect on the outcome, but I just feel stainless steel would be more attractive, durable, and easier to clean.CONSTRUCTION:This is well made. No sharp edges or snagging parts. Everything fits well and is designed with holes to be mounted to a board for secure work. Handles are easy to grip and do not cut into my hands. I only wish there was a way to retain all parts so they would not fall apart when stored. Currently the top of the press will come out of the base if allowed to float in a drawer. I just put mine into a zip-lock bag to resolve the issue, works great.USE:I have not made lots of burgers with this, but have made several batches, more large burgers than sliders. Both instances of the use of this item works well. There is instructions provided on how to use this device, as it can be a little confusing when seeing all the parts loose. It is easy to use though and you should not worry. The surfaces do not stick to the meat badly and the lower plate of both tools comes out to make the job as easy as possible. Just pack the meat inside (I use a spoon to put the meat into the device as it works best, trust me) and after a couple of times you will have the amount needed down to a science. Press the lid down into the mold a couple of times, rotating the handle about 1/3 to 1/2 the way around each time to make things more even. Then just push up from the bottom of the base to remove floor and burger. I just put the burger and floor of tool onto the grill or pan together and then pull up on the plastic floor plate which comes off the burger easily enough. A tip is to line the bottom of the burger press with wax paper, plastic wrap, oil, or even heavy seasoning to make the burgers release the most easy way. You can also stuff burgers with this tool. There is a detachable lid section for that and it works great. It locks on the lid with a slight twist and stays in place while making burgers without an issue.CLEAN UP:Like said before, I think that stainless steel would be better, but it would cost more as well. I got this on sale for just a couple of dollars. Overall it does clean up nicely. The plastic is not a porous one and all food comes off really easily. I would not just throw this into a sink full of dishes because it could get marred up and I do not know if once this plastic becomes scratched or loosed it finish if it will react the same way. I do not use a dishwasher so I can not say how well it holds up or cleans in one. It is easy to clean though and dry as well. It stores in a compact package as well. I do like to wash mine off with clean water before use each time and spray oil on it before use.
R**K
Perfect hamburger patty maker
For a long time I was making homemade burgers by hand. Attempting to shape uniformly and getting it all to hold together well. It was a bit frustrating, but always a good meal. I finally decided to get one of these patty makers and I must say I am very happy I did. This product is great!The instructions are easy to understand, there are multiple sizes and it works great.I have not tried the other sizes, but I went with the large patty. I crammed it full of burger anticipating the thing we all dread - burger stuck to everything and a horrible quality patty.I am so happy to say that as I pushed up on the bottom piece to release the patty it popped right out, in perfect shape and held together. I couldn't ask for better, this is worth every penny.Clean up was easy. I ended up hand washing it and everything cleaned up without issue. It can be a little tricky getting under the handle, but perhaps next time I will try the dishwasher.If you are tired of struggling with making patties by hand, or you have a patty maker that just doesn't work well, then I strongly recommend giving this thing a try, it's great!
D**Y
Very cool
With a little practice it works well wish it was a little bit bigger
P**Y
Solid, sturdy, and fun!
I was going to buy one of the “StufZ Burger Press” (as seen on TV) for $12.65, but after reading the reviews, I kept looking. I settled on the Cuisinart because of the reviews, the brand name, and the price. I got 2 of them – one for my son-in-law.This product is solid, sturdy, and easy to use. After making a few burgers, I think the directions are incorrect. The process says to put 1/3 lb meat into the cup and press the top (with the press cap detached) into the cup to produce the bottom part of the burger that has the indentation into which you add whatever stuffing you want to use. Then “…flatten about 1/6 lb of meat and lay over your filled burger.” Attach the press cap to the top and press down on the stuffed burger.I bought a package of 4 ea, pre-formed, 1/3 lb, angus 85% lean beef patties at Walmart. I also picked up a block of feta cheese and a jar of Wickles “Hoagie and Sub Relish”. I cut some of the feta into a ¼” dice.I jammed one of the 1/3 lb patties into the cup and pressed down with the top as far as it would go. The flange on the top stops its travel into the cup at the correct height. The cup overflowed. 1/3 lb. is too much. 1/3 lb = 5.33 ounces. ¼ lb = 4 ounces. 1/6 lb = 2.66 ounces. That’s a total of 8 ounces, or ½ lb. – Unless your meat is much more dense than mine, there’s no way to get ½ lb meat AND stuffing into this press.I suggest:1. Although the material is non-stick, spray a little PAM onto the press parts before using.2. Start by making the TOP of the burger. Put 3 oz into the cup and press with the lid cap attached. That should get you a flat thin top for your burger. Remove it and set it aside.3. Put 4 oz into the cup and press (with the lid cap detached). That should make the bottom of the burger with the well for stuffing.4. Remember that you’re going to be cooking meat – and probably to not much more than 145-150 degrees. You may want to pre-cook your stuffing. Onions, mushrooms, garlic, etc.5. Add the stuffing. NOT TOO MUCH – only to the top of the well. You can use the slider cup as a gauge –it holds about ¼ cup and you want a little less than that.6. Put the 4-oz. patty (from step #3 above) in the cup and after reattaching the lid cap, press to form the complete burger.7. Sometimes (often) you have to finish the sealing of the top with your hands/fingers.8. With 18” snow on my deck, I skipped the grill and preheated a cast-iron skillet in a 350 degree oven. Brown both sides of the burger (2-4 min/side) in the preheated pan over medium heat then return the pan to the oven for about 15 min.9. At the desired doneness (check with an instant read thermometer) remove from the oven and allow them to rest a bit.So, spray a little PAM, use less meat, form the top in the press, cook your stuffing, finish in the oven (or indirect grill heat).p.s. - I also doctor the meat with ground parmesan, seasoned salt, dried garlic, dried onion, cumin, and A1 steak sauce.PJ
S**G
Great Gourmet Burger Aide
Great summer burger making tool. This will get used for BBQ season a lot. It's actually fun to use and makes the perfect shape causing your meat to cook more evenly. Nice kitchen gadget to have on hand.
ترست بايلوت
منذ شهر
منذ شهر