🛞 Patch it, ride on – never let a flat slow your flow!
Slime 1051-A Rubber Cement is a 1 oz tube of high-quality adhesive designed to work seamlessly with Slime plugs and patches, providing a quick, no-mess solution for repairing tire punctures. Ideal for cyclists and outdoor enthusiasts, it ensures a firm, durable bond on all tire surfaces, making roadside repairs fast and reliable.
L**2
great for patching bicycle inner tubes; easier to use than the glue tubes that come with patch kits
This is not the same "rubber cement" as Elmer's school glue. This rubber cement is designed specifically for patching rubber tires. I use it for patching bicycle inner tubes (using vulcanizing tube patches) and it works great; just as well as those little tubes of glue that come in tire patch kits. This large can with built-in brush is so much easier to use than those little glue tubes. The brush built into the lid of the can lays down an even layer of cement very quickly and easily. Let it dry for 5 minutes then apply the patch. Works perfectly every time. If you are patching a bunch of tubes (even over several months), the price for this can is economical.Steps for patching a bicycle inner tube (follow this very carefully and the patch will last for the remaining life of the tube):1. locate the hole in the tube2. mark the hole with a pen3. sandpaper the area around the hole to remove the slick rubber skin on the inner tube4. if you completely sanded off your mark from step 2, mark it again5. apply an even layer of rubber cement over and around the hole, somewhat larger than the size of your patch6. wait 5 minutes for the cement to mostly dry7. remove the protective skin from under your patch8. stick the patch to your cement spot (you did cement a larger area than necessary so the patch edges are completely in the glue area, right?)9. press the patch down hard, all around the patch including the edges (finger pressure is OK, but a rolling tool is better)10. I usually let the patch dry for a couple of hours, but if you need to ride right away, putting it back in the tire and pumping it up will usually work11. if you haven't used the tube yet, pump it up after it dries for a couple of hours and let it hang somewhere, then check it the next day to make the tube is still full of air, meaning your patch is OK12. 95% of the time this procedure will work and the patch will last for the remaining life of the tube13. in the other 5% of the time, you screwed up (maybe not applying enough cement or not centering the patch over the hole) or maybe there was another hole in the tube somewhere. If I can find a 2nd hole, I will patch that, too. Otherwise, I just throw these tubes away instead of trying to figure out what went wrong.
J**T
Really good rubber cement for patches.
Love this glue for air mattress! Same as fixing a tube. Scruff up put rubber cement down and spread so it will cover the whole patch you use, hold for a minute or two and done in five minutes to add air.
M**E
Good stuff
It’s tire glue and it works really well
A**S
Small enough to store in my tire plug repair kit
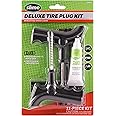
Some people have suggested to use tire cement glue instead of the supplied lubrication that comes with most tire plug repair kits to get a better seal when plugging a tire. So I purchased this tube to keep in the kit that stays in my vehicle at all times.
P**S
Best rubber cement for the money for patching most tubes.
I have gone thru cans of these 1050 Slime rubber cement (though only a small amount is needed) in patching tubes in this lower income city of cheap bike (mostly), using inexpensive patches, and can attest that it is very good (used correctly), and is the best for the money (8 oz. for under $8.00).Unless the puncture is too large (see below), patches using this do not come off upon inflation, with the exception of certain tubes which are not made with the normal rubber. Such have a slippery surface and despite buffing the cement will peel off once day. However, if you remove the first coat and reapply the cement and let it dry and apply the patch, then the patches will hold.Note there are basically three types of tube flats (aside from a bad valve). One is due to a puncture, such as it caused by glass, wire and some other sharp object. Another is that of pinch flats, caused by hitting a curb (like due to faulty "bunny hopes") or something hard, resulting in two horizontal flats in the same area of the tube, sometimes on opposite sides. A third cause is abrasion flats caused by a hole in the tire,. usually as a result of "drifting" (skidding). If a hole in the tube is larger than a very small hole then you should replace the tube (often cheaper to buy as 4 packs from a certain mart).Basic instructions in patching a tube:1. Remove the wheel (axle nuts, if used, are usually 15mm) and deflate the tube (cock the pump nozzle to one side so you hear air and rotate the tire somewhat). Then remove the tire from off the rim (if necessary, use a tire lever to pry off one side of the tire, beginning a foot away from the valve, and after one side of the tire is off then carefully push any of the tube up into the tire, then squeeze the tire and then push the tire lever all the way under the tire, lean the tire to the side and slowly pry it off, carefully ending with the valve).2. Find out the specific location of the tire leakage by inflating the tire (maybe about 6 pumps using a full pump as this $10 one) until it is spongy like a balloon (you can press it in about an inch) but not stressed. Then, if leak is not found, rotate each side of the tire past your cheek so you can feel the leak. Or, if necessary, vertically submerge each section of the tube in water (begin with the valve) and look for bubbles.3. Next, clean/dry the area around the leak and if necessary use a marker to make a wide circle around the leak so that you know where it is. Note that if possible, it is best to leave the tube inflated until we get to step 6. Also, try to have clean fingers and minimize skin contact with the leak area.4. Next, use a buffer to friction-clean the wide area around the leak (blow away any sand if you use sandpaper), and then spread a thin coating of rubber cement onto the leak area on the dry tube, rubbing the cement into the tube for a few seconds until it begins to dry. Note that it is best to use cement that is made for rubber patches, like Slime 1050, and DO NOT use super glue or anything else but rubber cement!5. Next, let the rubber cement dry for about 2 - 3 minutes (outside in windy or sunny warm dry weather it can dry faster), while you slowly remove the foil backing from the patch, holding the edge of the patch. You may also remove the cellophane cover if you want, since that does not stretch like the rubber does - but AVOID putting your fingers on the bottom of the patch (where the foil was).6. After the cement is dry (it will look dry) deflate the tire if there is much air left in it, and then place the patch over the center of the leak. Then place the tube on a smooth hard surface and press down all areas of the patch7. Wait about a minute or two before putting some air into the tube (about 4-5 pumps) to make sure the patch is holding and there is no leak (note: some tubes are made of a different material which feels very smooth, kind of like plastic, and for these you may need to repeat steps 4 and 5 if the patch begins to peel off). If all is well then place the inner tube into tire and onto the bike and re-inflate it until tire is firm, (about 16 pumps or more) then stop. Do not over inflate (the side of the tire will tell you the max. PSI and you can check your pressure with a gauge).Hope this helps.
D**S
Good product
Works great for tire plugs
E**R
Unbeatable quality and purchase price.
Item arrived quickly and was packaged well. This is the best price anywhere for this. A fantastic purchase and transaction.
E**O
Did not hold on bike tire
Bought to repair a pin hole in a 10 speed road bike tube. Left it with the patch for several days to cure and the tire did not hold air. Had I known DH was trying to repair the tube, I would have skipped the slime and ordered a new tube for less money. He thought he was being thrifty. Now we have glue and a new tube on the tire.
Trustpilot
1 week ago
1 month ago
2 days ago
2 weeks ago