🚗 Protect Your Ride in Style!
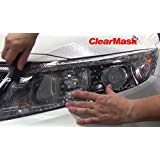
The 3M 8 Mil Headlight Protection Film Kit includes two bulk sheets measuring 15 inches by 30 inches, offering superior thickness, optical clarity, and flexibility for easy installation. Designed to keep your headlights looking new, this film is a must-have for any vehicle owner.
| Material | Tempered Glass |
| Screen Surface Description | Glossy |
| Screen Size | 15 Inches |
| Item Hardness | 9H |
| Special Features | 550% Flexible Elongation |
| Number of Items | 2 |
| Item Dimensions L x W | 30"L x 15"W |
| Unit Count | 3.13 Square Feet |
D**K
Excellent Thickness 3M Brand Film
The product was exactly as described, a thicker 12mil 3M brand film, LLumar. I used it to protect my glass headlight lenses and it was very easy to install once I got the hang of it. The film is very durable but doesn’t appear to be very stretchy, although if you applied heat I bet it would be better. It comes with instructions and tips and tricks as well which was unexpected. Be sure to read them thoroughly and mix up a good slip solution as directed.I have yet to drive the vehicle but the intent was to prevent rock chips from breaking the glass headlight lenses. Hoping this will do the trick
G**E
The solution to improperly used plastic is this properly applied plastic!
To start with let’s all agree plastic headlights suck! That said, I just finished wrapping the headlights on my 97 Civic which are curved and have a seam between headlight and turn signal. Took my time and followed directions-in fact I read them start-to-finish three times-and at least so far they look beautiful! I’m impressed with the quality of the wrap, it should last several years. If I were keeping the car I would apply two layers but as it is going to be sold I just used one but I did leave a tab at the top so the owner can just peel it off in the future easily if it gets cloudy. I have a few small spots around the assembly edges that I am sure will lay down and adhere tomorrow-they aren’t on the lens, just on the flat part around the light reflector, out of view once assembled and protected from car washes etc. that might cause edges to lift. Actually I’m so impressed I may just buy new lenses for my Volvo 245SE and another set of these. Mine are cloudy as heck and new plastic costs 1/3 what glass lenses do so even adding this cost makes it more economical. And I don’t drive a 30 year old car because I’m a car nut(although I am) but because I’m a cheapskate! This old Volvo is one of the most dependable, least expensive to maintain and safest cars on the road, It has 400,000+ miles and engine and transmission have never required repair. I drive around 475 miles round trip to the VA hospital and average 85MPH and 28MPG when roads are clear-3 passes twixt here and there. On the other hand I am beginning to like this Honda and I was a Honda factory tech before I retired so I am certain this one has another 200,000 miles in her before major before she dies, at least!
S**U
Thick film, hard to curve and cut with blade
Film is thick and strong and clear, perhaps a little too thick for easy maneuverability and application, or perhaps just due to my inexperience.I refinished oxidized headlights on a car and applied this film to the end product. These headlights had some curves to them, and despite using a heat gun to help stretch the film over curved surfaces, I had great difficulty.The film has been on the outdoor-parked car for slightly over a year now and seems to be holding up well. There’s a little bit of rainbow stretch distortions if you look at the headlight directly when they are on. This may be due to how much I had to stretch the product or my own heat application.
B**E
Increase the longevity of headlights
In the Florida heat headlights take a beating. Add road construction and all kinds of debris getting the front of your car headlights get scuffed and damaged quickly. Headlights still look prestine. Easy to put on if you use the soapy water method.
I**O
Feels like it should be good protection
I applied this to two new headlights, I didn't want to have any pitting or yellowing. I was a little hesitant to try it because I have very little patience. I tried the first one out with the headlight on a bench and I used warm soapy water and a little heat gun and it wasn't too bad. It came out pretty smooth I didn't have any bubbles but heat will be your friend. The second one I tried with it on the car and it didn't come out as well as the other one. I was trying to stretch it and there's little marks on the film which you'll notice if you look close. If I had to do it again I would definitely take the one out of the car, it was easier for me to get around the corners. Try to use some heat and a lot of soapy water and have patience.Update April 2025Headlights still look brand new, there's not even a hint of yellow or any pitting, looks like I just put it on.
J**.
Defects in film visible after installation much to my dismay....
Tried to use the product on some brand new headlights before installing them on the car but noted fold marks and puckers in the film. I hoped they would smooth out once applied but alas... they are all even more visible once on the lens. Two hours of my life I could make do with not wasting. Not sure if this is a defective batch issue, or a handling issue before it got to me.... but in any case the product wasn't suitable for use.
C**S
Not specifically made for headlights.
This is a clear protective film, but not specifically for headlights. The instructions tell how to install on door or hood edges to protect the paint. Nothing about headlights. It works, but you have to cut them to shape yourself (a given of course since it's not made for a specific vehicle so not a negative) and we'll see how well the adhesive holds up to the heat given off by headlights (on vehicles with LED headlights it won't be as much of a worry).
Trustpilot
1 week ago
1 week ago


